Understanding Classifier step
Explore the use and configuration of the AI-powered Classifier action step.
After reading this article you’ll know:
-
What classifier action step is
-
How to configure the classifier in your application
-
Some use case examples
Nowadays, artificial intelligence (AI) is becoming an integral part of many business operations, including document management and validation processes. Thanks to AI, it's now possible to streamline these processes, save time, and enhance accuracy. One of such AI features is rather important in this field as it provides automated classification capabilities - the Classifier AI action step. This article aims to provide a comprehensive understanding of what the classifier AI action step is, its use cases, and how to use it in your Betty Blocks applications.
The Classifier action step is another key AI feature within the Betty Blocks application flow that empowers you to use the capabilities of OpenAI. Using algorithms to categorize data into different classes or categories. For example, a spam filter in your email uses an AI Classifier to distinguish between spam and non-spam messages. The Classifier also works great within image recognition tools - it can identify and categorize objects on images, like cats and dogs.
Working similarly to the Condition step, the Classifier step brings the added advantage of AI. Essentially, it allows you to direct the course of actions based on the classification results of an AI model.
This innovative feature opens up a wide range of possibilities for document analysis, validation, and workflow optimization. Whether you need to validate the accuracy of generated answers or inputs, categorize different types of documents, or determine workflows based on document types or content, the Classifier AI action step can be your go-to tool.
We’ll explain a bit more about various real-world scenarios at the end of this document. For now, let’s dive into using the AI Classifier step in your action workflow.
Classifier step in use
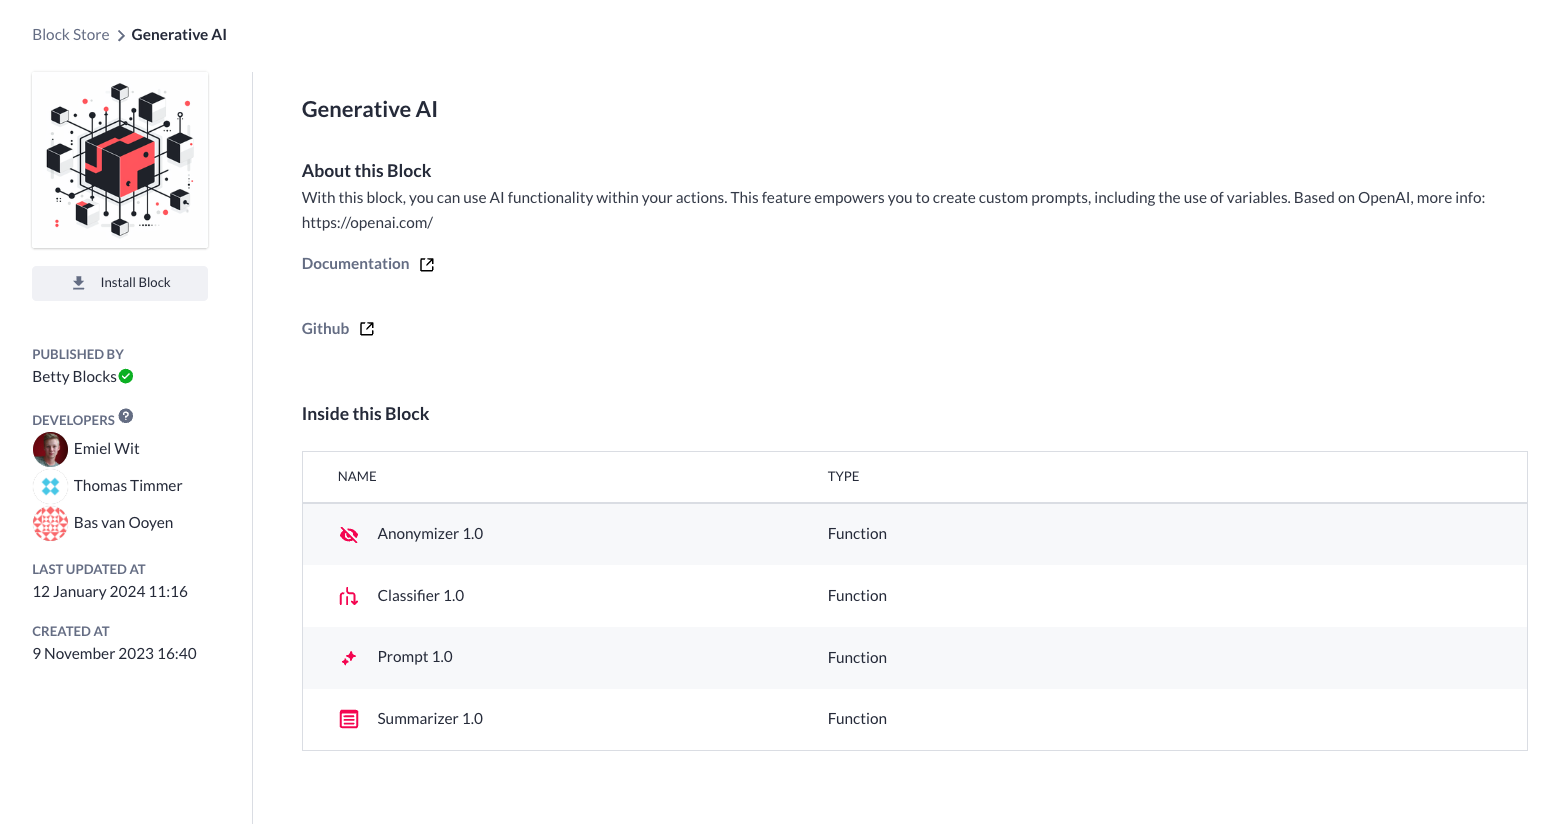
Integrating the AI Classifier step into your Betty Blocks applications is straightforward and requires no extensive coding or complex setup. The feature is available in the block store; so you first need to install the Generative AI block to your application. Besides other AI action steps, it includes ‘Classifier 1.0’ which we are going to use.
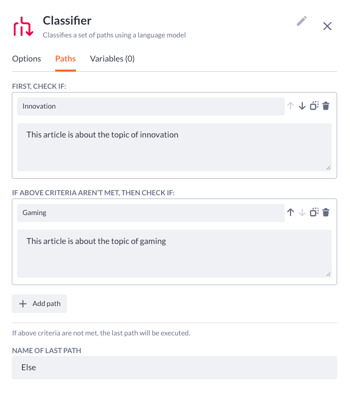
In our simple use case, we’ll describe how to set up a classification feature to differentiate the two categories of texts - on topics of Innovation and Gaming. It is going to process the texts that are added to the form and eventually choose the right category using the smart semantic analysis of ChatGPT.
Preparation
For a demonstration of the Classifier step, we’ve prepared a Betty Blocks application for working with texts using AI capabilities. It has a functionality based on a create form, through which one can add some text content to the data model.
The data model includes pre-added properties:
-
‘Category’ (list property): values here will be our two topics (‘Innovation’ and ‘Gaming’) and ‘Undetermined’ if the text doesn’t belong to any of the two)
-
‘Content name’ (text, single-line)
-
‘Input content’ (text, multi-line)
-
‘Output content’ (text, multi-line)
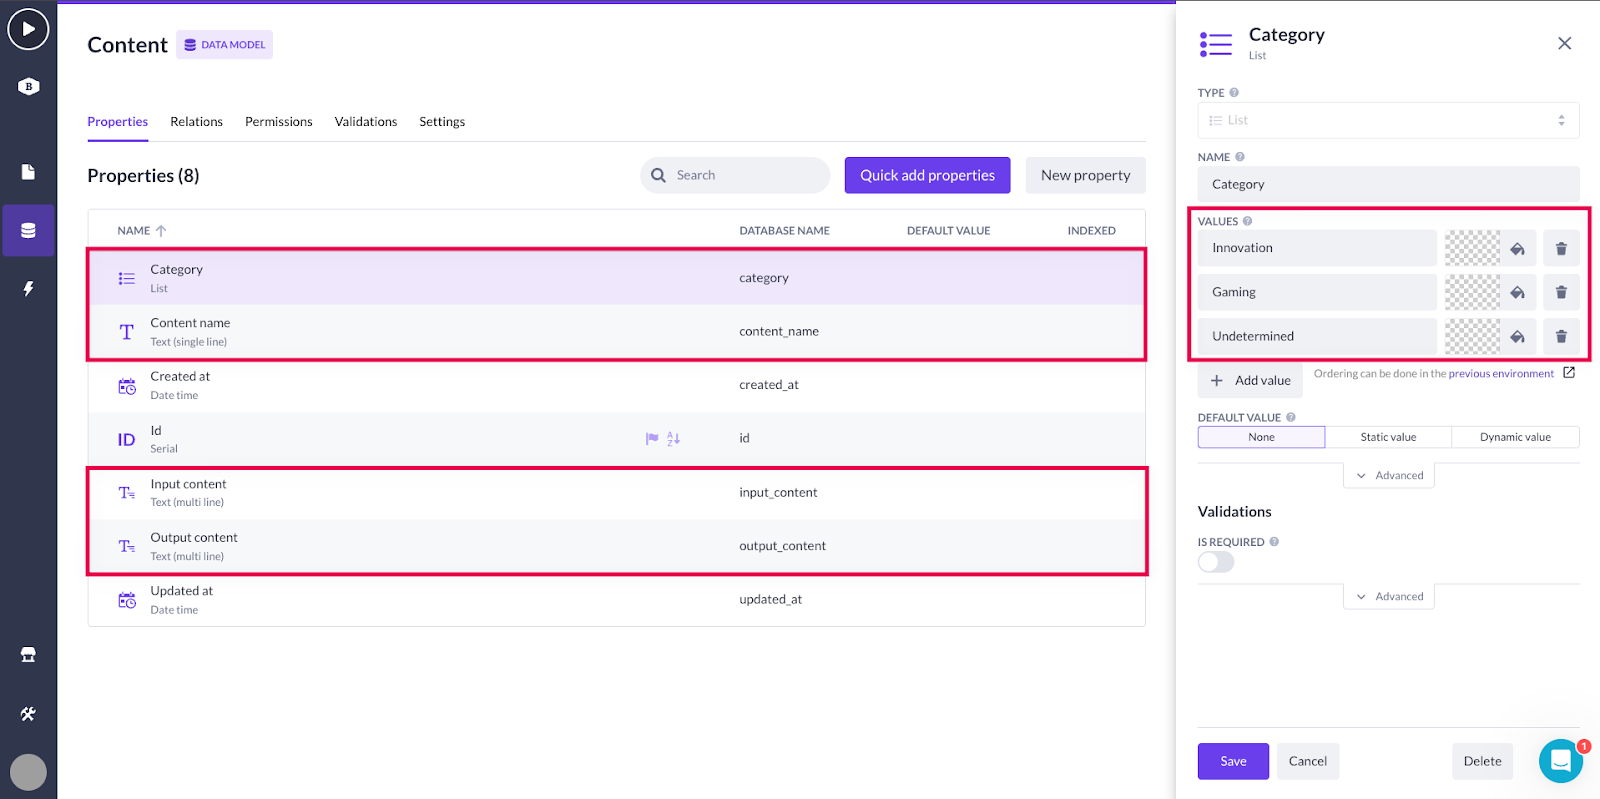
After the text records are created, they will be stored in the Data table. From each of the data table records, we can open a detail page within which we will build our AI-based functionality.
Here’s our detail page where we can see a data container that grabs data added via the create form on our previous page.

-
Let’s add a new action button to the data container, below the content.
-
Pick up the ID property from the corresponding data model (‘Content.Id’ in our case), so that the future action knows exactly what record we triggered.
-
Press the pencil button beside the action in the action button options.
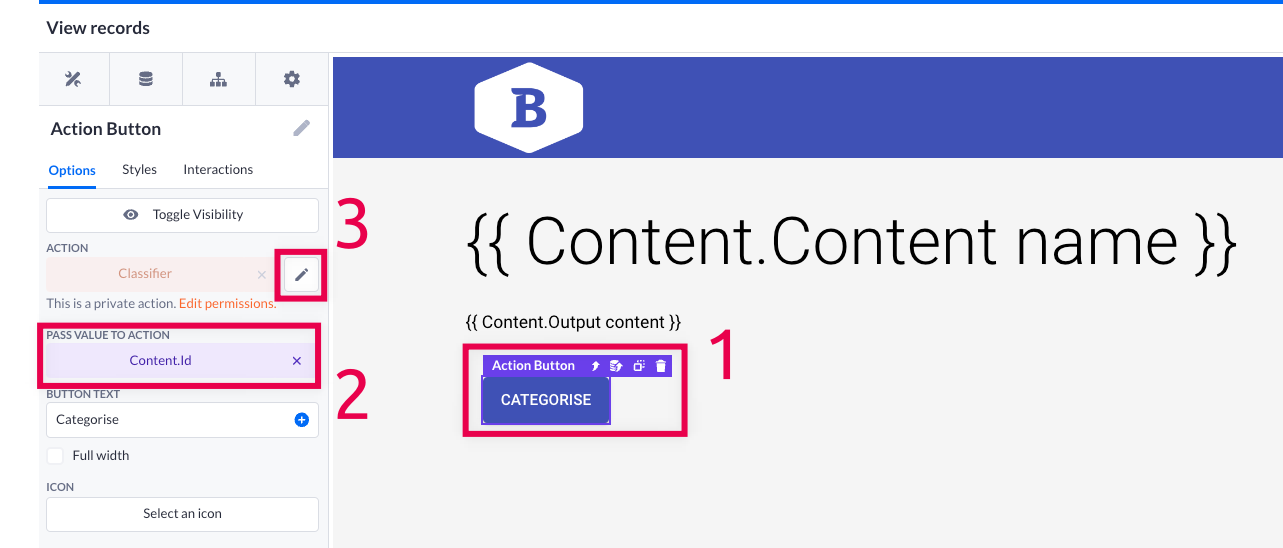
Building the action
Time to build the action flow itself. But before you start doing that, you need to make sure you know the categories (classes) that you want your AI step to differentiate from. In our case, only three categories will be ‘Innovation’, ‘Gaming’, and ‘Else’ (others).
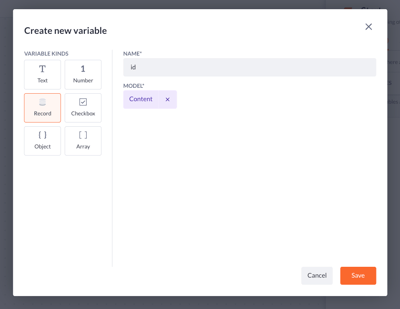
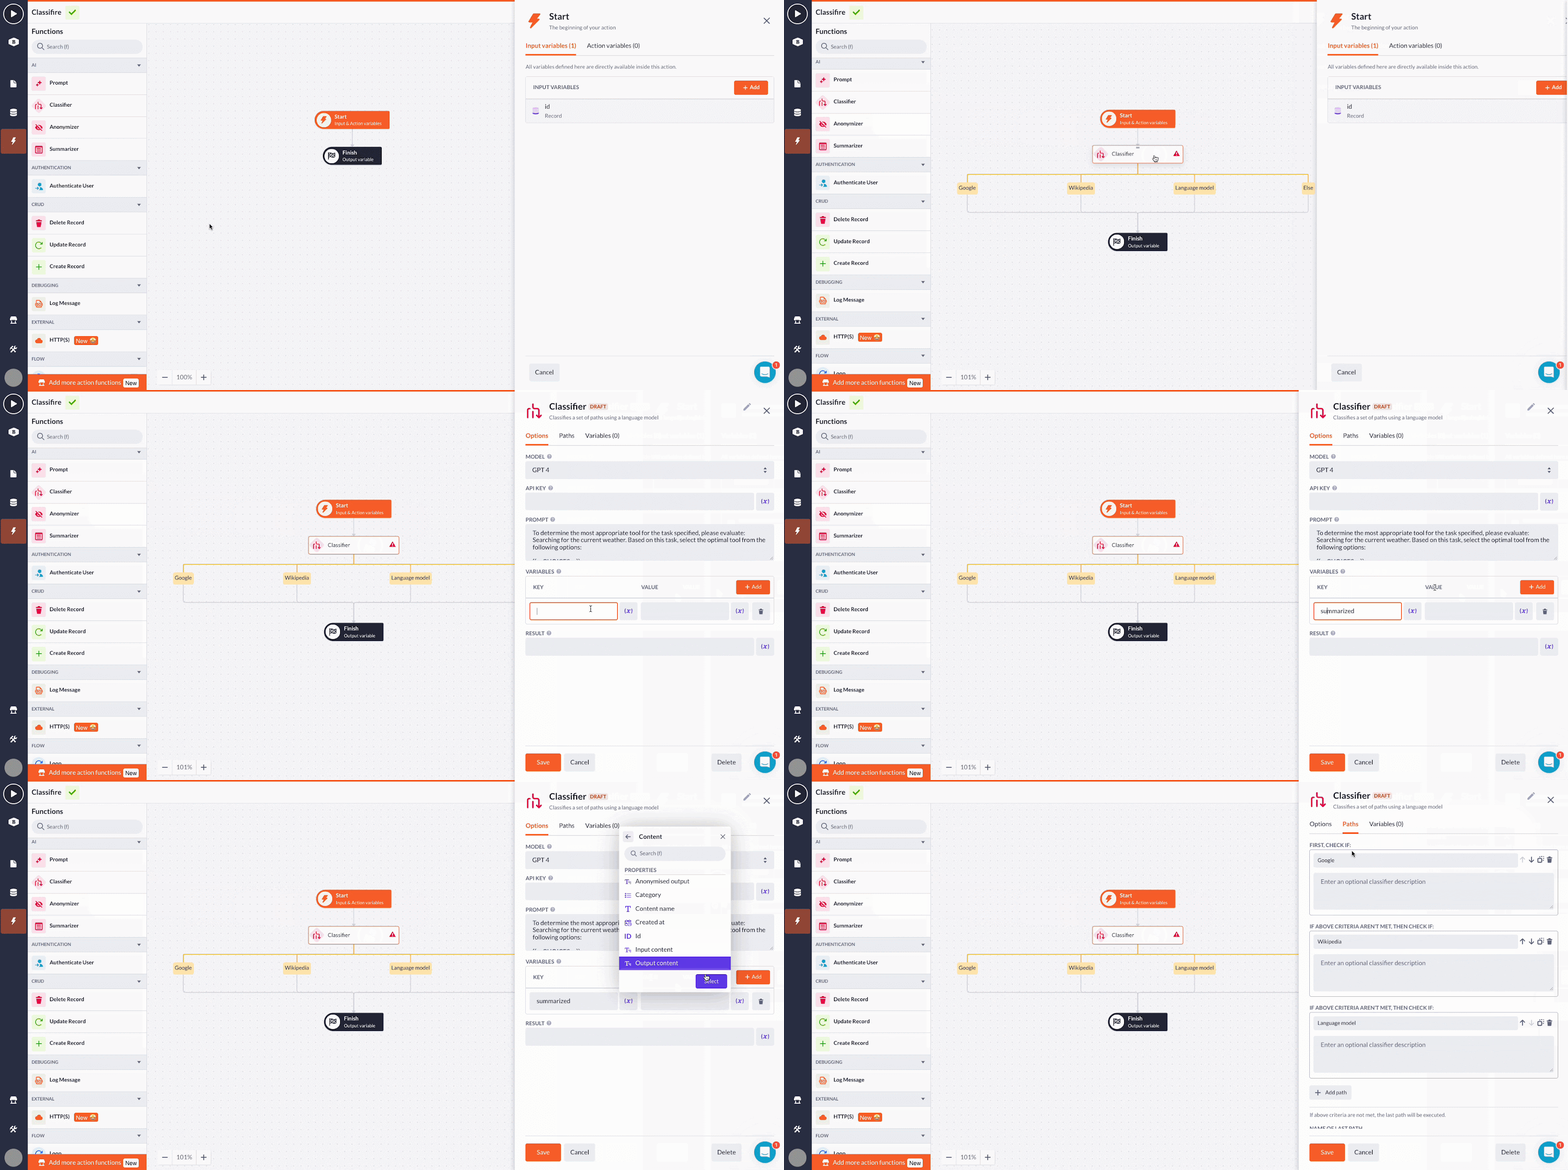
1. Open the Start step and add a new input variable. Select a record type, and corresponding model (‘Content’ in our case). Fill in the ‘id’ in the name field. Press Save.
2. Drag and drop the Classifier step to your action flow. Open the step itself and fill in the following values in the options tab:
-
Select a model - version of ChatGPT
-
Paste the API key (from OpenAI) for the model
-
Fill in the prompt to use for classification. Use
to template the classification values and description into the prompt. -
Add the variables associated with the prompt. In our example, we will use id.output_content from our Content model
3. Open the Paths tab. Here you add classification paths, similarly to adding conditions to the condition step. Our paths are Innovation, Gaming (and Else), and we can also describe them in a separate field.
Press Save after you’ve finished the configuration.
4. To wrap it up, let’s add some Update record steps after each path of the Classifier step. This will enable updating the category of each record (identified via its ID).
Press Save when you’re done.
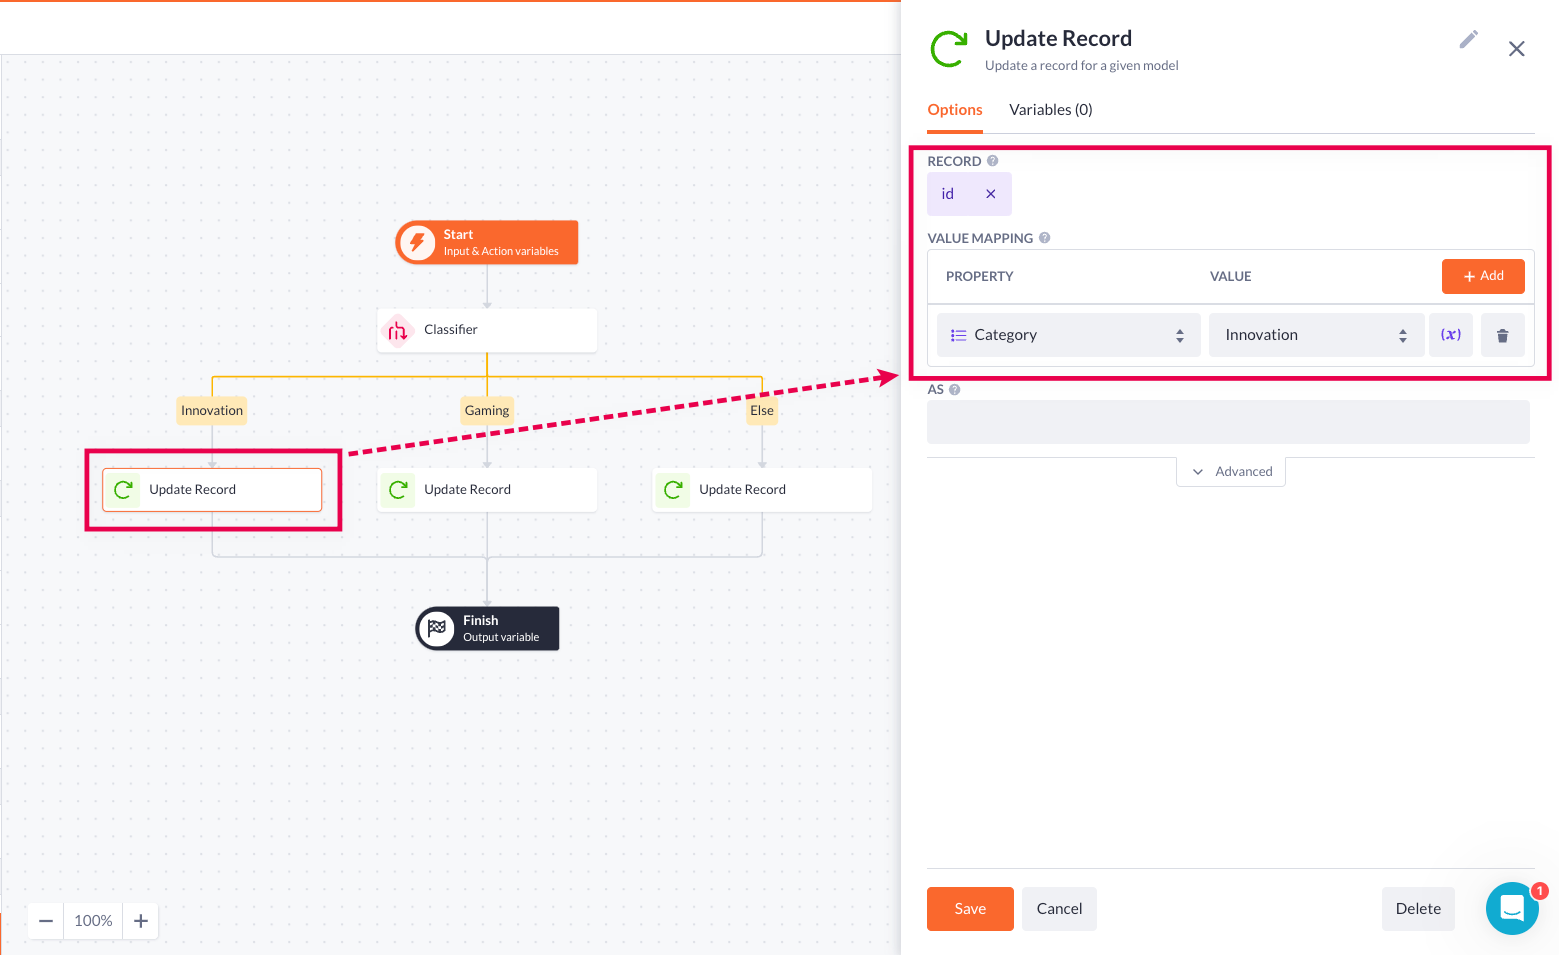
Conclusion
It’s time to look at whether our configuration was successful. Let’s do a simple check by creating a page called ‘Categories’ with a data table that will display the content name with the category it belongs to.
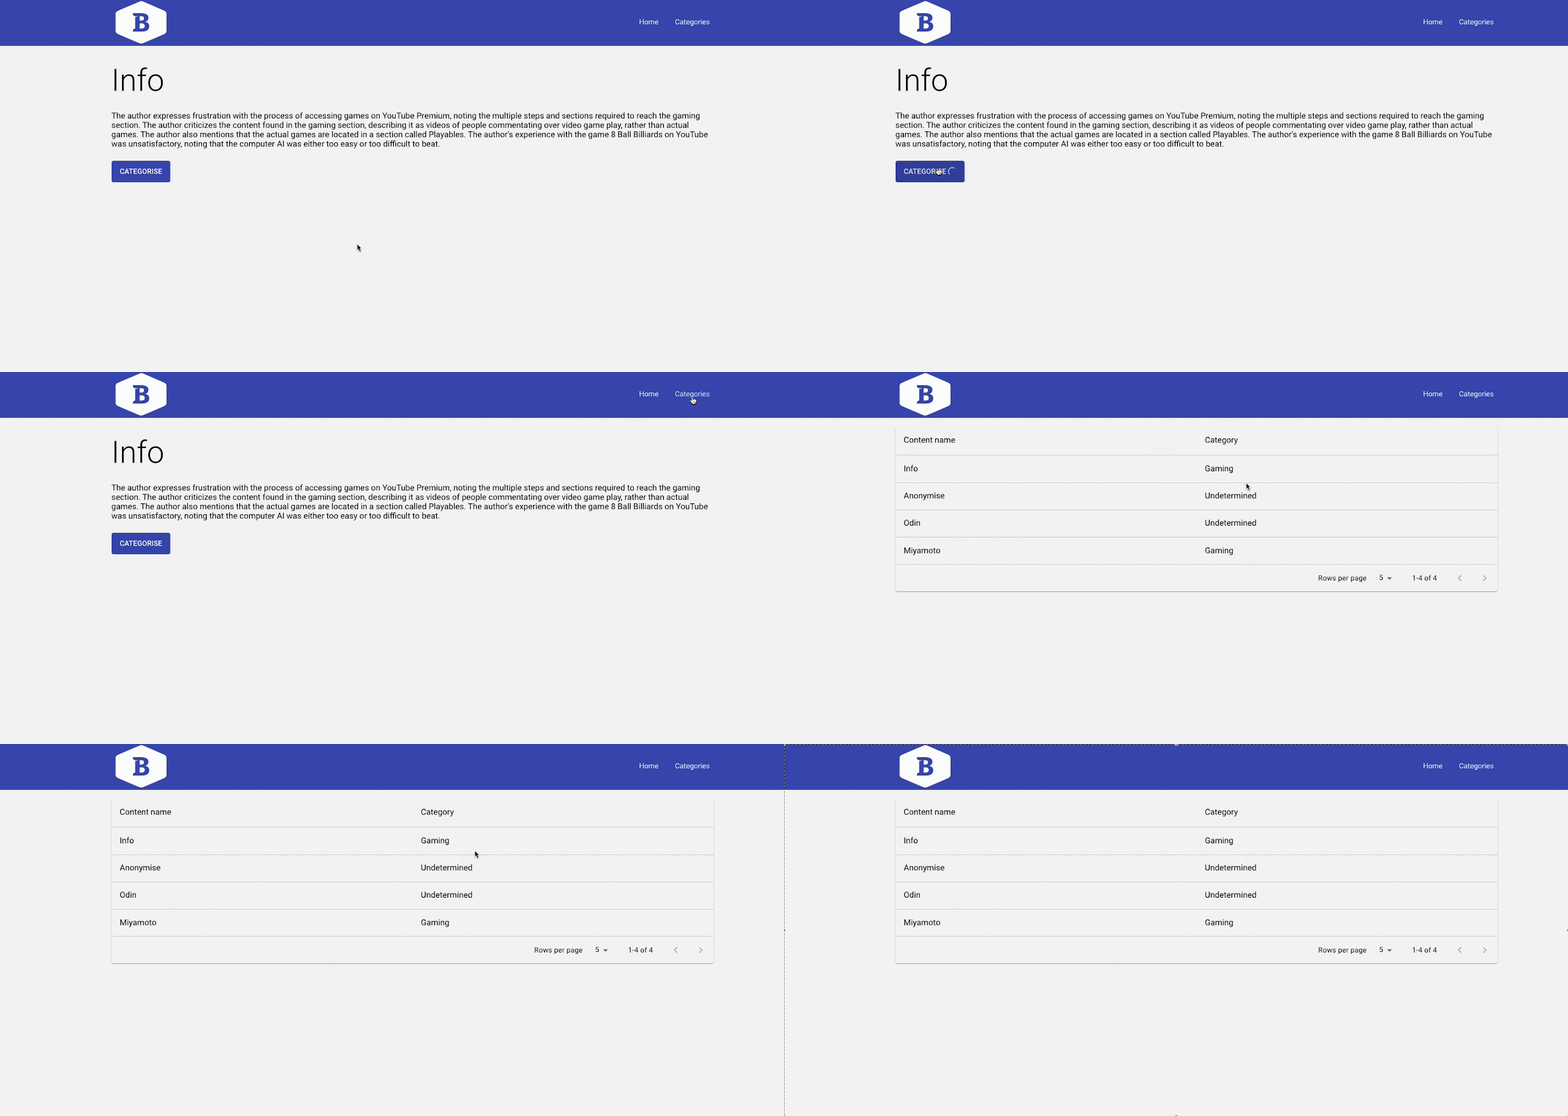
Done! Although the title of our content was pretty neutral, the Classifier step analyzed the content input and concluded that it belonged to the Gaming category.
The Classifier AI step opens up qualitatively new approaches to huge variations of use cases. In practice, you can apply the classifier AI functionality to real-world scenarios like:
-
validation and accuracy checks for user input (emails, delivery addresses, etc.)
-
dynamic decision-making based on document types or content
-
creating search engines based on the context of a document
-
filtering user emails automatically redirecting them to corresponding departments
