After reading this article you’ll know:
-
The functionality and main features of the template
-
The purpose of using this template
-
What pages were used to create the template
Created to support your application-building experience during the essential learning path walkthrough, this template represents a simple project management application. The Essential path review application has a login-logout functionality, allows you to create, update, and delete projects and tasks that belong to these projects, and additionally contains the back office where you can manage web users.
Main features
Let’s go a bit more in detail about what kind of feature you can find within the Essential path review template. Mind that everything explained in this chapter is strictly front-end related (that is, what you get after compiling your application with this template).
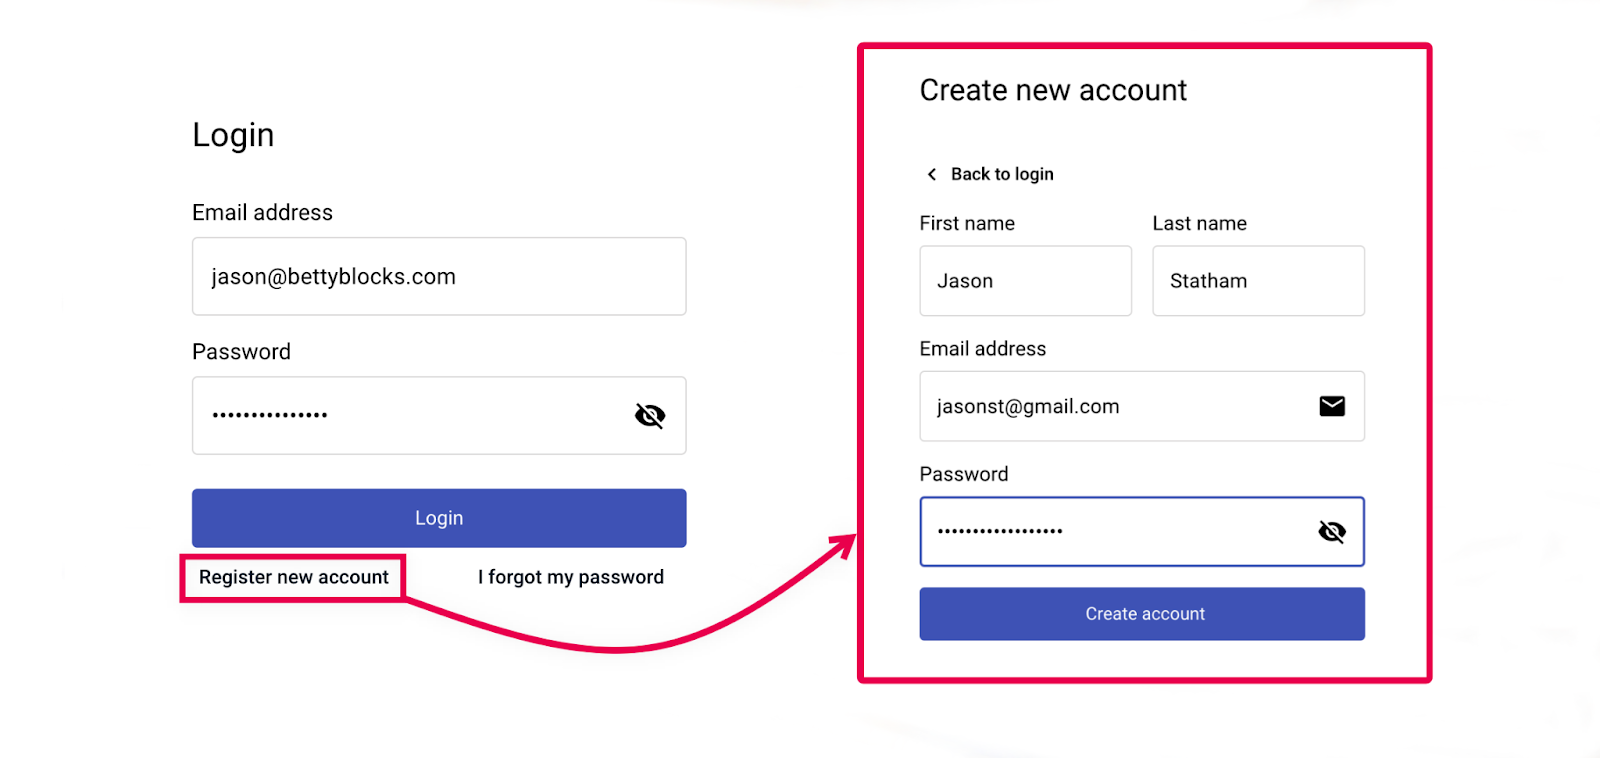
Register new account
Registering a new user account is required as you take the first steps. This first registered user will be automatically granted an administrator role. The details to fill in during the registration are:
-
First name
-
Last name
-
Email address
-
Password
Login/logout
Once a new user is registered, they have to go through the login process. Email address and password are required. If someone needs to log in to the application using different credentials, they will have to log out first. Logging out is also required if a user does not want to stay in the system.
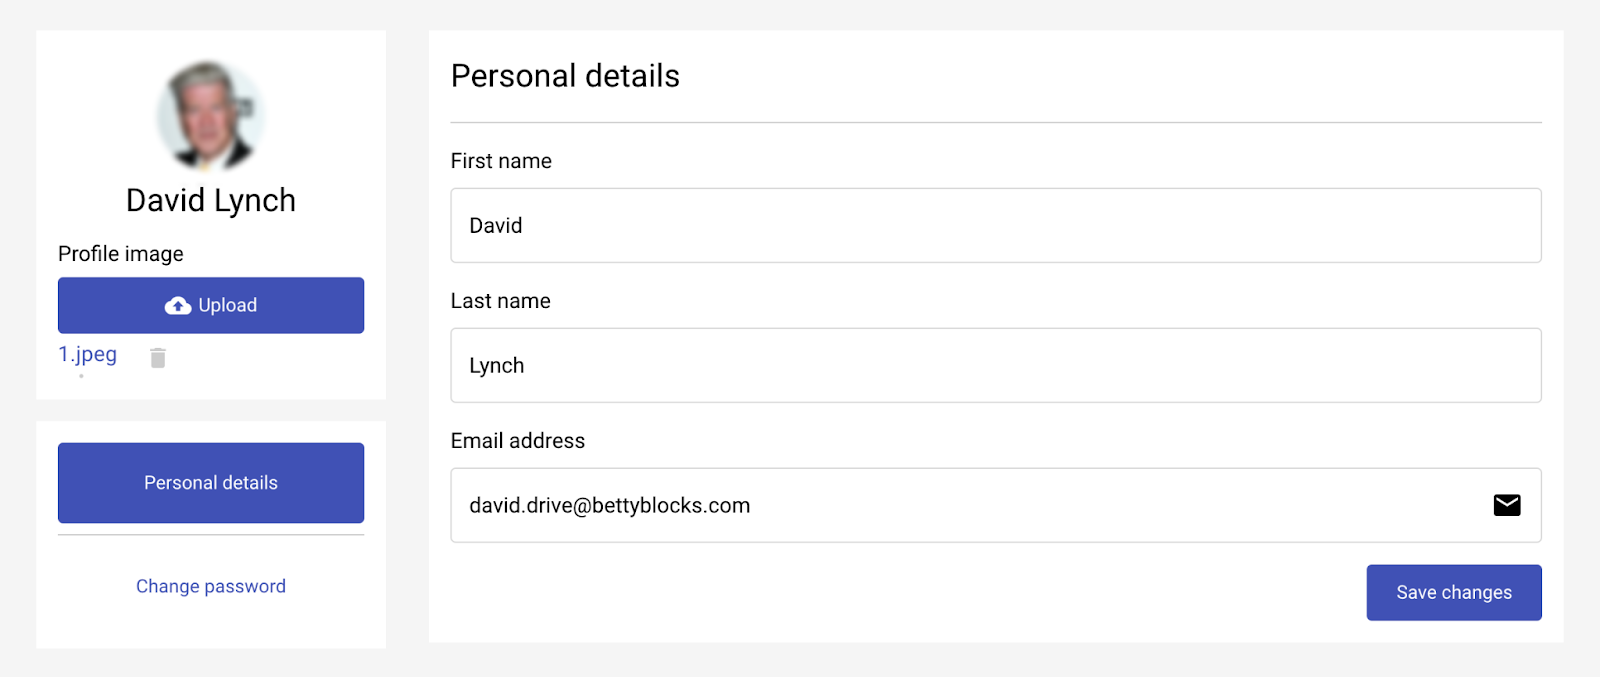
Updating profile details
The user’s profile details are displayed on a separate account page. One can go to this page any time to update profile information:
-
First name
-
Last name
-
Email address
-
Profile image
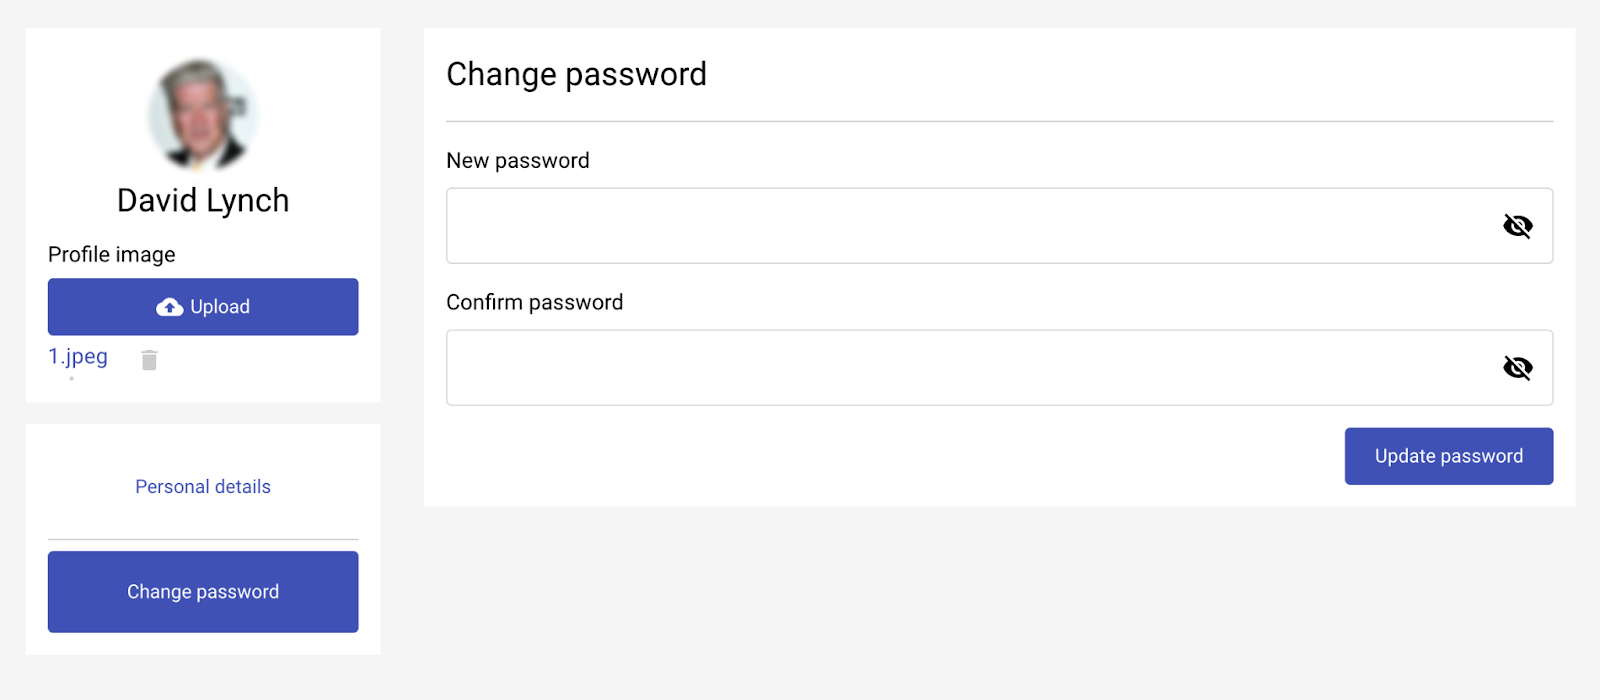
Another tab on the account settings page is created for updating passwords. The fields to fill in:
-
Current password
-
New password
-
Confirm password
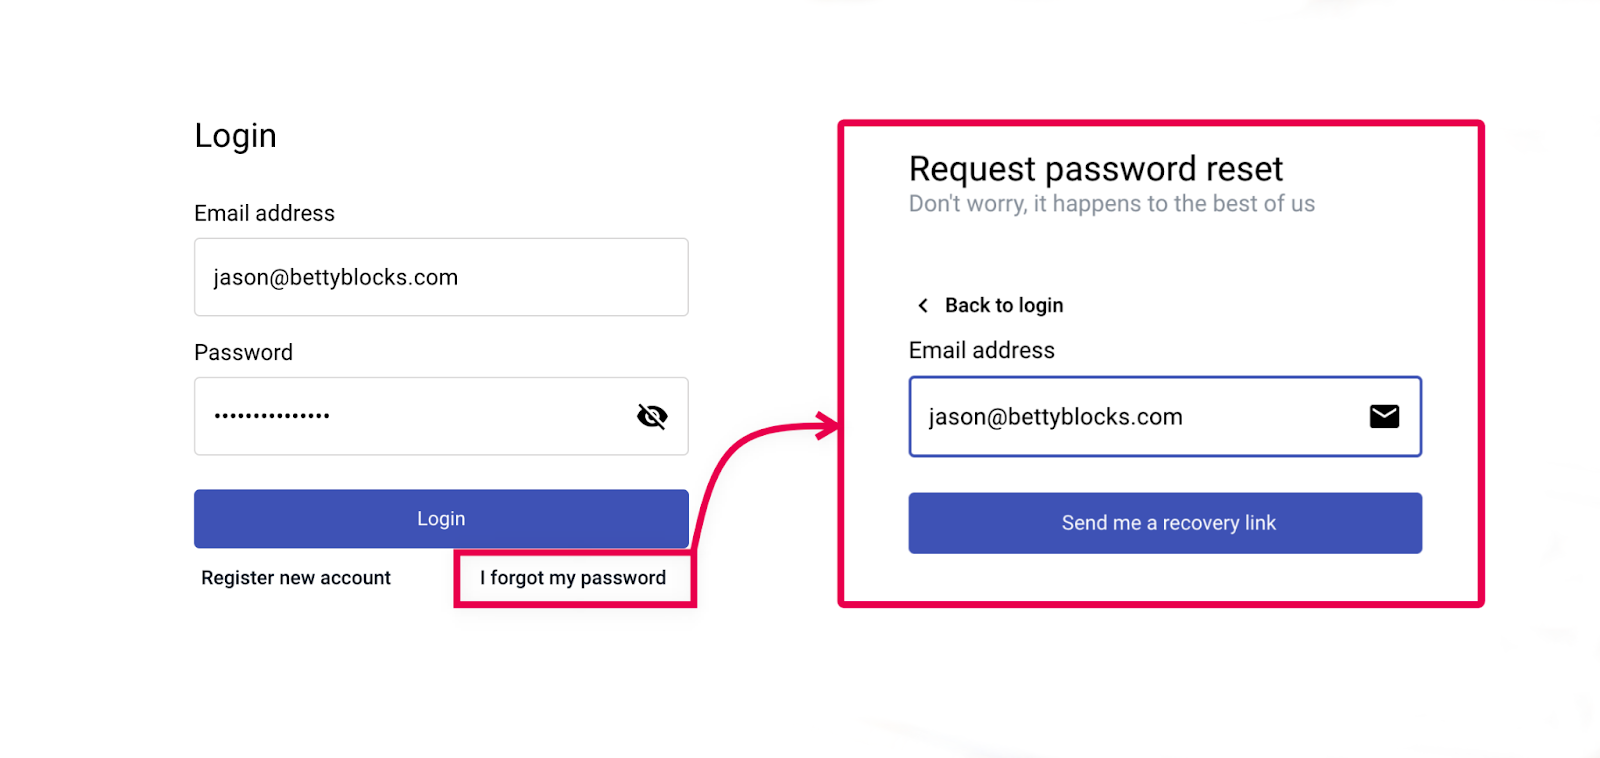
Password reset
If a user forgets their password, they can request a password reset from the login page. This action requires the user’s email address to which they will receive a special email with the recovery link.
Manage project/tasks
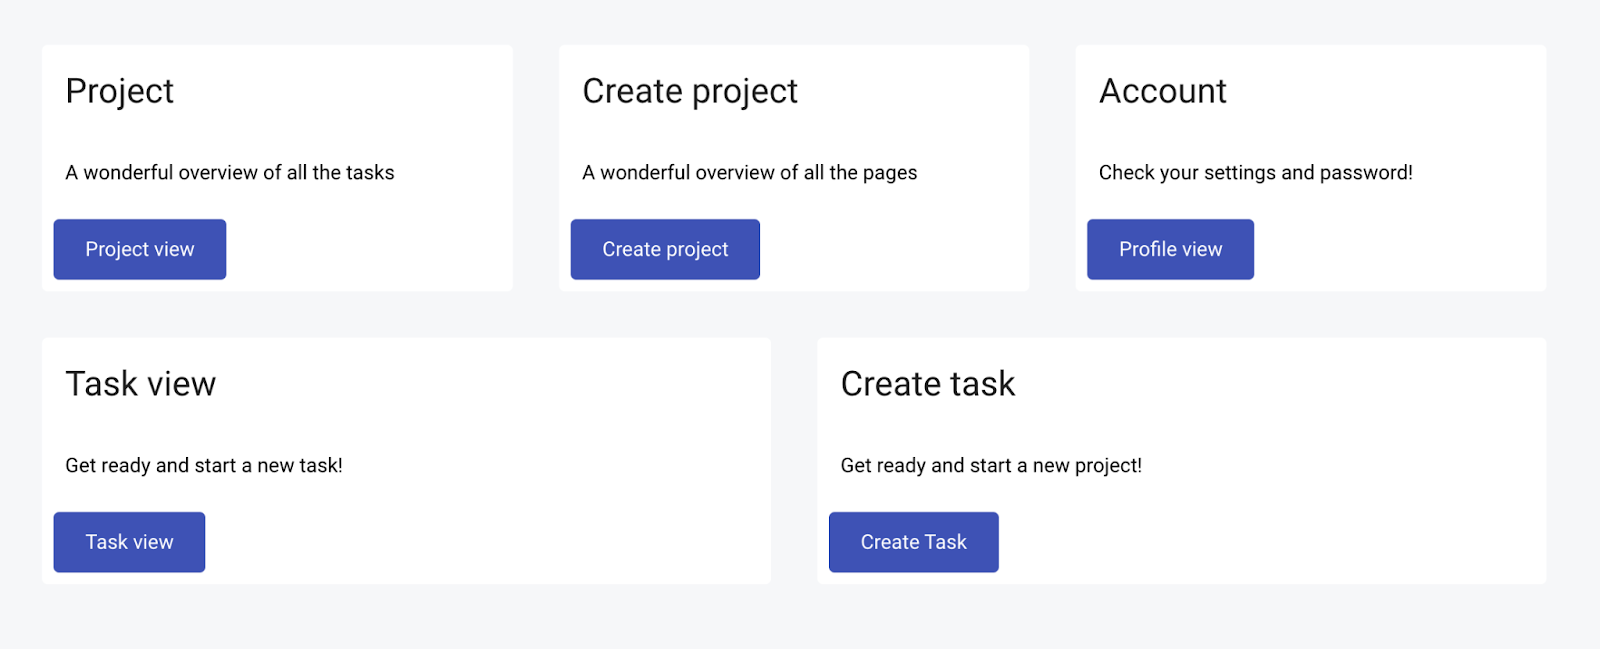
The primary purpose of this application is project and task management. It is realized through a CRUD (create, read, update, delete functionality) of projects and tasks within the following four pages:
-
Create project
-
Project overview
-
Create task
-
Task detail
You can reach those from the home page, as well as your account.
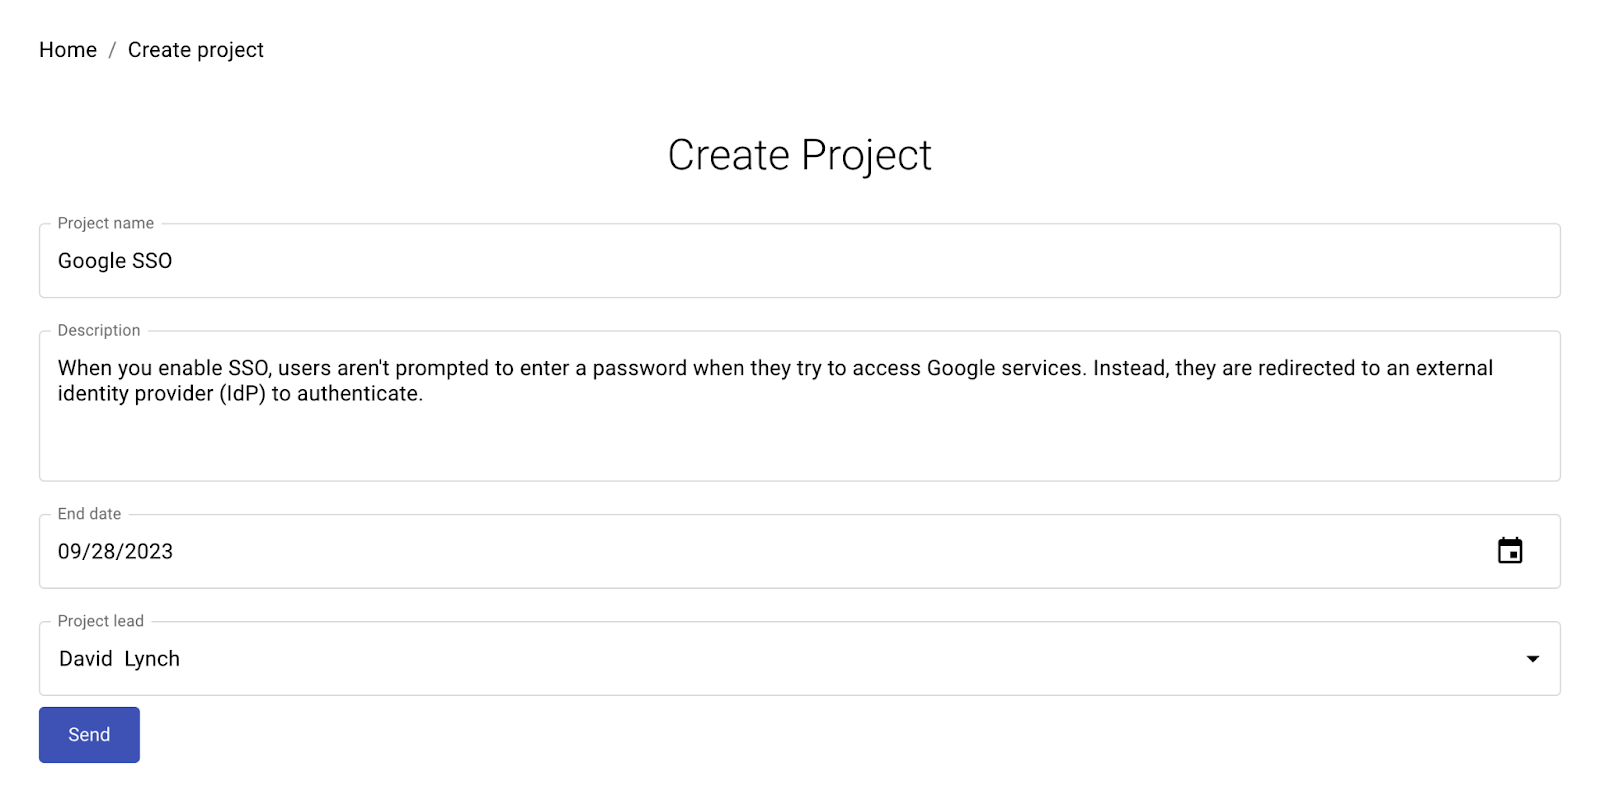
In order to create a project, you need to provide:
-
Project name
-
Description
-
End date
-
Project lead
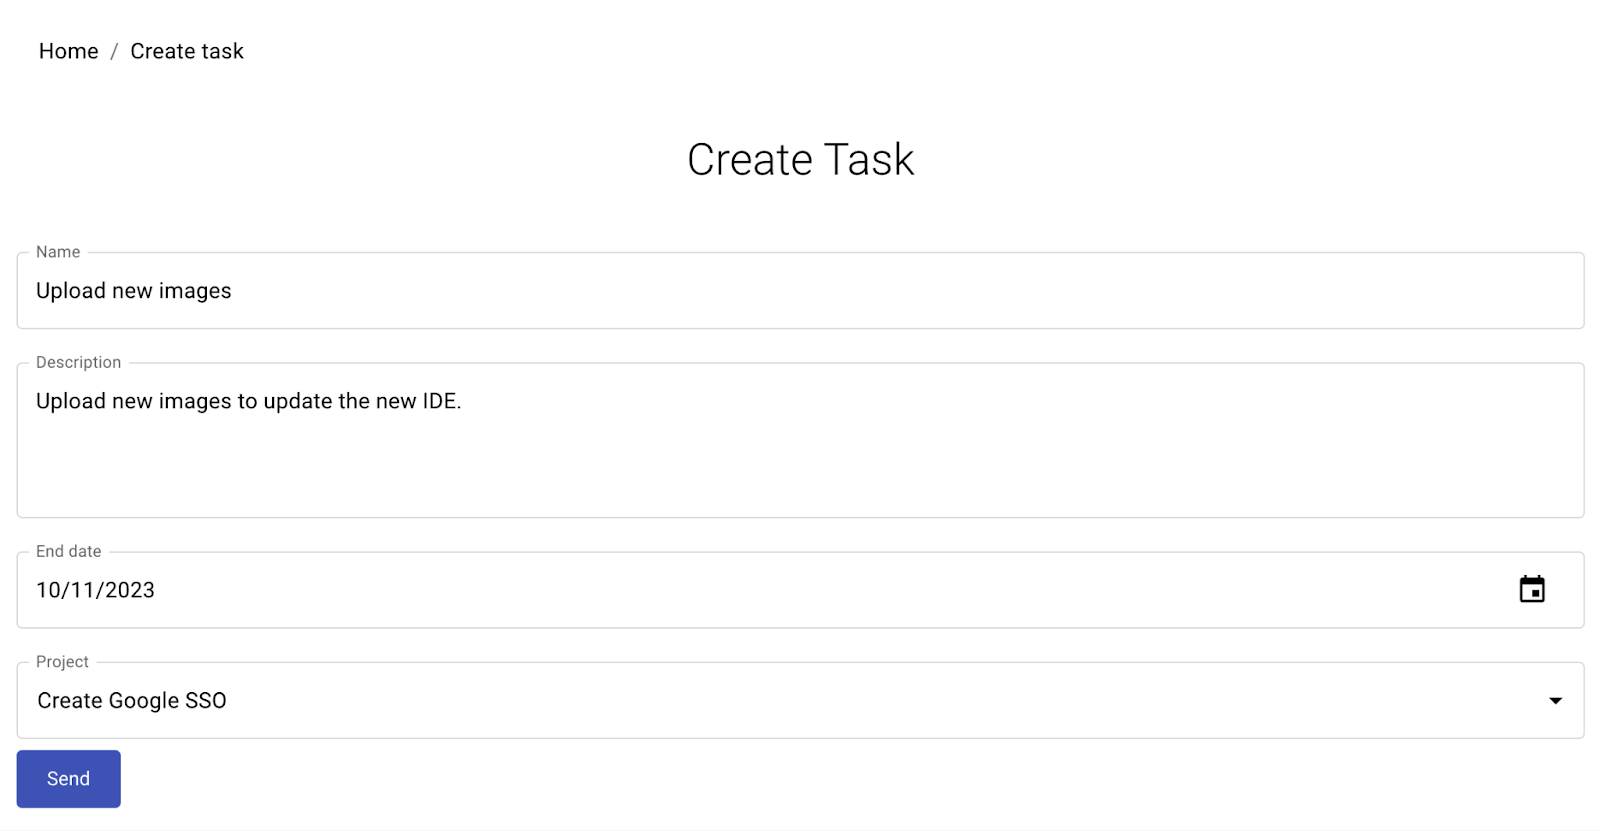
To create a task, you need to provide:
-
Task name
-
Description
-
End date
-
Project
When the task or project has been created, you can change its status and edit the information (name, description, end date) from the Task view and Project (view) pages accordingly. When editing a project, you can also create a new task along with it that will be assigned to this particular project.

Project/task statuses
Each project or task has its own status (1). You can set it yourself when creating a new project or task and change it in the future. Also, these statuses are highlighted with color.
-
To do (red)
-
In progress (yellow)
-
Done (green)
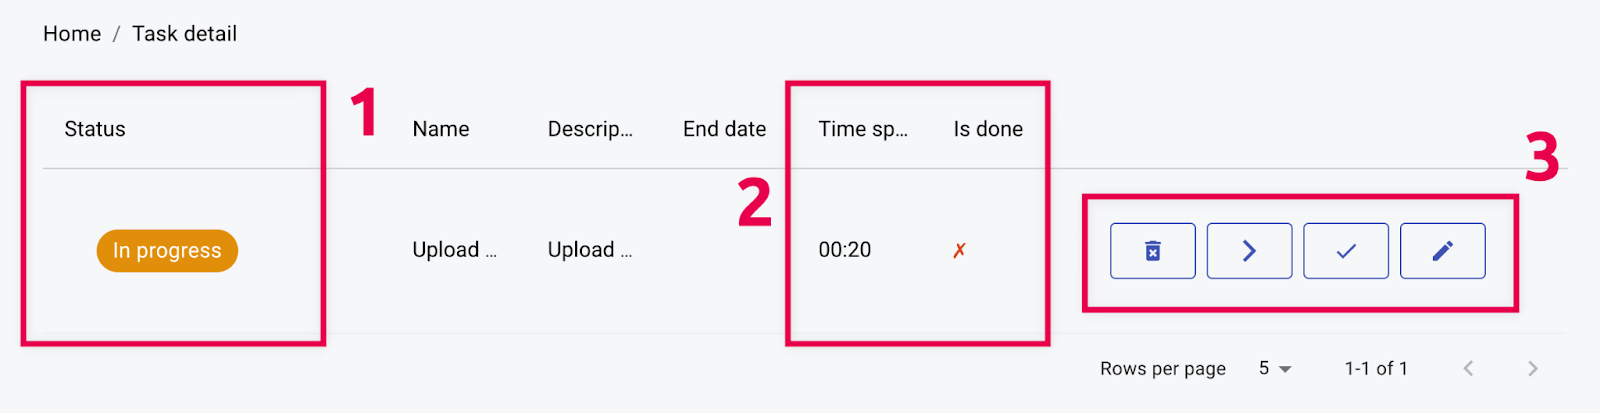
You will notice the time spent indicator which measures the time from the task being in progress and the ‘Is done’ section which indicates whether the task has been completed (2).
On the right of the detail page, there is a section with four management buttons (3). These stand for (from left to right):
-
Delete (task)
-
Set (task) to ‘In progress’
-
Set (task) to ‘Done’
-
Edit (task)
The ‘Edit’ button leads you to the new modal where you can change the time spent doing the task and the project the task assigned to, besides the name, description, and end date.
Back office
Serves as a management interface for users of your application. Here an administrator can add and edit web user profiles, assign an admin role if needed, and set the email configuration.
Since the configuration in the back office is similar to the one in the Login flow template, we recommend having a look at its article.
Switch language
The switching languages button can be found on the navigation bar (flag icon). Two languages by default are English and Dutch.
Note: The switch language function works only for individual pieces of text. Learn more about multilingual applications.
Pages overview
This is the ‘inside’ part of the template where you can see which components the application is made of. Open the page builder to find this list of pages.
-
Email configuration. The part of back office functionality that is used to configure the server to send email notifications to inform the application’s webusers of changes.
-
Home. The homepage of your application. Besides the navigation bar on top, it contains five cards with the application navigation.
-
My Account. The page to edit your personal profile details: name, email address, profile picture, and password.
-
Project create. A simple page containing a create form. Here you create projects that will be shown on the ‘Projects overview’ page.
-
Project detail. One is redirected to this page when updating project details. It contains two forms: update and create, and the data table below the forms which shows the tasks and their current state indicator.
-
Projects overview. The page with a data table showing all the existing projects with their names and statuses, and a four-button management menu.
-
Task create. A simple page containing a create form. Here you create tasks that will be shown on the Task view (Task detail) page.
-
Task detail. Overview of all tasks in the data table which displays names, statuses, end dates, current state indicator (Is done), and a four-button management menu (the same as in the Projects overview).
-
User Login - Create New Account. The page to create a new user’s profile.
-
User Login - Login. The start page of your application via which registered users can log in using their credentials.
-
User Login - Password Reset Request. Using this page you can request to reset your password; a special link will be sent to your email address
-
User Login - Reset Password. The page with reset password form; here users can create a new password.
-
Webuser management. This part of the back office is used to search, add, and manage webusers. The page is realized by means of the back office page template.