After reading this article you’ll know:
-
What is the before/after trigger and how to work with it
-
How to use a sub-action step to create a specific triggered action
Every action you create begins with a trigger. Normally, it has a ‘Start’ step initiated when something is triggered, but there are some cases when you need to use the triggered action before or after a certain action is processed. Here we will take a use case with ‘before delete trigger’ and explain how you can apply a Sub-action step to configure particular actions and get the result before the rest of the flow continues. At the end of this article, you can also read through some tips on creating a similar use case with the 'after create trigger' functionality.
Getting started
Let’s assume you have several projects with multiple tasks assigned to them. If you delete one of these projects, you have to be aware that all tasks assigned to them will be kind of hanging unattached creating further difficulties. As we don’t want this to happen, we will use a trick and insert a sub-action in the action flow.
For our ‘Projects’ page, we’ve used the CRUD with a slide-out panel that automatically creates the create, update, and delete action flows.
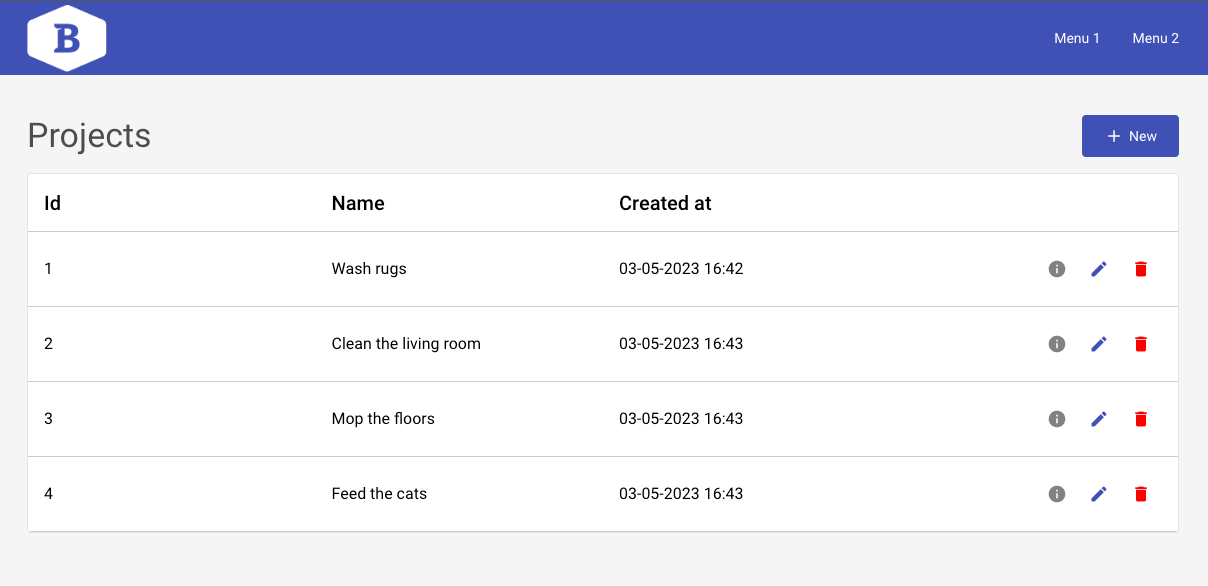
On top of that, if you select any of those projects, it will open a ‘Project detail’ page that contains all tasks assigned to the chosen project. You can delete each of these tasks separately, but in this use case, we want them to be deleted along with the project they belong to.
Note: Find out how the detail page is created by reading this article.
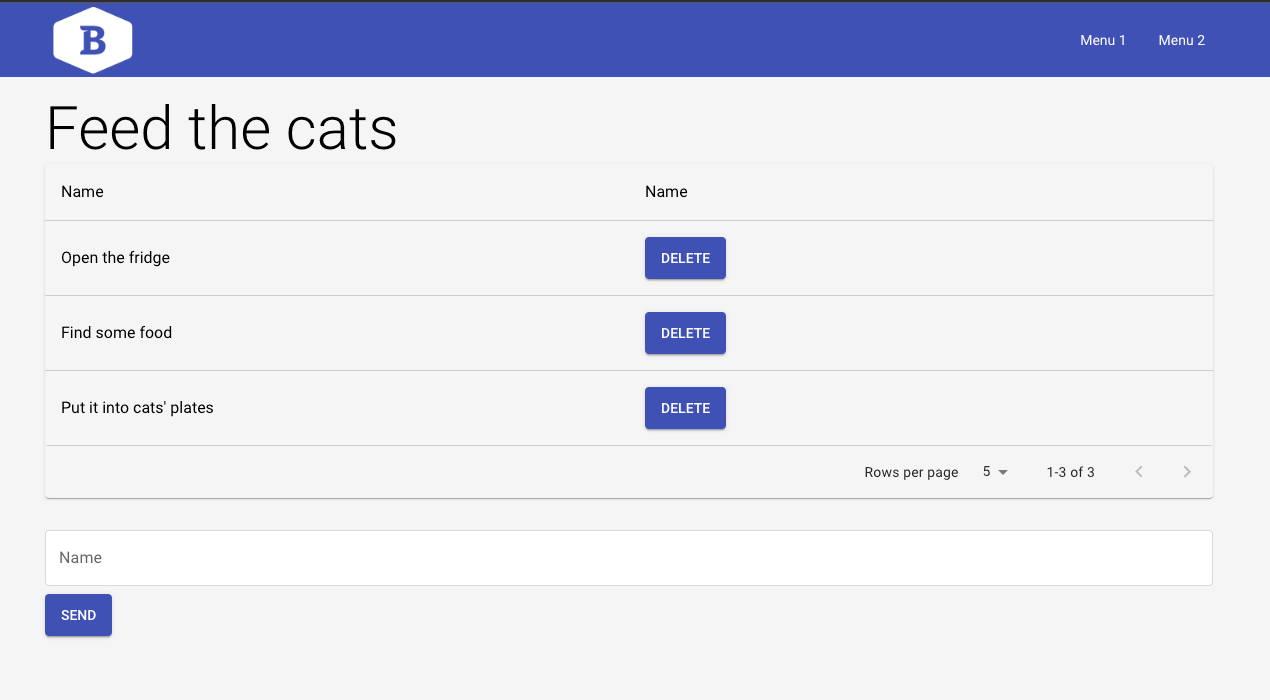
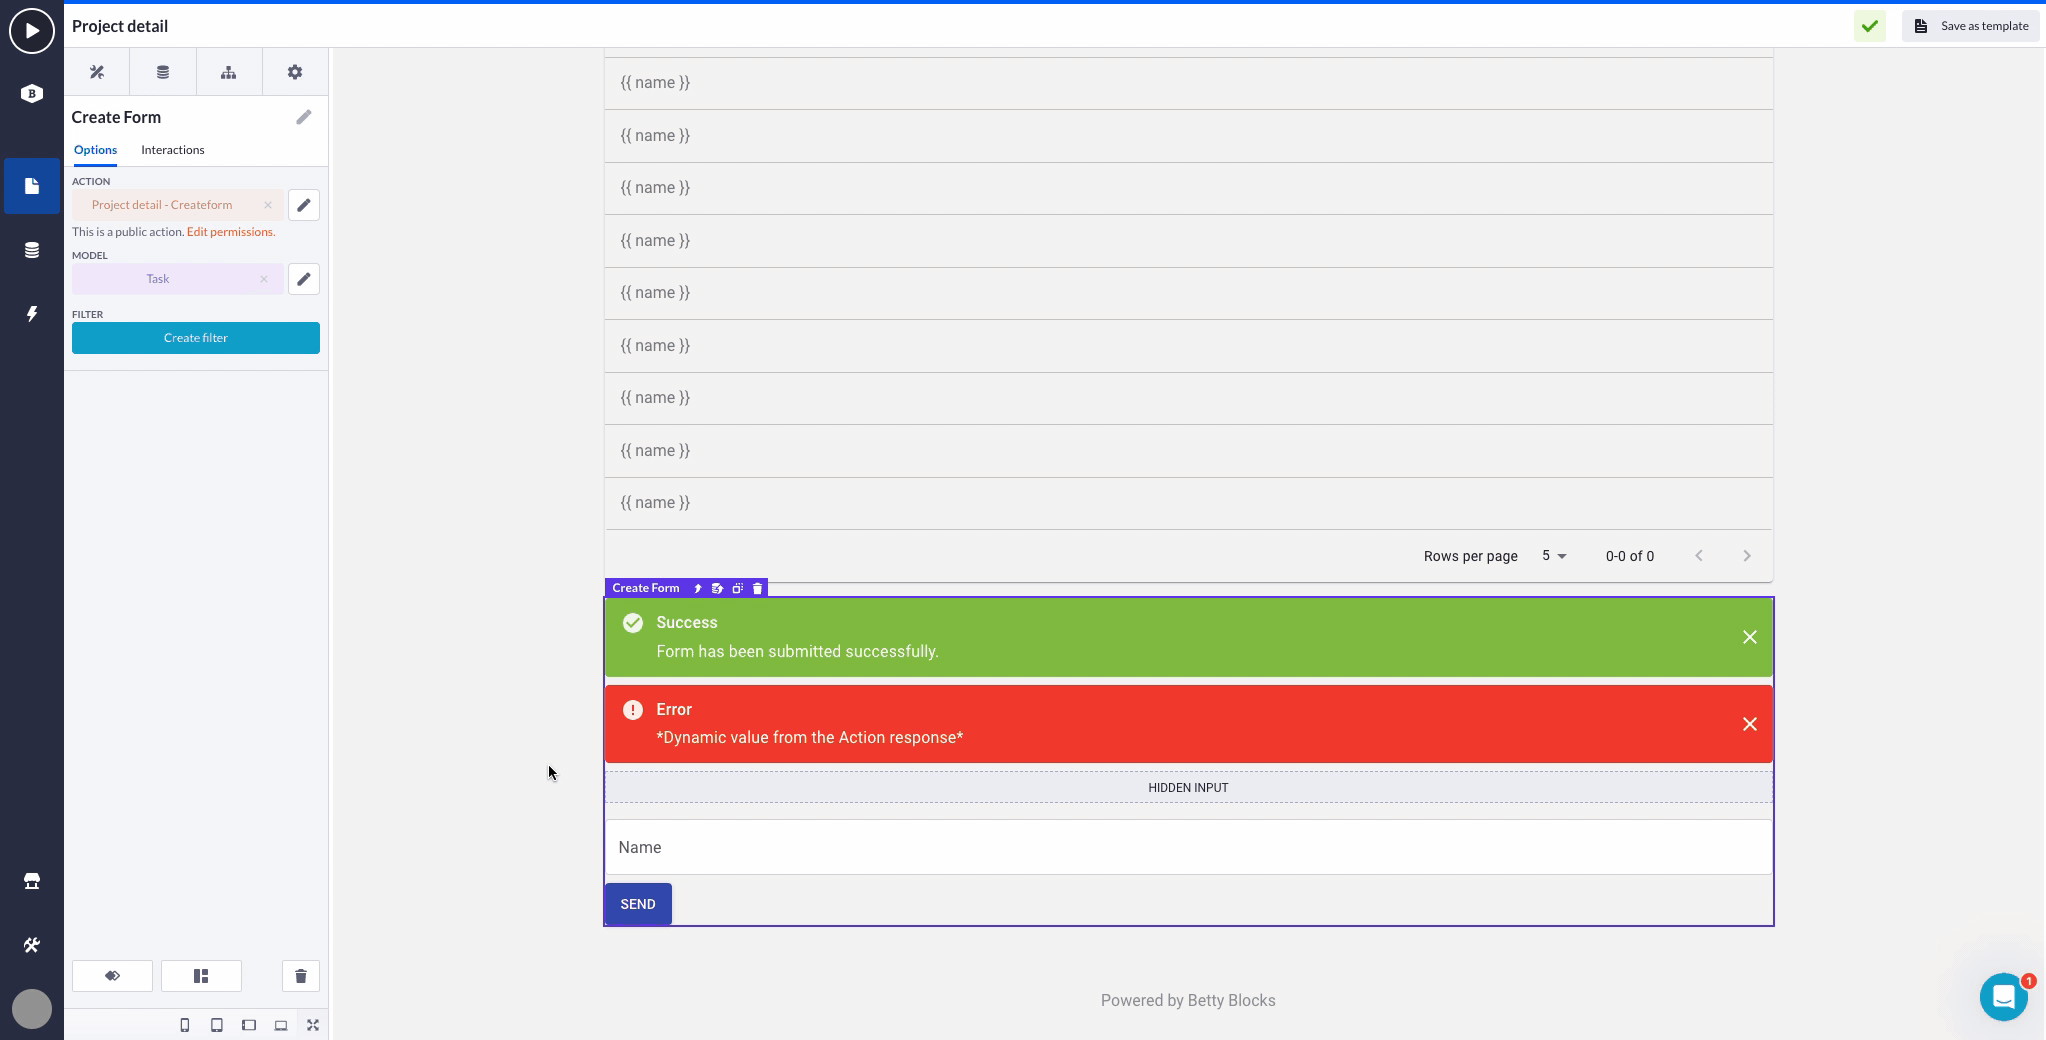
To make sure our created tasks belong to this particular project, we configured the Create form in such a way: added a ‘project_record’ action variable to the start step with filtering ‘id equals id’ (so that it knows which project ID we actually want to add our tasks to) and passed this ‘project_record’ property value to the create record step.
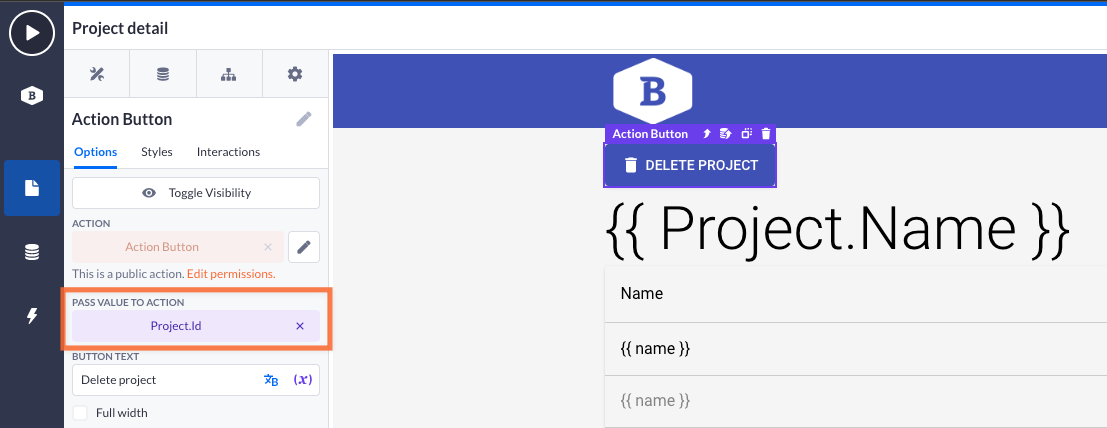
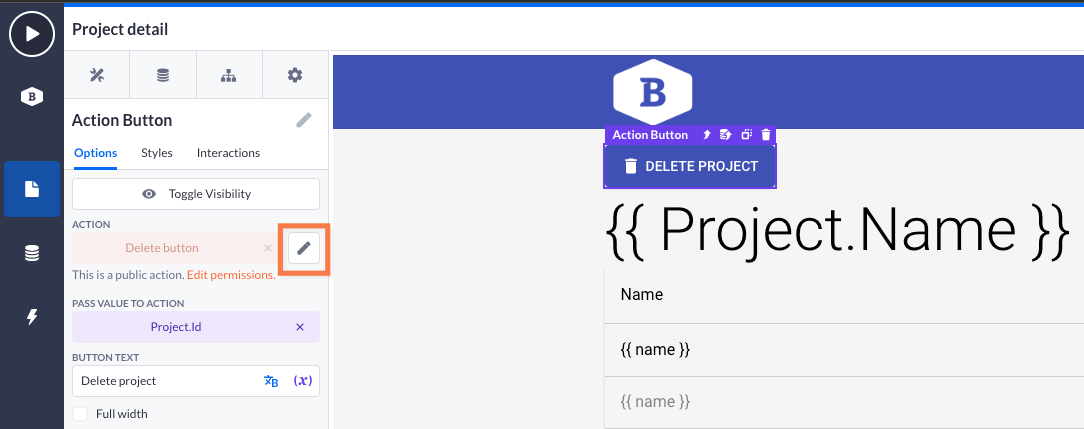
Also, we would need a trigger for deleting our project along with all tasks belonging to it. The easiest way to set this is by adding an Action button to our ‘Project detail’ page (but you can as well add it to the ‘Projects’ overview page). In options, pass value to the ‘Project.Id’ property and leave this for now.
Sub-action configuration
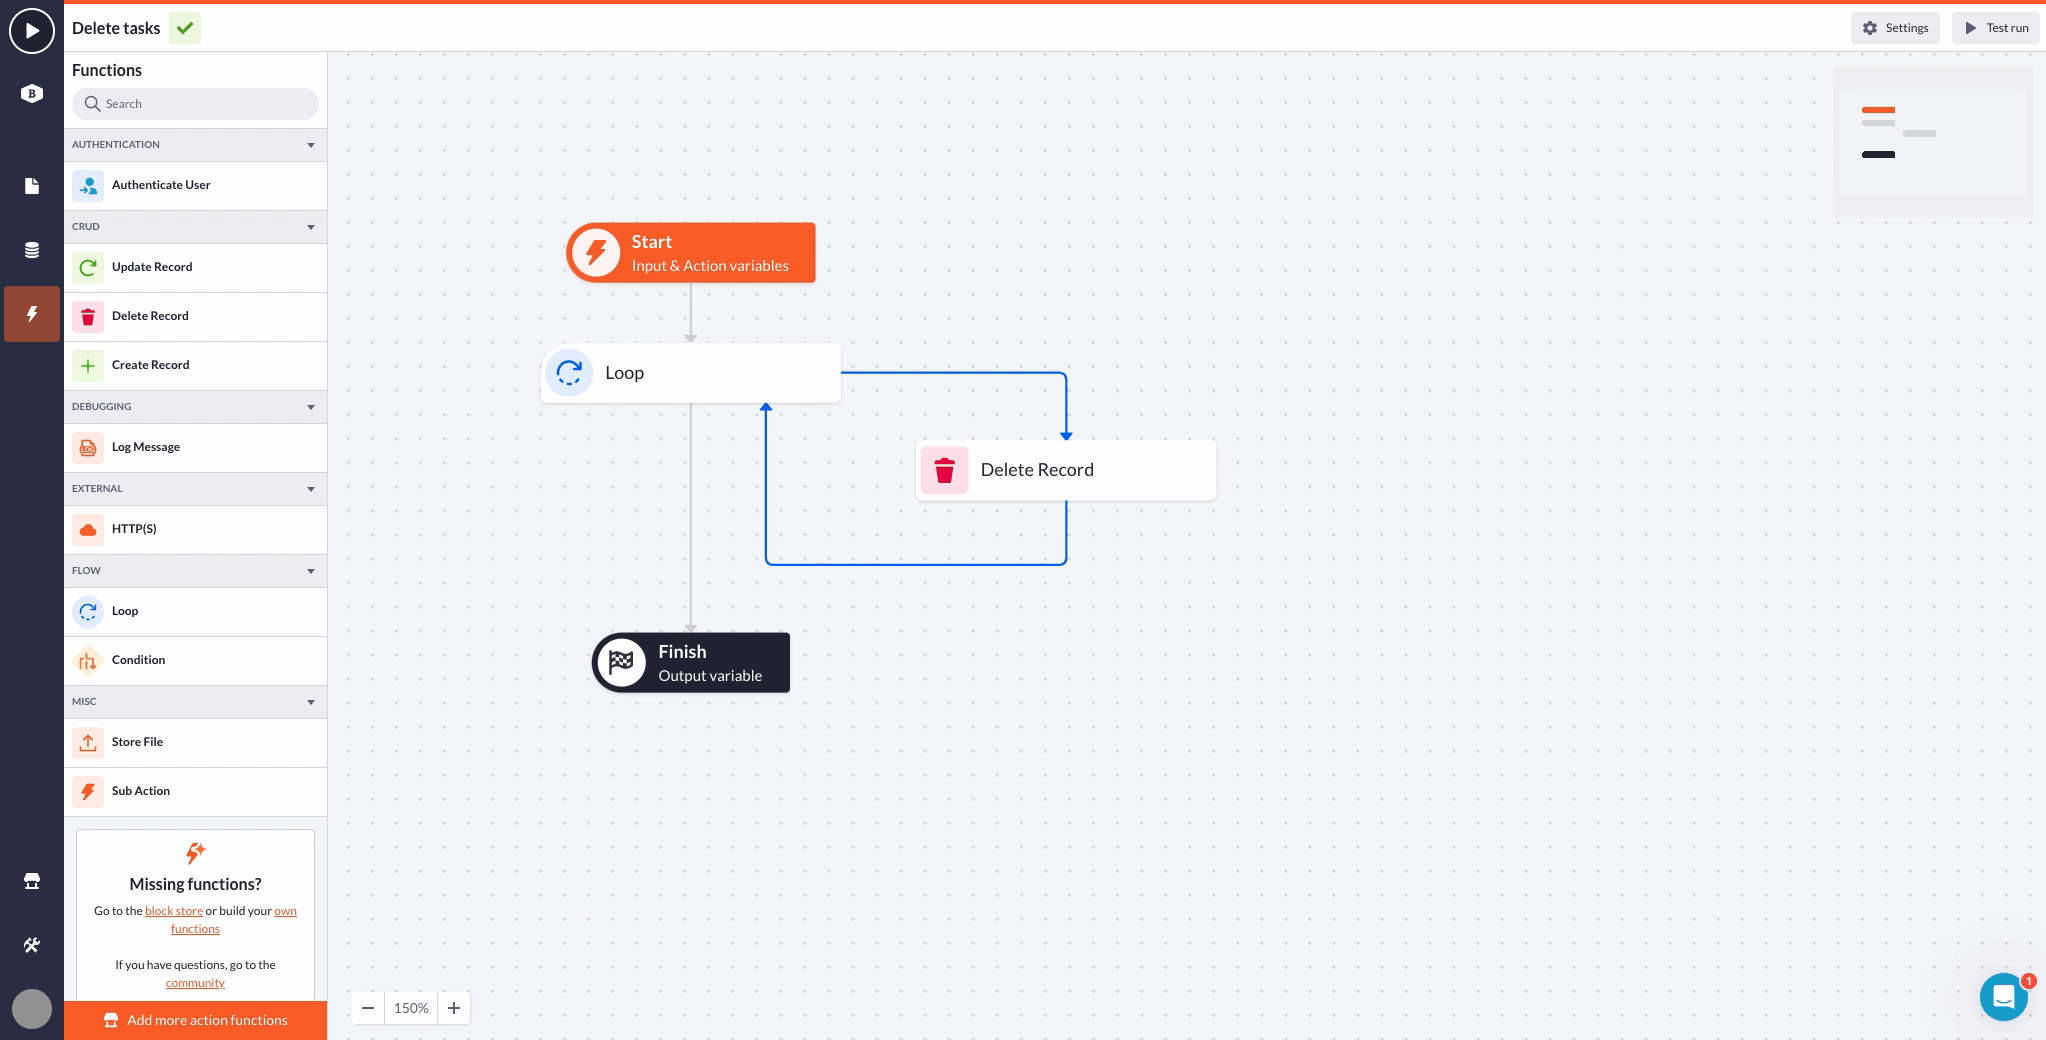
In this step of configuration, we are going to create a new action step that will further serve us as a Sub-action responsible for deleting all tasks that belong to a particular project. It means that first, we will delete all the tasks with a Sub-action, and then the flow will proceed to delete the project itself.
Go to the Actions overview and create a new action, call it something like ‘Delete tasks’. Input and action variables in the start step will be the same as we had in the previous ‘Create form’ action.

The next thing we need to throw into the flow is the Loop step as we would like to iterate through deleting all tasks within the project. Select the collection ‘project_records.Tasks’ and type in the iterator name (‘task’ in our case).
Add a Delete record step into the loop and select the ‘task’ variable from the loop configuration. Click on the Save button when you’re done.
Note: For other use cases with a sub-action, you might find this article useful.
Setting up the ‘Delete project’ button
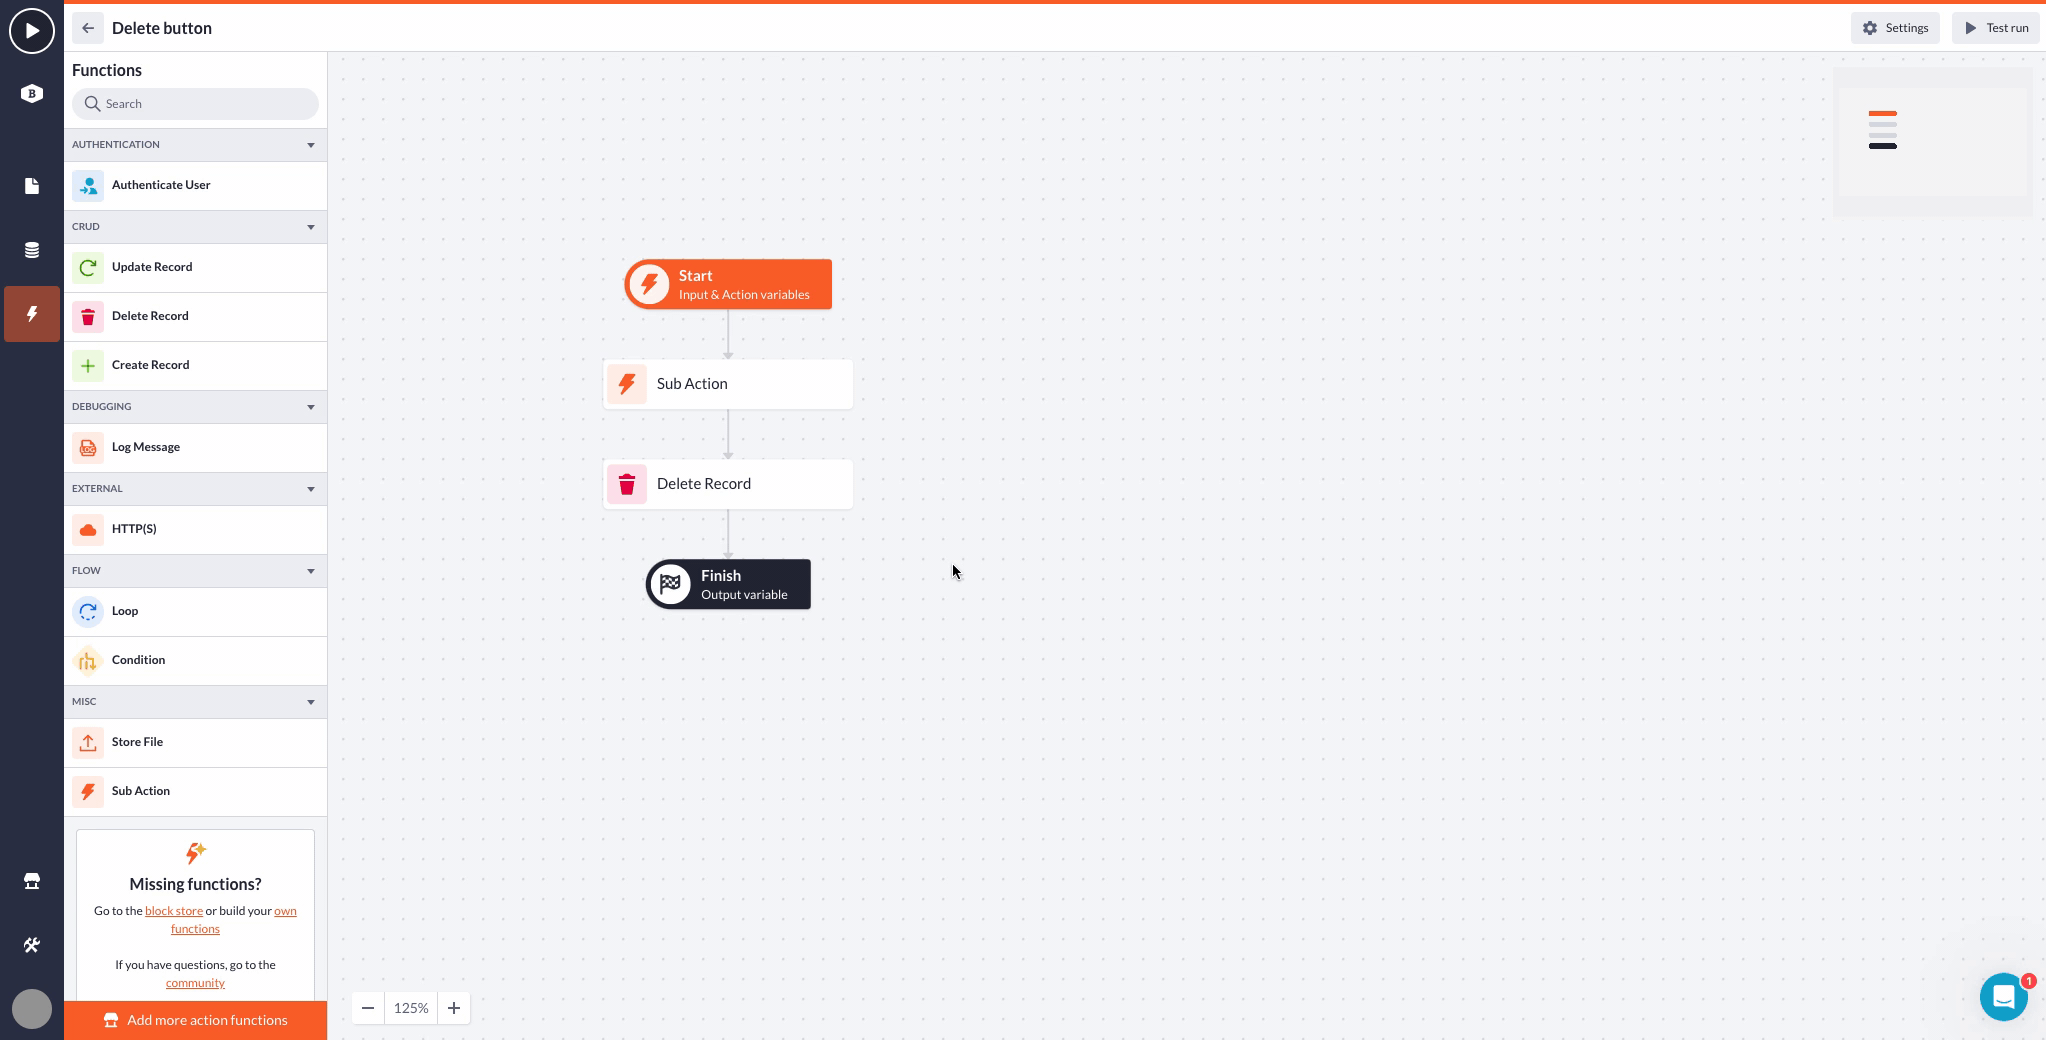
Now let’s come back to our ‘Delete project’ button and the action functioning behind it. For convenience, we’ve renamed it to the ‘Delete button’. Click on the pencil icon to open it in the Actions overview.
The setup here will be pretty basic:
-
The same variables at the start step (‘id’ and ‘project record’)
-
Next comes the sub-action step (install it from the block store if you haven’t yet) where we select the ‘Delete tasks’ action that we’ve created in the previous part (don’t forget to set the input variable to ‘project_id’ and value to ‘id’)
-
Drop the delete record step with the ‘project_record’ variable
Wrapping up
It’s time to come back to our front end to see if what we’ve set up here is really working. Go to the ‘Projects’ page and compile it by pressing the play button. Pick up one of the existing projects and press the ‘Delete project’ button.
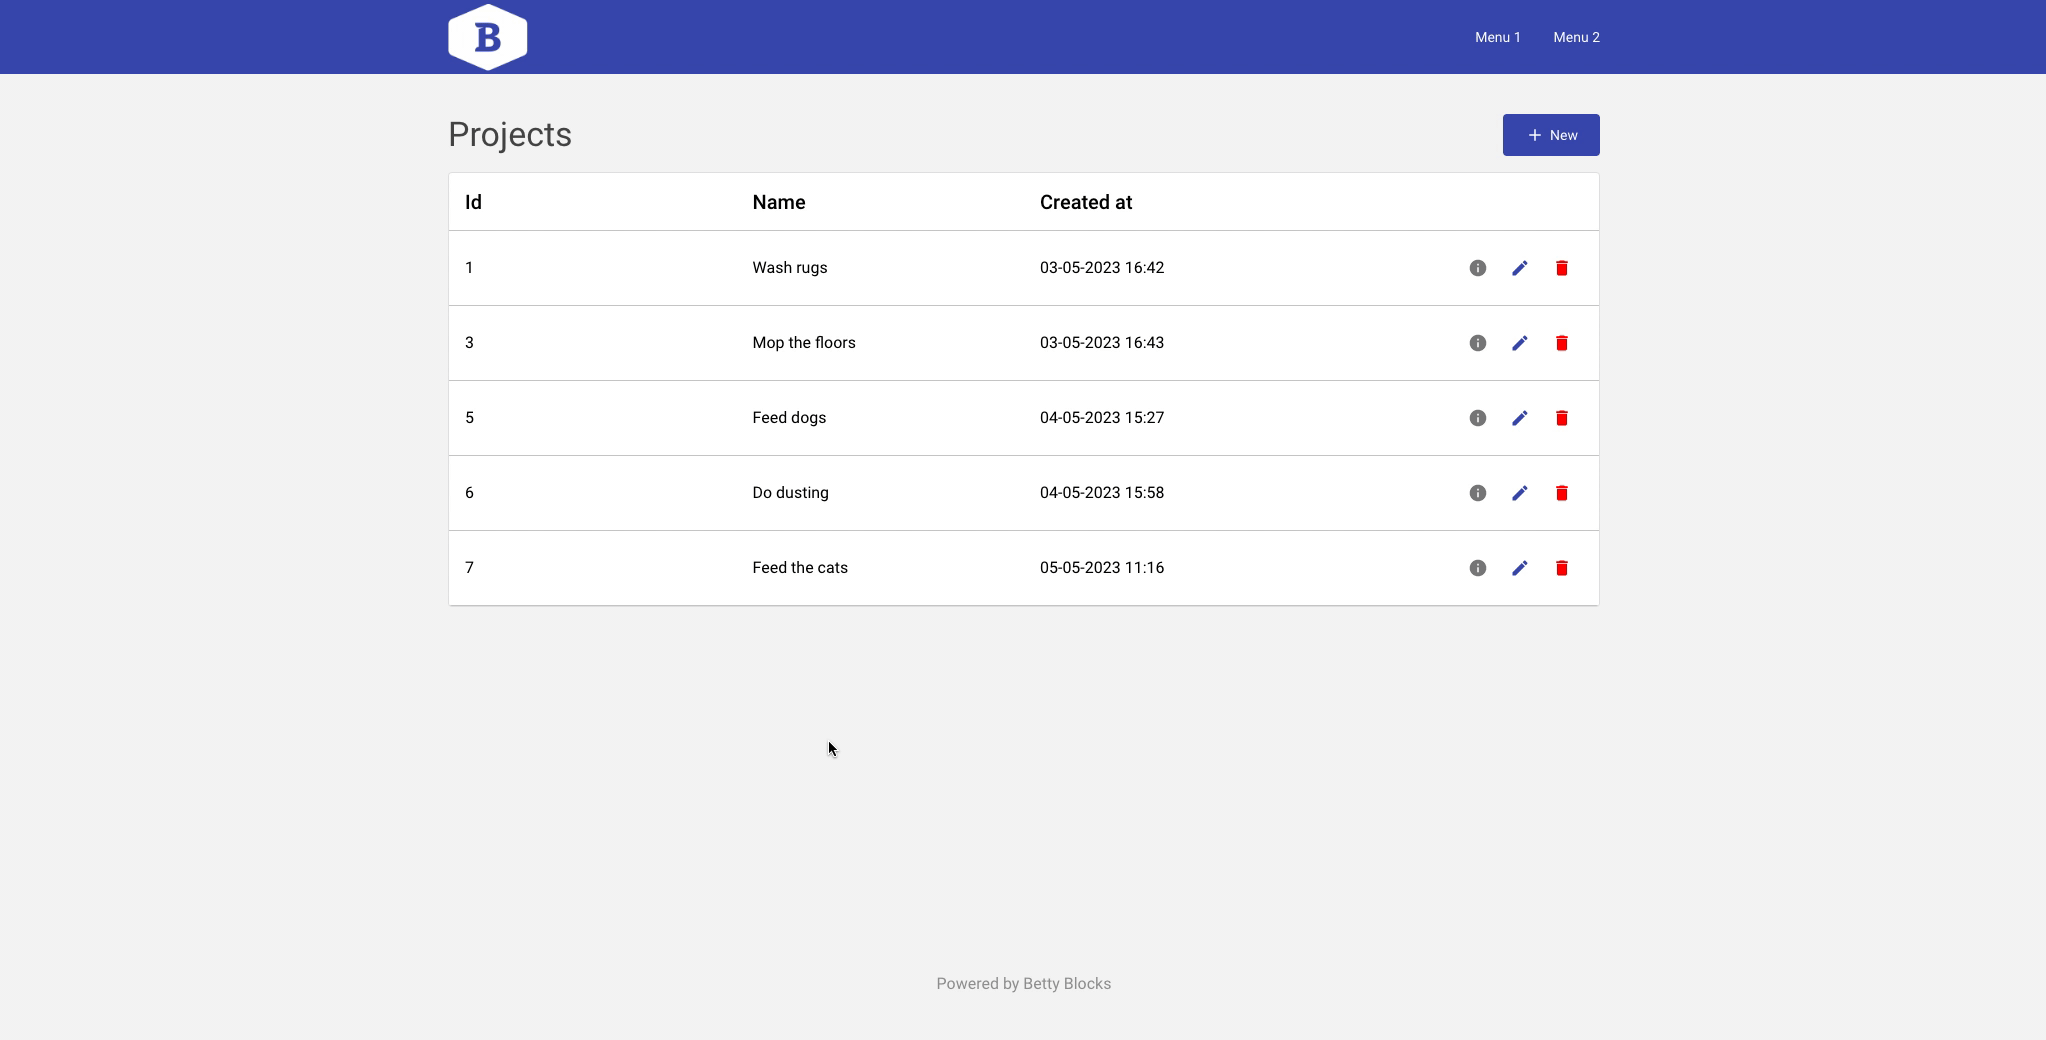
If everything’s been set up right, you’ll be able to delete the whole project along with the tasks that belong to it. In case it didn’t happen, it’s recommended that you Log step after each step in your action flows to check what went wrong throughout the process.
Creating an after-trigger
Lastly, there are some tips for you on how to apply a use case similar to this, but after trigger. Let's say one wants to send an email to a user when their project gets created, updated, or deleted. There will be three separate actions for this one accordingly and normally you'd need to set up a 'Send email' step for each of them. But, luckily, there is another way, much easier.
Again, you can set up your email configuration using the Sub-action step and use it after the primary action (create, update or delete). Here's an example of how it looks like with a Create form step for the same application that we configured throughout this article.

'Email_topic' variable within the Sub-action step is used to switch the wording in the final message the user receives when something happens to projects in their application. Finally, they receive this kind of email:
"Your project has been {created}, {updated}, {deleted}."

Read through this article to learn how to set up the 'Send email' action step from the Block Store.