
This guide walks through the Betty Blocks builder side of the Entra ID OIDC SSO integration.
Before you start, make sure your identity team has completed the Entra ID / Azure side and shared these values with you: the OAuth (authorization) endpoint, token endpoint, client ID, client secret, tenant ID, and scope. If you don't have these yet, see the companion configuration guide first.
What you'll build
Setting up SSO between a Betty Blocks authentication profile and Entra ID comes down to three things:
-
A configuration that stores all the Entra ID credentials.
-
A login button and action that sends the user to Entra ID to sign in.
-
A callback page and action that authenticates the user when Entra ID sends them back.
Step 1: Create the two pages
Before setting anything else up, create two public pages you'll wire up later.
1. Create a page called Login. Use the manual builder and start from scratch. Set the page type to Public.
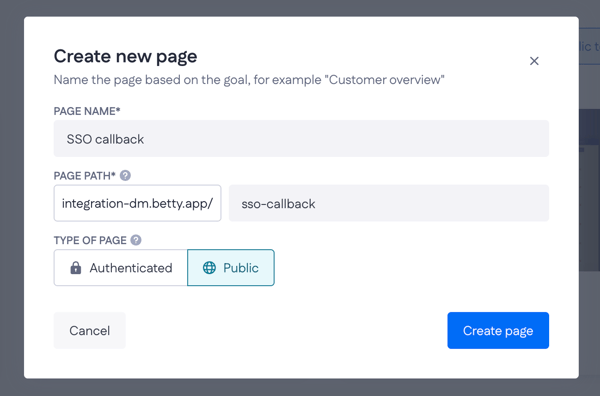
2. Create a second page called SSO callback. Again, manual builder, start from scratch, type Public.
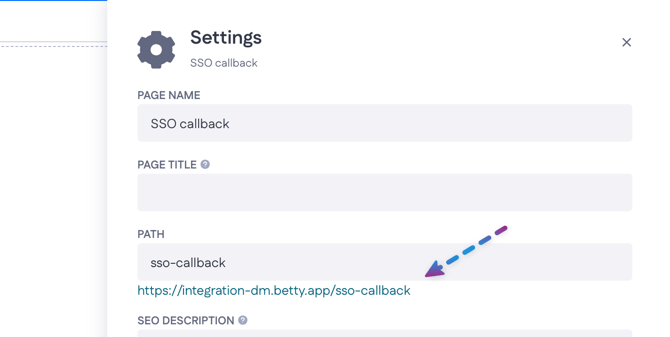
3. Open the SSO callback page's settings and copy its URL — you'll paste it into the configuration in the next step.
Step 2: Create the configuration
The configuration is where all the Entra ID credentials live, so nothing is hardcoded into the actions.
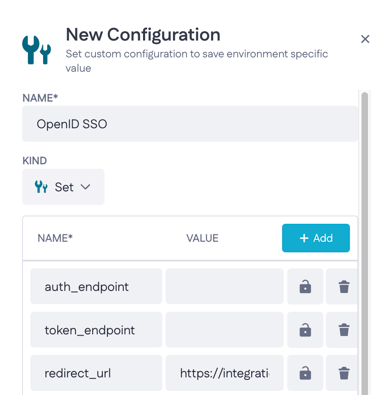
1. In the bottom-left corner, go to Tools → Configurations → New configuration.
2. Set the kind to Set (not Single) — a set can hold multiple key/value pairs.
3. Name it, for example Open ID SSO.
4. Add the following key/value pairs:
-
auth_endpoint -
token_endpoint -
redirect_url— paste the SSO callback page URL you copied in Step 1. -
client_id -
client_secret— click the lock icon to encrypt this value. This is best practice. -
tenant_id -
scope -
usernameattribute andname_attribute— which claims to read for the username and full name (this guide only stores those two).
5. Save the configuration.
Step 3: Build the login button and action
3.1 Add an Action Button
-
Open the Login page (still empty at this point).
-
Go to Components, drag a single Column onto the page.
-
Add a button, specifically an Action Button — this automatically creates an action for you.
3.2 Configure the login action
This action builds the URL that redirects the user to Entra ID's login page.
-
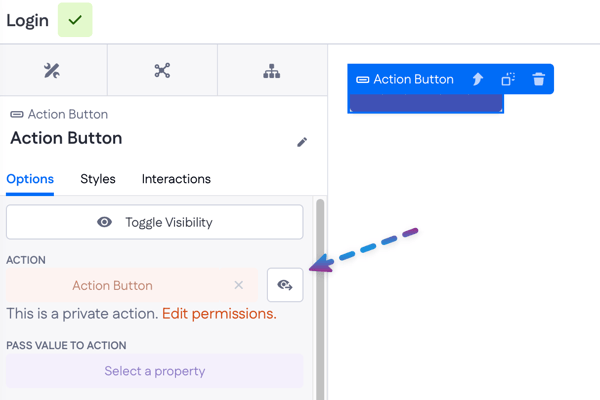
Click the small eye icon on the Action Button to edit its action (as shown on previous screenshot)
-
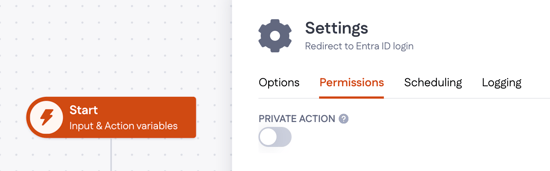
Under Settings, make the action Public.
-
Rename the action so it's clear what it does, e.g.
Redirect to Entra ID login -
Add an Expression step (lets you write JavaScript).
-
In the Expression step, add four variables sourced from the configuration:
auth_endpoint,client_id,redirect_url,scope. -
Add an output variable named output URL, type Text.
-
Set the expression, interpolating the configuration variables, for example:
"" + "?client_id=" + "" + "&redirect_uri=" + "" "&response_type=code" + "&scope=" + encodeURIComponent("")
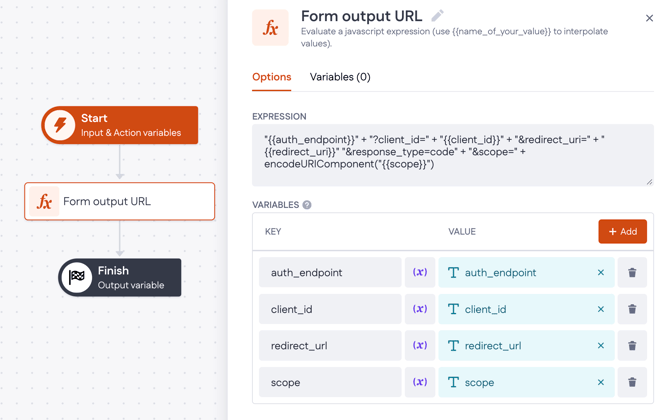
The response type is hardcoded to code because it never changes. encodeURIComponent on the scope makes sure spaces and special characters are URL-safe.
-
Save the Expression step.
-
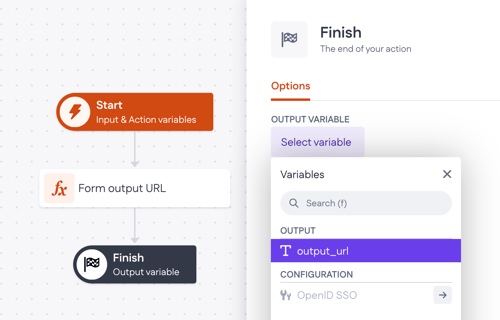
In the Finish step of the action, set the output variable to
output_url.
3.3 Wire up the button
-
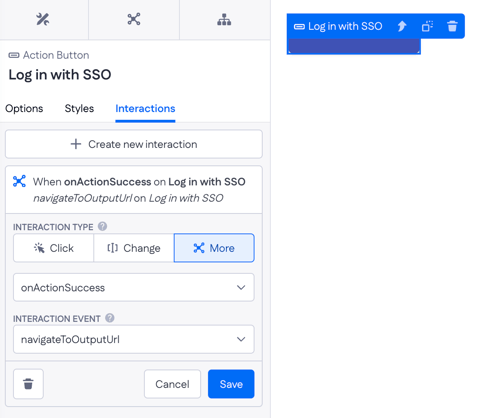
Back on the Login page, select the Action Button and update its label text (e.g. "Log in with SSO").
-
Add a new interaction: On action success → Navigate to output URL. Save interaction
3.4 Test the redirect
- Click
Playto compile the page (and app). - Click the button and confirm you're redirected to the Entra ID login page.
Step 4: Set up the user data model
Redirecting the user to Entra ID is only half the job — Betty Blocks still needs a model, an authentication profile, and a callback action to actually log the user in.
4.1 Create the Webuser model
-
Go to Models →
New model. Call itWebuser -
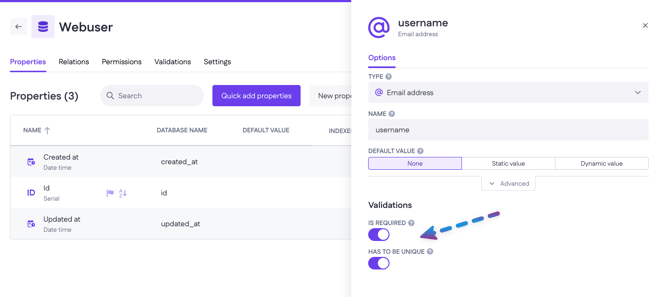
Add an email property. Make it required and unique — this is the username.
-
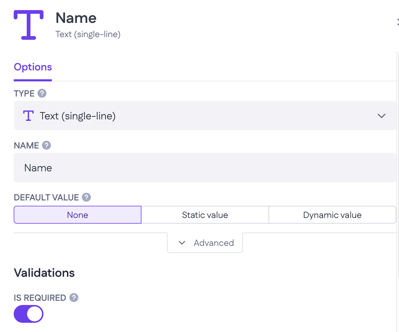
Add a
Nameproperty, type Text (single-line), also required.
Step 5: Create the authentication profile
-
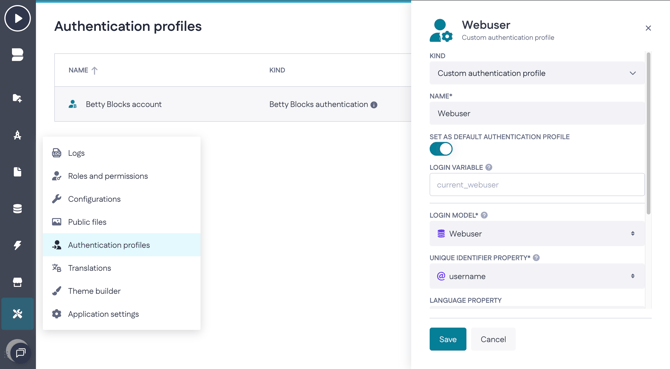
Go to Tools → Authentication profiles → New profile.
-
Set the kind to Custom authentication profile.
-
Name it
Webuser. -
Set it as the default authentication profile (you'll get a warning about switching — confirm it). Leave the existing developer/IDE profile untouched; it's only for builder access.
-
Set the model to Webuser.
-
Set the unique identifier property to the
username(email) property.
-
Set the login page to the Login page created in Step 1.
Step 6: Build the SSO callback page
Entra ID redirects the user back to the callback page with an access token and an authorization code as URL parameters. This page's job is to grab those and hand them to an action.
6.1 Confirm the redirect URL
-
Copy the SSO callback page's URL from its Settings (if you haven't already).
-
Go to Configurations, open Open ID SSO, and paste it into Redirect URL.
Note: the callback URL is environment-specific. When you promote this to an acceptance or production environment, update the Redirect URI value in the configuration to match that environment's URL.
6.2 Add a waiting indicator (optional)
-
Add a single Column and Text components to the page.
-
Add some text, e.g. "Please wait while we verify your credentials."
-
Add Progress Bar as a visual indicator while the credentials are verified.

This is purely cosmetic — nothing here drives the actual authentication.
6.3 Add the form
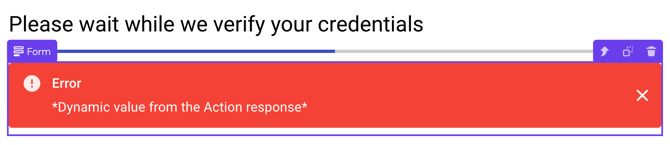
-
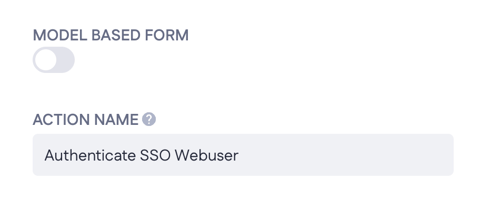
Add Form component – not model-based type
-
Give the action a name, e.g.
Authenticate SSO Webuser. Save.
-
Remove the Success message: if everything goes right, the user won't see anything here; they'll already be redirected.
-
Keep the Error message in case something goes wrong.
-
Remove the Send button as the form should submit itself automatically.
6.4 Accept the access token and code
-
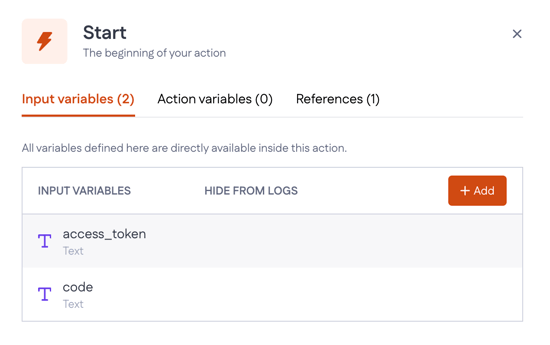
Click the Form's eye icon to open its action. In the Start step, add two input variables, both type Text:
access_tokenandcode
-
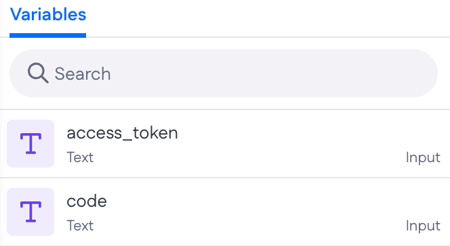
Back on the page, add two page input variables (also Text) with the same names:
access_token,code— these read the values Entra ID appends to the callback URL.
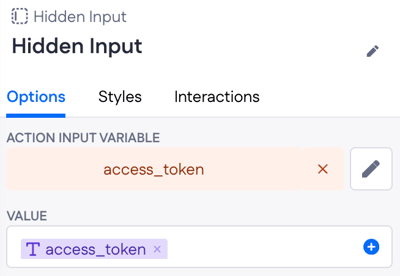
-
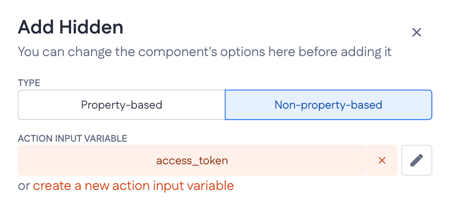
Add two hidden input fields to the Form: mark each non-property based, and .
-
Bind one to the
access_tokeninput variable and the other to thecodeinput variable
6.5 Auto-submit and redirect
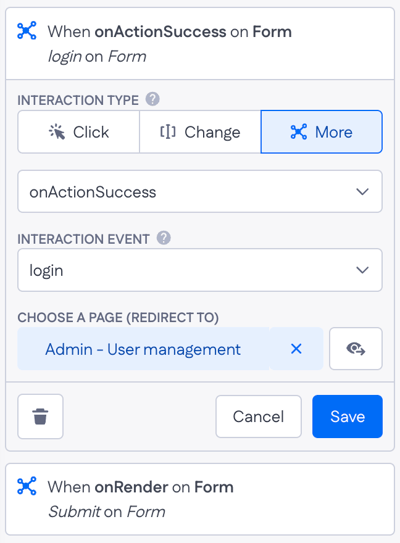
With the Form selected, add two interactions:
- On render → Submit → target component: the Form. This submits the form as soon as the page loads.
- On action success → Login to selected page (e.g. the user management / home page).
Step 7: Build the authenticate-SSO action
This is the core of the flow: exchange the authorization code for tokens, decode the identity, find or create the user, assign a role, and authenticate them.
7.1 Make the action public
Open the action and, under Settings, make sure it's Public — the user hasn't logged in yet, so it can't be private.
7.2 Install the OpenID Connect blocks
-
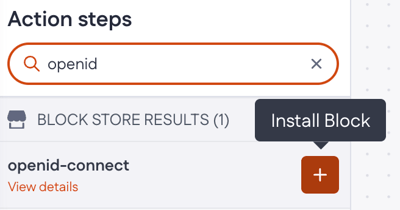
In the action canvas, search the Block Store for action steps: OpenID.
-
Install the OpenID Connect block package. This adds four new action steps you'll use below.
7.3 Get access and ID token
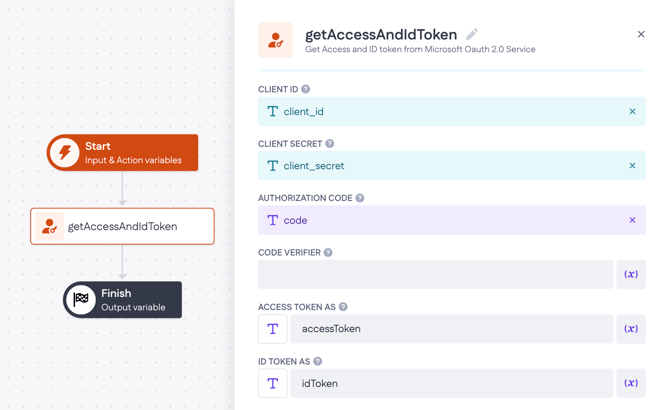
Drag the Get access and ID token step onto the canvas and configure it:
-
token_endpoint,redirect_url,client_id,client_secret– all from the configuration. -
Authorization code— the code input variable from Step 6.4. -
Code verifier— leave empty (not used for the Entra ID integration). -
Name the outputs: access token, ID token, refresh token.
-
Store the result as an Object.
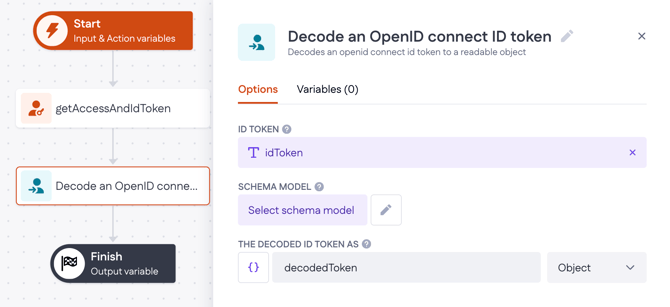
7.4 Decode the ID token
-
Drag the Decode ID token step onto the canvas.
-
Select the ID token from the previous step as its input.
-
Name it and store the result as an Object.
7.5 Get user data from the ID token
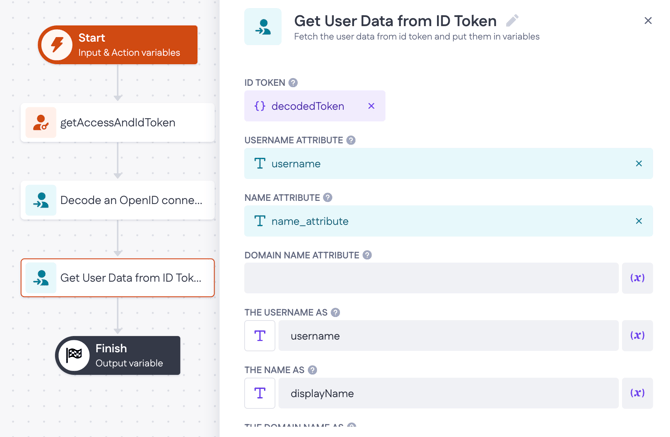
-
Drag the Get user data from ID token step onto the canvas, input: the decoded token.
-
Set the username attribute and name attribute to the values from the configuration (the claim names you configured, e.g.
preferred_username). -
Leave the domain name attribute empty — not required for this setup.
-
Store the username and display name as variables.
7.6 Check whether the user already exists
-
Drag a Condition step onto the canvas.
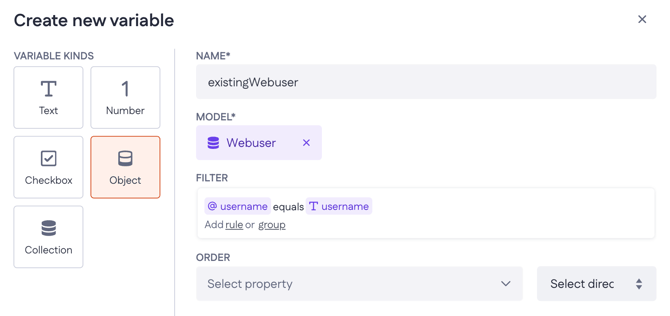
-
Add a variable: fetch a
Webuserobject, name itexistingWebuser, with a filter whereusernameequals theusernameretrieved in 7.5
-
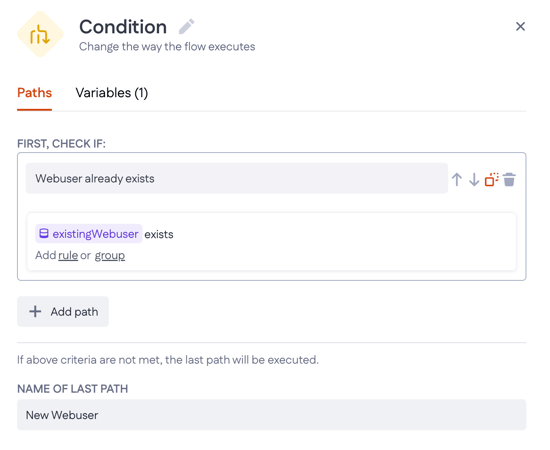
Set the first path's condition to
existingWebuser→ filter exists. -
Rename the other (else) path, e.g.
New Webuser.
7.7 Create the user if they don't exist yet
In the new_web_user branch:
-
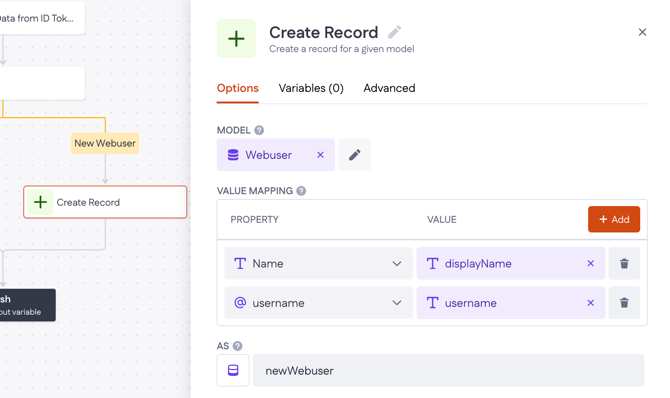
Drag a Create Record step onto that branch.
-
Set the model to Webuser.
-
Map
name→ the display name from 7.5, andusername→ the username from 7.5.
-
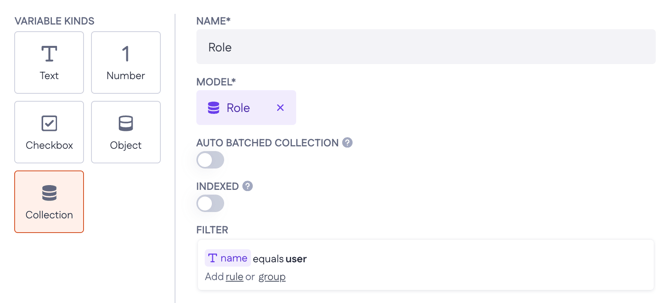
Add a Collection variable: fetch the Role model, filtered on
nameequalsuser, name it role. -
In the step's options, assign this
Roleto the new user.
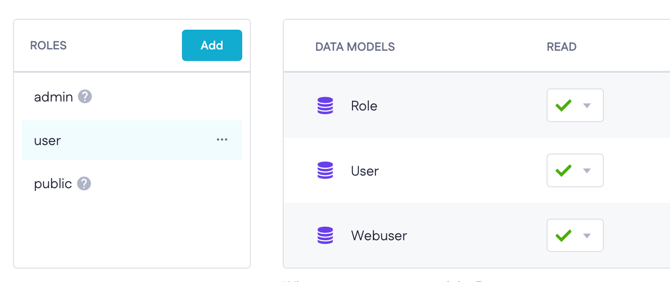
This assumes a role named user already exists. If it doesn't yet, go to Tools → Roles and permissions → Add, and create a role called user (it gets default read access to all existing models).
7.8 Authenticate the user
After the Condition branches merge back together:
-
Drag the Authenticate user step onto the canvas.
-
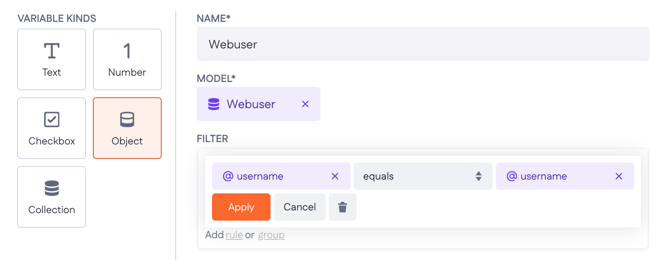
Add a variable: fetch a
Webuserobject, name it, filterusernameequals theusernamefrom 7.5.
-
In the step's options, select your custom (
Webuser) authentication profile. -
Set the record ID to the id property of the
Webuservariable. -
Name the resulting output, e.g.
jwtToken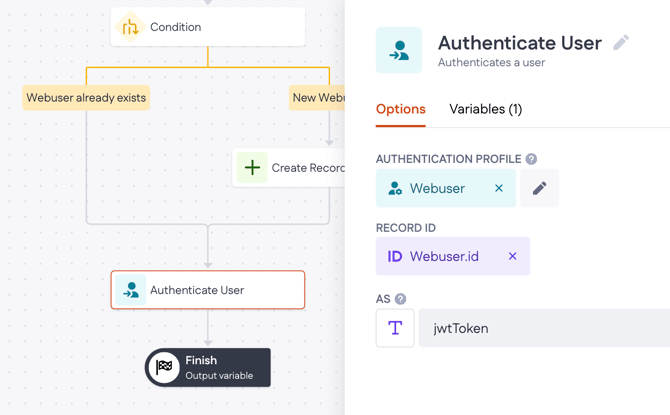
7.9 Output the token
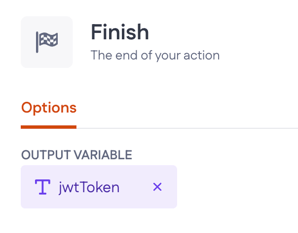
In the action's Finish step, set the output variable to jwtToken from the previous step. Save the action.
Step 8: Test the full flow
-
Go to Pages and open the Login page.
-
Click the login button.
-
Sign in with an Entra ID account (or pick the already-signed-in account).
-
Confirm you're redirected through the callback page and land signed in to the app
Tips and things to double-check
-
Always encrypt the client secret in the configuration (the lock icon).
-
Redirect URIs are environment-specific — update the configuration when promoting to acceptance or production.
-
Keep the login action and the authenticate-SSO action public; the user hits both before they're logged in.
-
Store the token responses as objects so individual claims stay easy to reference later.
-
Only request and store the claims you actually need — this guide only keeps the username and full name.