Prompt AI step
Create custom prompts within your action step powered by OpenAI functionality.
After reading this article you’ll know the following:
-
What the prompt action step is
-
How to build a simple question-answer functionality
-
Some other ways to use prompts while working with text
As a builder on Betty Blocks, you can now seamlessly integrate AI capabilities and create dynamic and smart features in your applications using the AI prompt action step. First, we will dive into text-to-text capabilities showing you how to build a simple question-answer use case in your application. Additionally, some other ideas for working with text will be mentioned.
Getting started
This action step is currently designed for text-to-text transformations. For instance, you can summarize or anonymize texts, correct spelling, etc. As we always seek to present the easiest use cases at first - let’s get started with a simple question-answer functionality. This one will be based on a Create form from the page builder and the action behind it.
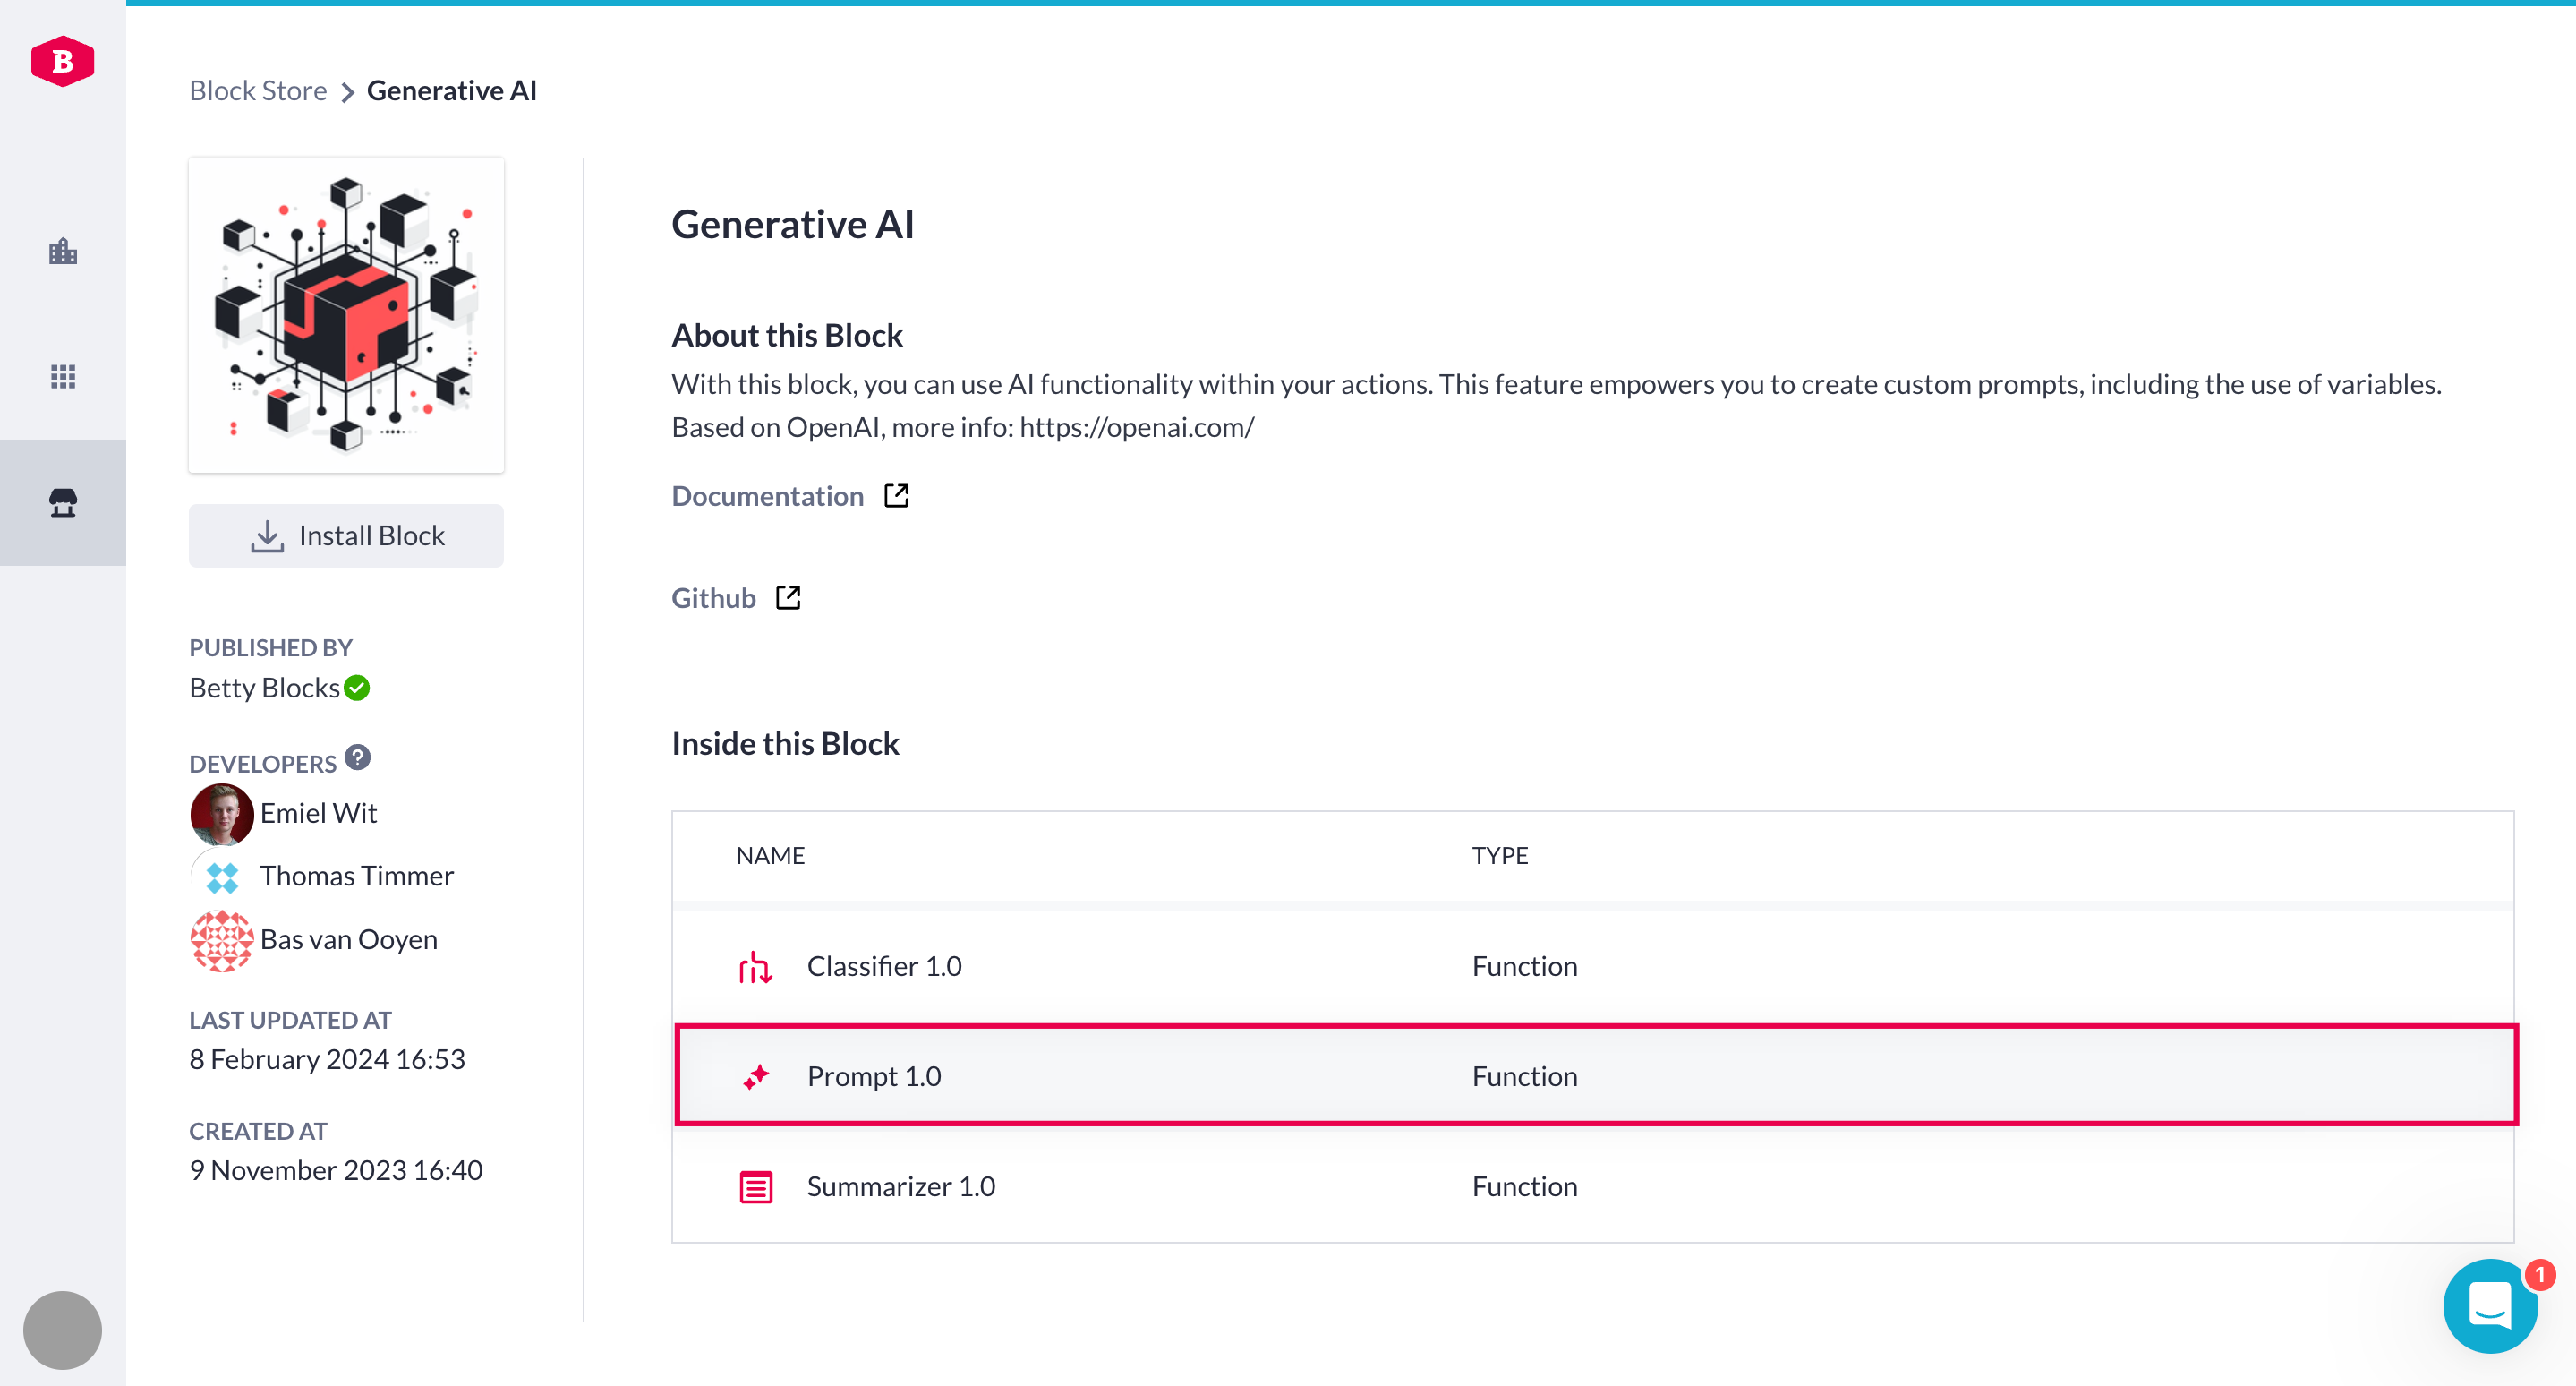
Go to the Block Store and search for the ‘Generative AI’ block that contains a Prompt AI action step. Install it to your application.
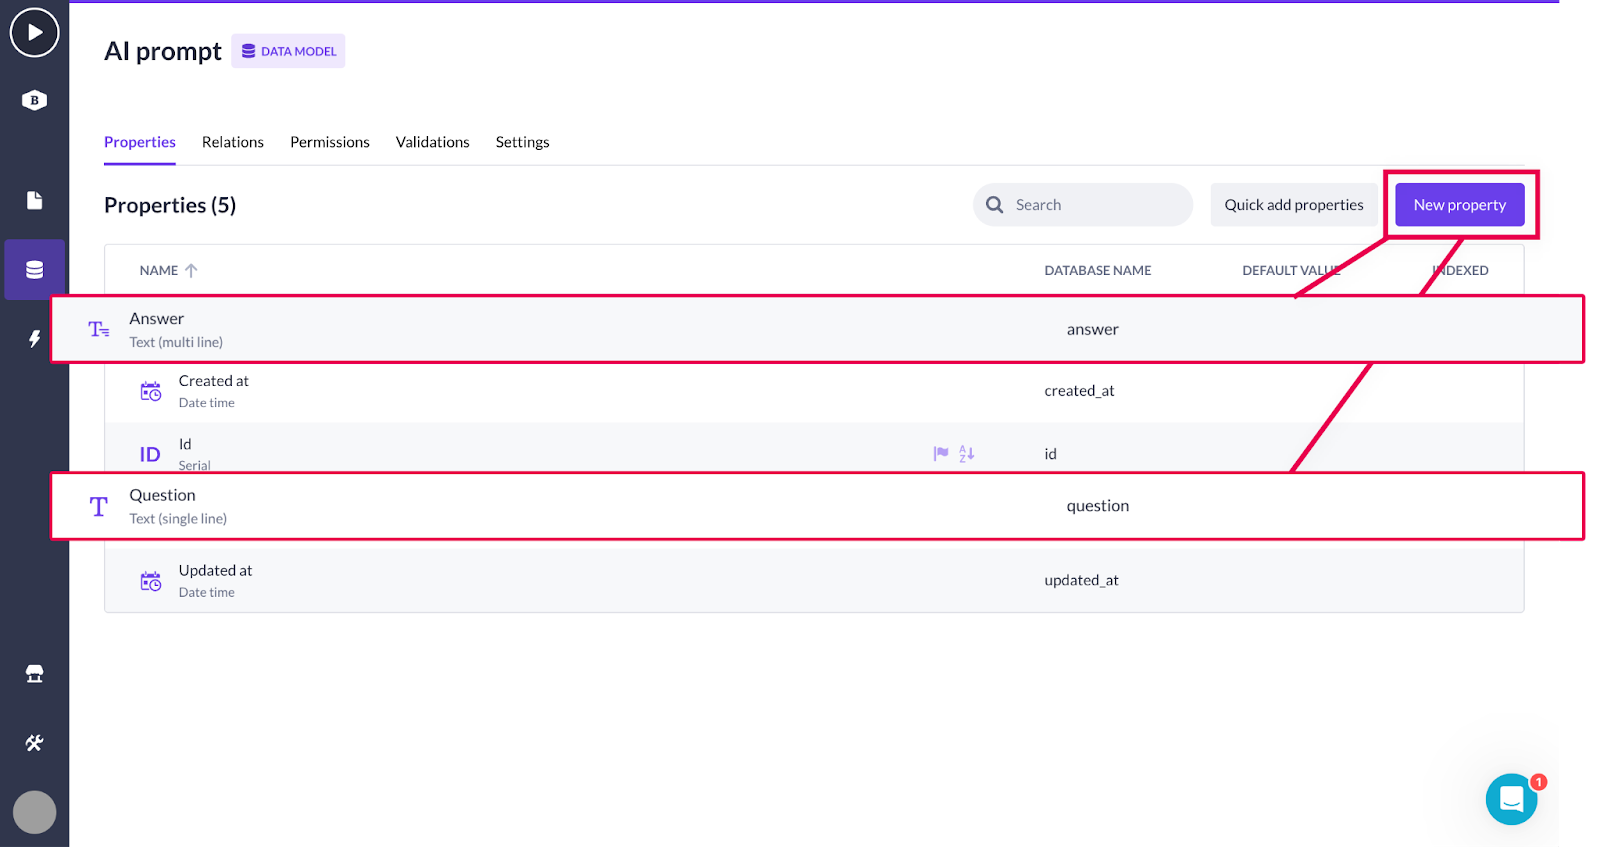
Done? Now go to your application and create a new data model to use for our future create form. Add some properties to it according to your needs. In our case, these are:
-
Text (multi-line) - Answer
-
Text (single line) - Question
Preparing the page components
Let’s prepare the page of your application for future functionality: we need a Create form component for typing in a question, and a Data container with a Text component to get the answer from OpenAI.
Go to the page builder and select (or create) a page you want to use for implementing your AI question-answer feature. Follow the instructions:
-
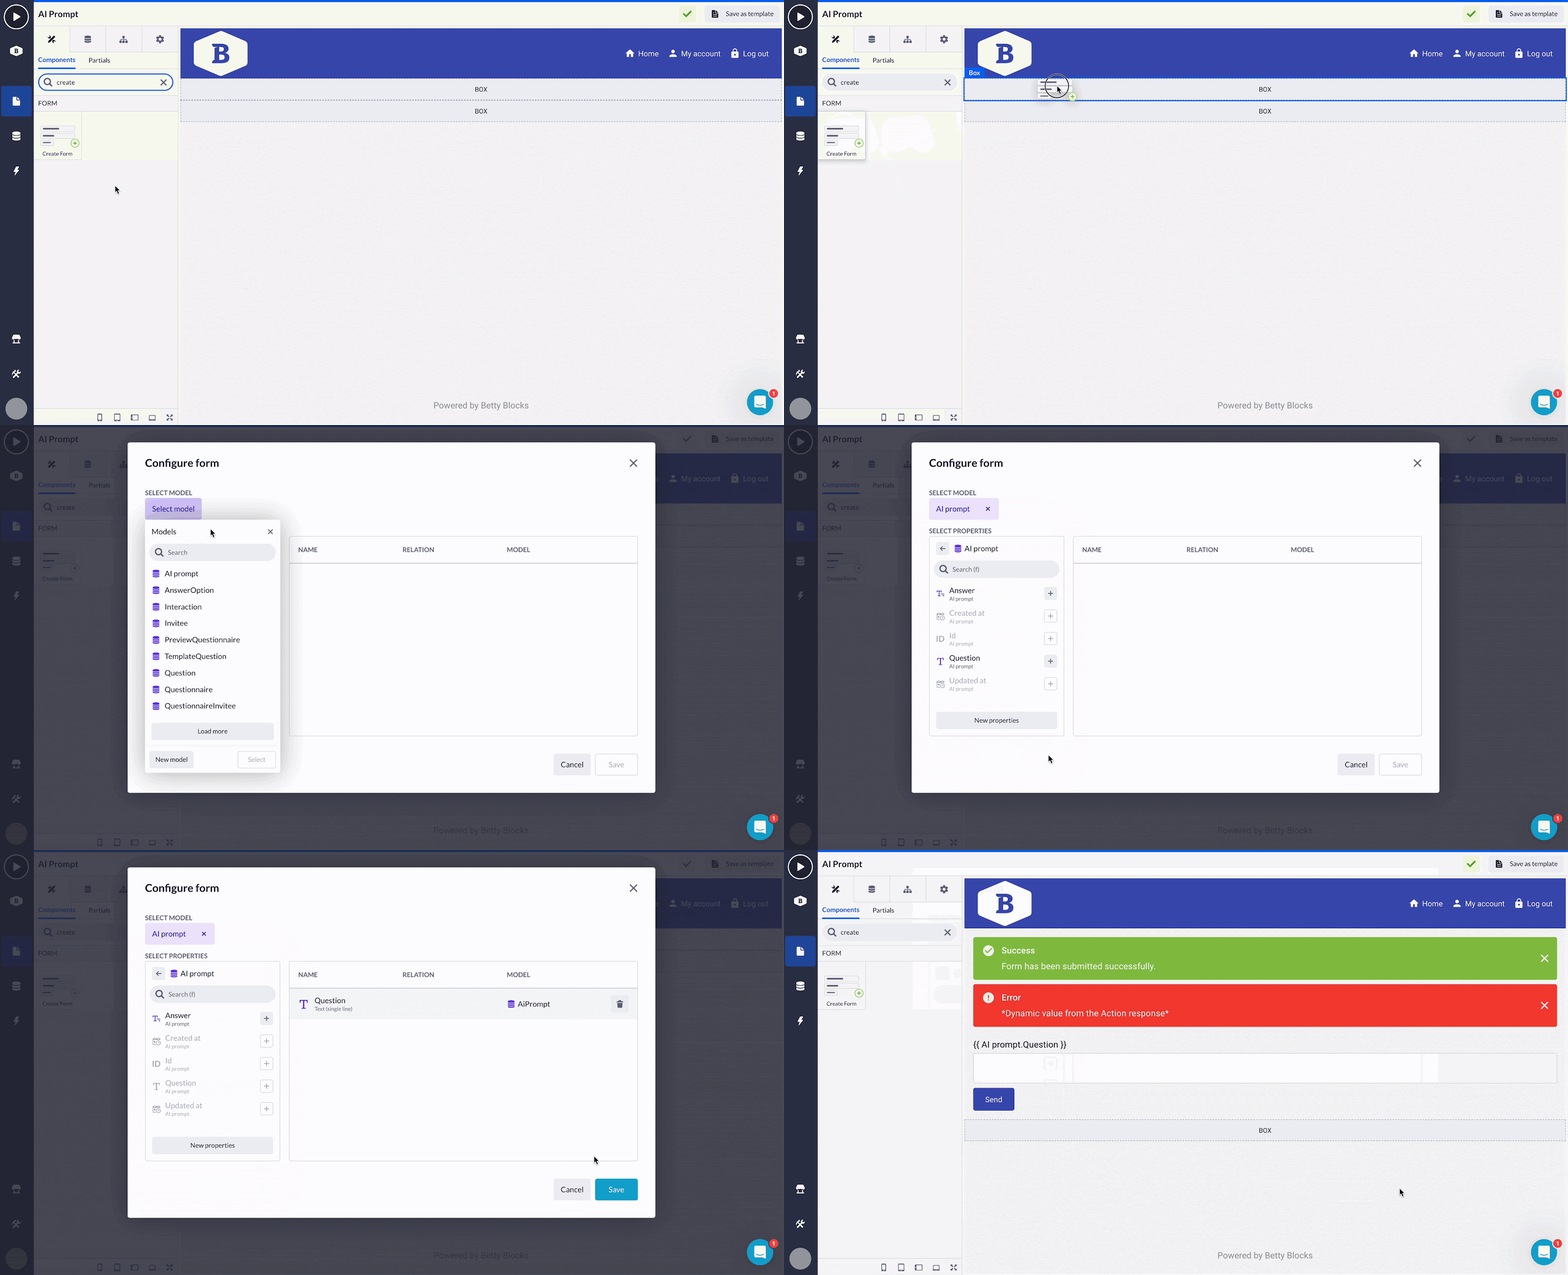
Take the Create form from the component overview and drop it onto the page’s canvas. Configure the form by selecting the prepared (AI prompt) model and its ‘Question’ property
-
Find the Data container component and drop it below the create form (make sure it’s not within the Create form). In the configuration window, pick up the same ‘AI prompt’ model. Press
Save. -
Take the Text component and drop it into the data container. In the text’s content options, click on the
+button to add the ‘Answer’ property from the ‘AI prompt’ model. PressSelect.
.gif)
Using the AI prompt action step
After we’ve prepared our page’s front-end elements, it’s time to set up the actions part. Navigate to the Create form’s options and click on the pencil icon beside the action field to open the action behind this form.
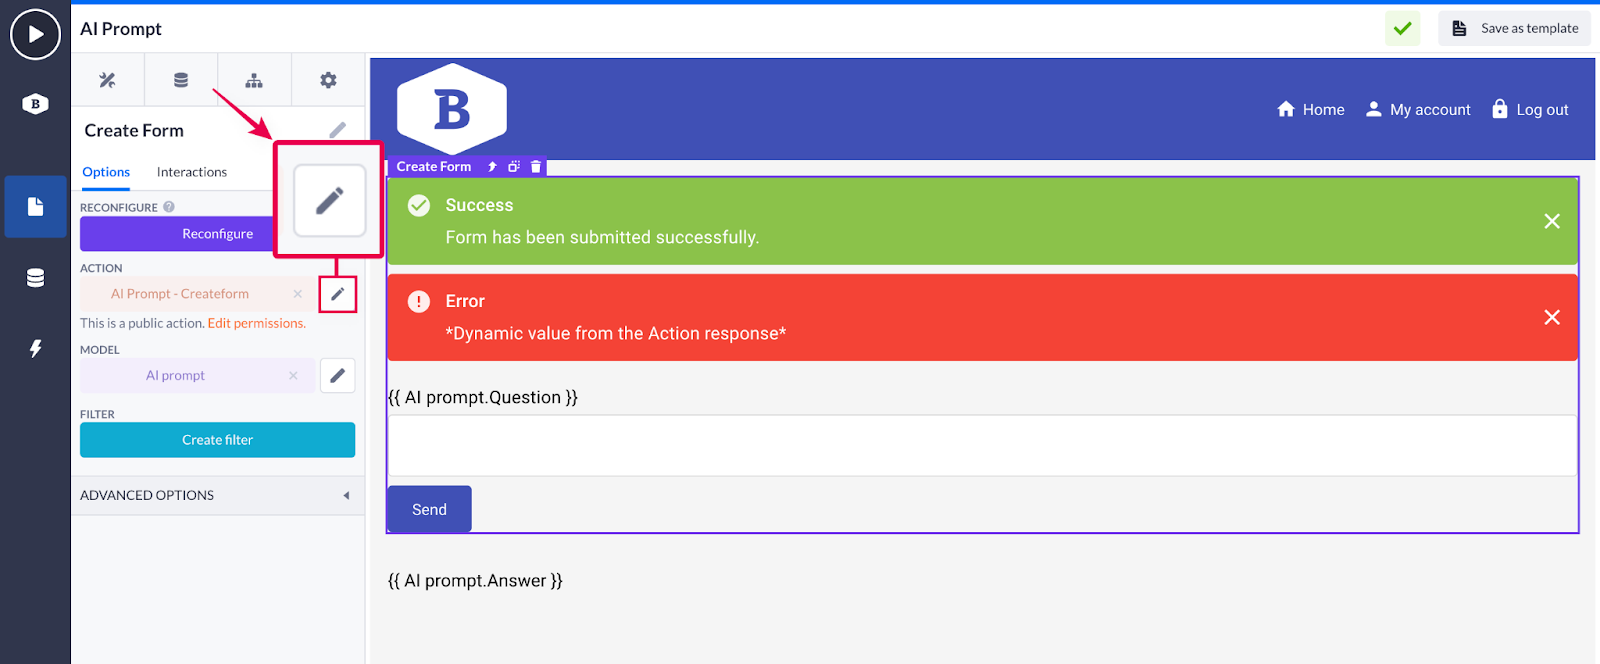
The kind of action flow we are going to build will consist of three steps: the Create record with a question in it, the AI prompt step that will send our request to OpenAI, and the Update record step that is going to update the text field with the received answer from the AI system.
The Create record step should be already configured for us. Just ensure it has all the items as in the screenshot below.
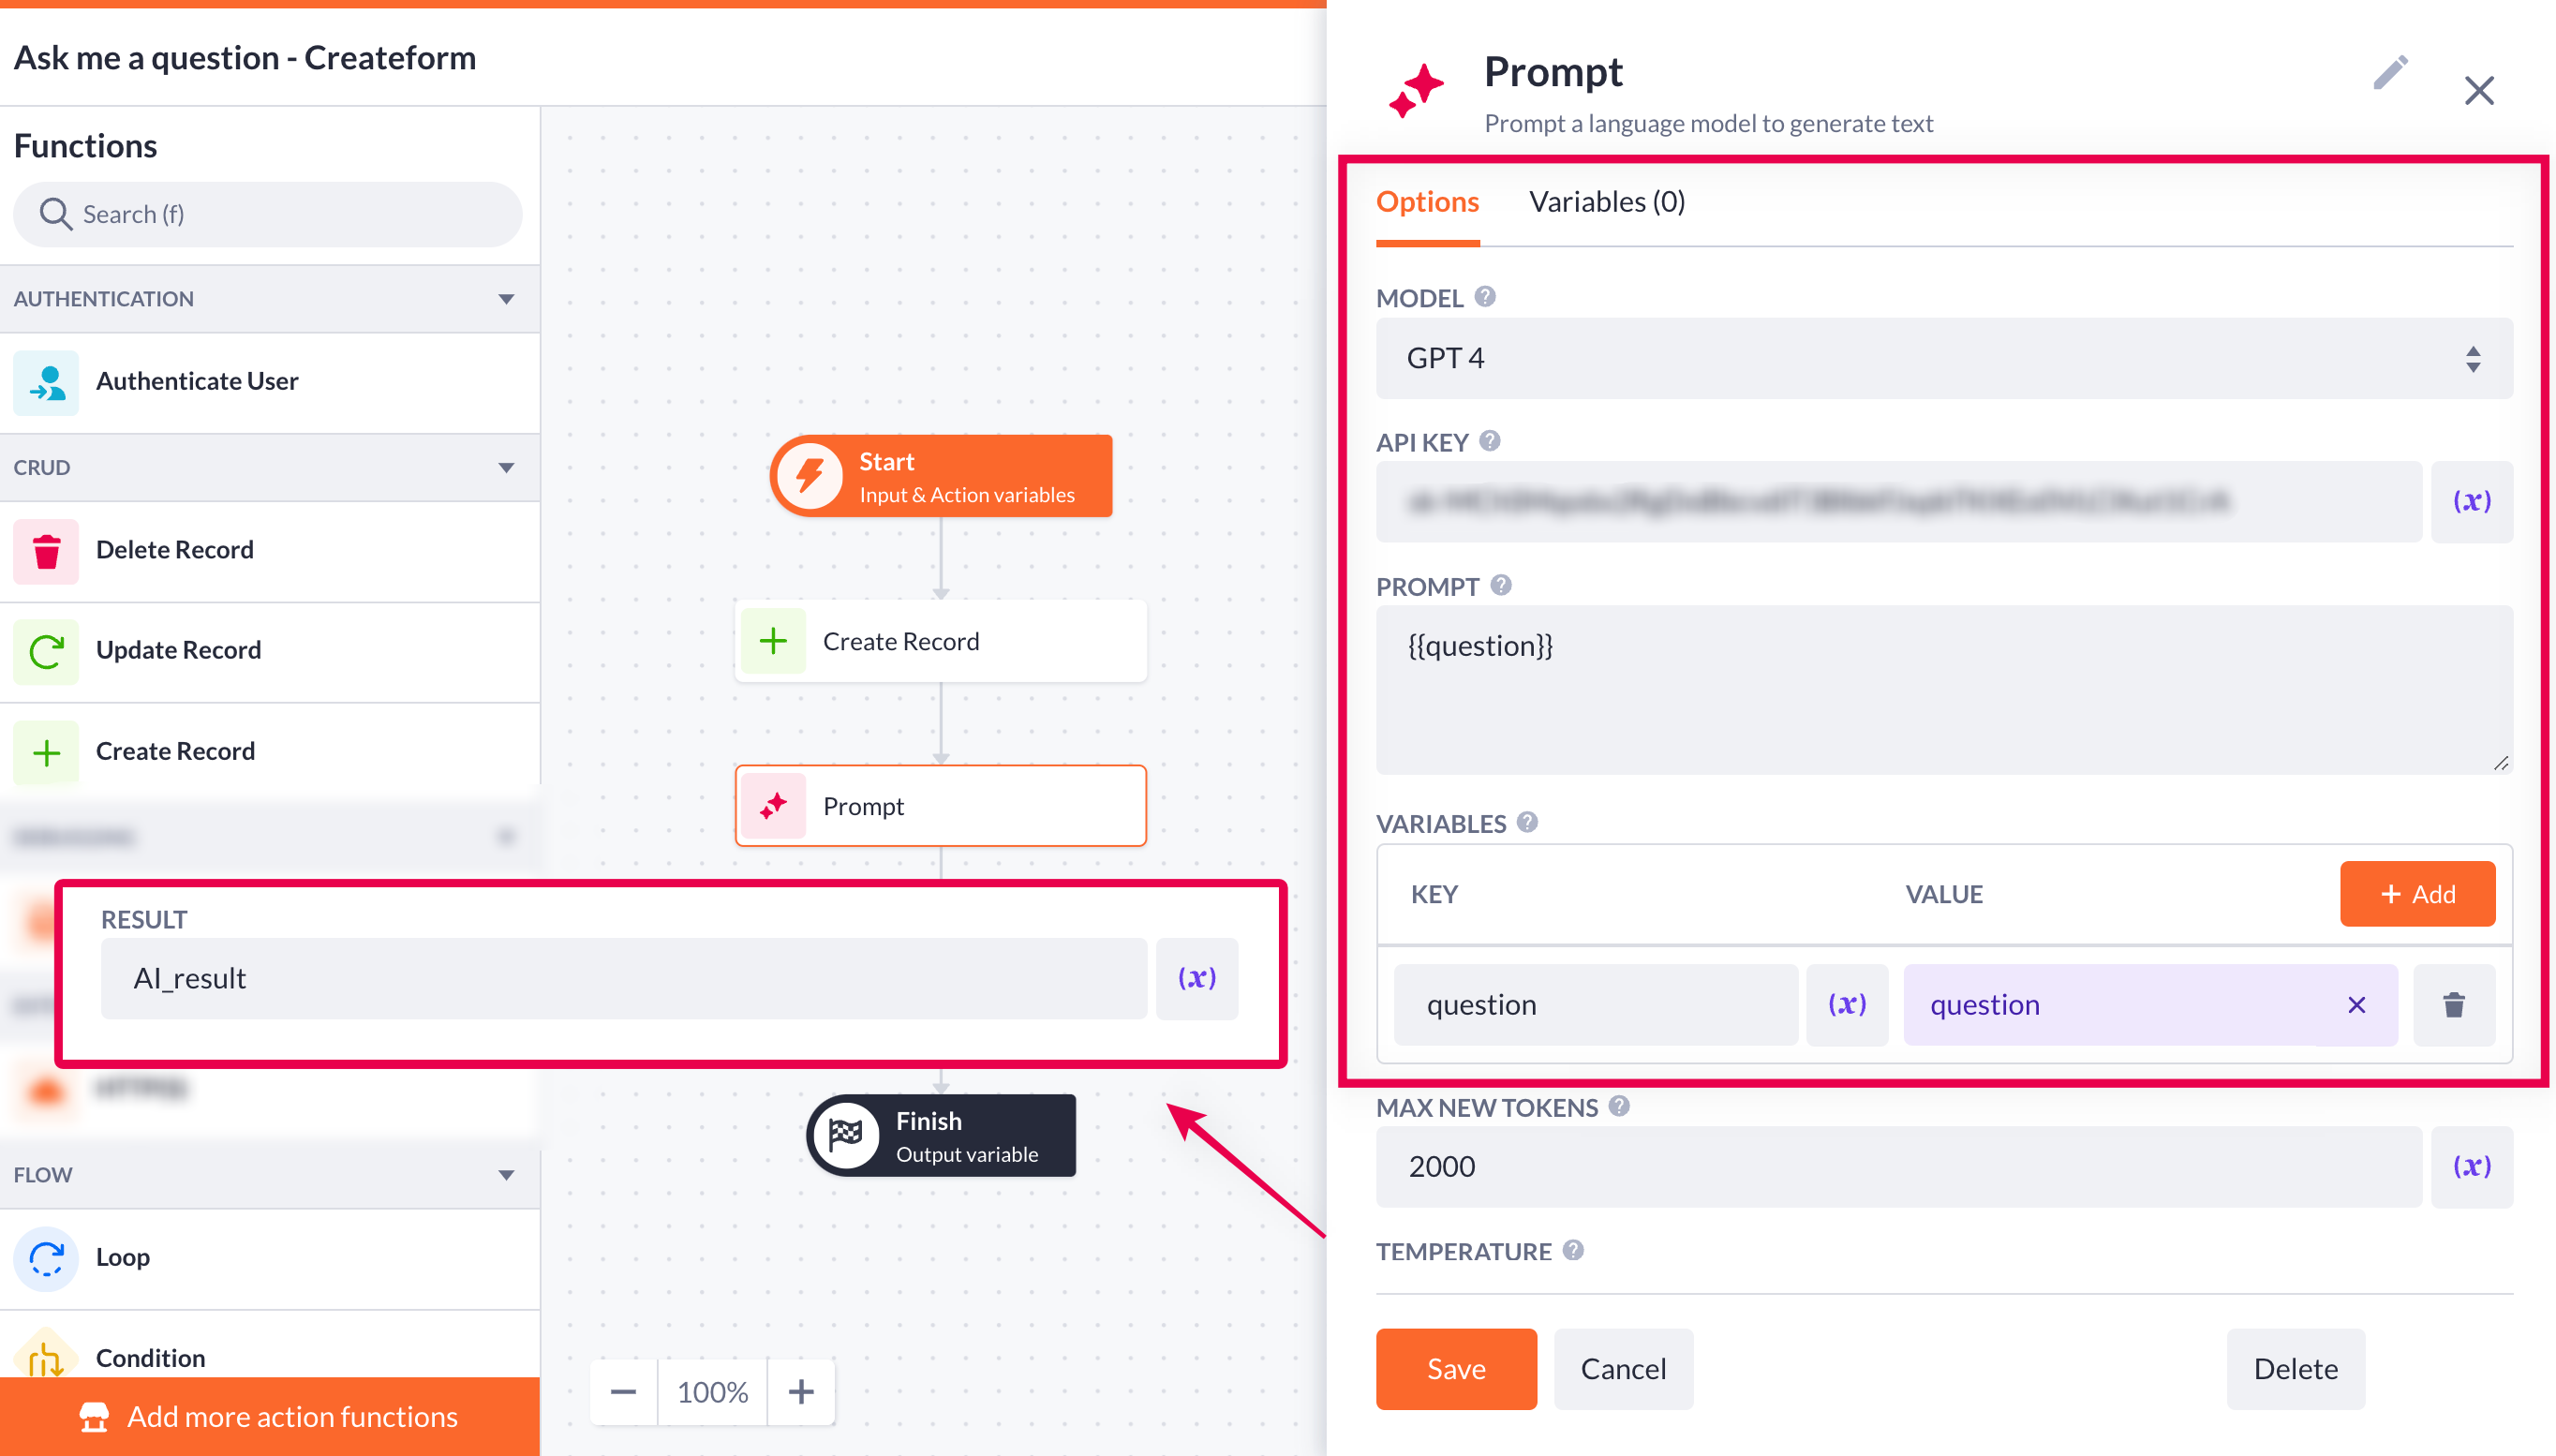
Take the AI prompt step from the steps (functions) overview and place it below the create record step. Make sure you’ve filled in the following fields and save your progress:
-
Model: select which version of GPT you currently use
-
API key: here you should enter the API key (that you retrieved from the OpenAI side) for accessing the model
-
Prompt: type in the prompt for the model, in our example:
-
Variables: define variables to be used in the prompt. Make sure you've typed in 'question' in the key and chosen the question variable in the value (not vice versa!)
-
Result: type in the name for the result variable, we’ll need to pick it up in the next step
-
Additionally, you can specify the maximum new token limit for the generated response and temperature - this one defines how creative the AI’s response is going to be (0 is the most predictable, and 20 is the most random). We’ll leave it as it is for now
Drag the Update record step and place it below the AI prompt step. First of all, go to the variables tab:
-
Add a new record variable. Call it something like 'prompt_to_update'
-
Set the filter to id equals create_result.id
In its options, set the following:
-
Record: pick up the prompt_to_update variable in the record field to define what will be updated.
-
Value mapping: Add two properties and set the values accordingly: Answer - AI_result, Question - question (variable)
-
As: name the variable for the updated record
.gif)
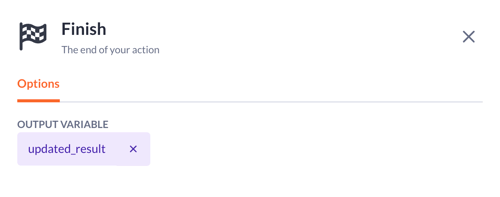
Finally, there should be updated_result variable selected in the Finish step
If you want to store all your questions and answers, go for the Back office page template.
Wrapping up
All right, everything is practically done and now we can check if our example is working and whether the connection with OpenAI has been successfully set up. Come back to our page and compile it.
If the setting is done right, you’ll be able to get the answer to your questions right on your Betty Blocks application page!

Note: Ensure you’ve also checked the data model permissions and action’s privacy settings before compiling the page. Also, for a page like ours to work smoothly (without manual refreshing), you need to add a refetch interaction.
Other use cases that you can complete by employing the AI prompt action step include:
-
Text summarizing. You can create prompts like:
Summarize the CONTENT

START CONTENT
StructuredContentPage 186062961210 Prompt AI step
END CONTENT
-
Text anonymizing. Protect your sensitive information by anonymizing the texts:
Anonymize the CONTENT

START CONTENT
StructuredContentPage 186062961210 Prompt AI step
END CONTENT
-
Spelling correction. Improve the accuracy of your texts by correcting spelling errors:
Correct spelling of this text: StructuredContentPage 186062961210 Prompt AI step
All of these can be used in the prompt action step's prompt field.

Follow the updates as we expand the capabilities of the AI prompt action step by introducing multiple types, such as text-to-object, object-to-text, and text-to-array. These additions will simplify creating diverse AI use cases within your applications.

