After reading this article you’ll know how to:
-
Create your own survey with a ready-to-use questionnaire template
-
Configure a questionnaire’s sections, questions, and answer options
-
Invite users to participate in your questionnaire
-
View responses to your questionnaires
The dynamic questionnaire is a kind of survey that changes according to the respondent's answers, in other words, asks the right questions at the right time. User experience becomes smoother, more logical, and less time-consuming as during the questionnaire process irrelevant questions are skipped.
Main features
Create questionnaire
Using this template, you create a questionnaire to be answered by users. A questionnaire consists of general information: name and description. Every questionnaire has sections. A section consists of one or more questions.
There are 5 question types in this template that you can use:
-
Text (single line)
-
Text (multi-line)
-
File upload
-
Multiple choice (single answer)
-
Multiple choice (multiple answers)
The last two require you to enter options that will be given to the user while they’re answering a questionnaire. These options can have an interaction so you can show or hide other questions based on a given answer.
Update questionnaire
Once a questionnaire has been created and released, it can always be updated. After saving the changes to the questionnaire, the version will be increased by 0.1. This allows you to keep track of older versions.
Invite users
To answer a questionnaire, no account is needed. A questionnaire will have a unique link that you can send out to users inviting them to participate. You can also invite a user by email. Their email will be saved in the system so it will be easier to invite them for another questionnaire.
View responses
After people have answered the questionnaire, it is possible to take a look at the responses they gave. Each answered questionnaire is visible. These details will include the email of the user. User emails will be hidden if they answer via the link.
Pages overview
-
Admin - Overview. Main admin page to view all created questionnaires.
-
Admin - Questionnaire Created. Confirmation page to let you know that the questionnaire has been successfully created.
-
Admin - Questionnaire Details. This page enables you to see each questionnaire’s details.
-
Admin - Questionnaire Edit. The page to edit details of a questionnaire.
-
Admin - Questionnaire Response Details. The page to view the details of questionnaire responses.
-
My Account. View and edit profile details and update your password.
-
Questionnaire - Answering. The page to answer the created questionnaire.
-
Questionnaire - Start. The page to preview and start participating in a questionnaire
-
Questionnaire - Submitted. The page with confirmation that your questionnaire has been submitted.
-
Questionnaire - Summary. This page shows the summary of your questionnaire.
-
User Login - Login. The page for registered users to log in at.
-
User Login - Password Reset Request. Request a password reset in case you forgot your initial one.
-
User Login - Reset Password. The page for users to create a new password.
Getting started with the template
Creating application
Open My Betty Blocks and see your dashboard with suggested application templates in the Start building section. Choose View all templates, then find the Dynamic Questionnaire template and click Use template.
Note: If you want to see the template’s live preview, click on its thumbnail, and in an open window find the Live preview button.

Creating webuser in the back office
In order to start using our newly created application, we need to create a first webuser. Only by doing so, you will be able to use the compiled version of the application as an admin and invite respondents to the questionnaire.
Luckily, we have a back-office template to make things easier for you. Just follow this configuration to set it up. Choose the Webuser with the First name, Last name, and Email address properties first, and you can also add other properties if you want them to be visible within a data table on the back office page.

Note: This configuration requires full public access to a back office page, models, and actions. Then later you can set it back.
Save the configuration and let's stay at our new back office page to finish up the setting. In the side menu, change the page view to the record view and choose the Create tab.

Then you need to unlock the wrapper in the back office by clicking on a small lock button at the bottom of the options menu. Within the create tab (a slide-out window on the right), there is a create form with various fields and properties. We don't need them, therefore, you can delete all of them leaving just the First name, Last name, Email address, Password, and Profile image (optional).

There is one more thing missing - the field to assign a webuser an administrator. Go to the components overview and find the Multi Autocomplete form component there and drop it to our create form in a slide-out window on the left. Select the Webuser.Roles property. Compile the page by pressing Play in the top left corner of the interface.

For roles to be displayed as they are ('admin' and 'webuser'), choose Role.Name property in the label for options field.

Now you can add one or multiple webusers (with or without an admin role) in the compiled back office of your application. Just press +New button and fill in the fields in a slide-out window.
Note: Surely, you care about security, thus make sure you've set up the right model permissions for your back office or close access to it to no-admin users.
Creating your first questionnaire
We have set up everything to get started working with the application. Compile the app by clicking on the play icon in the top left corner of the builder bar. Once compiling is done, a new tab will open and you will be redirected to the login page where you can log in using the credentials of the webuser you just created.
After logging in, you will see your home page:

Since the application is brand new, no questionnaires have been created yet. So we will make our first one right now.
To create your first questionnaire, click on the Create questionnaire button. You will be greeted with the input fields of your first questionnaire. Some fields are pre-filled to help with orientation.
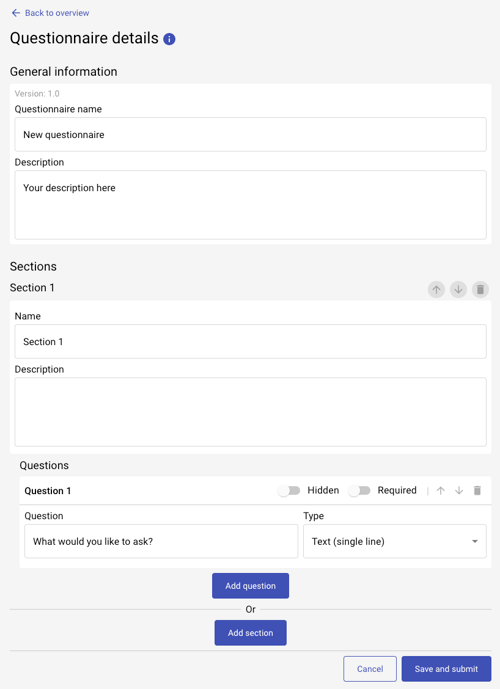
General information
The questionnaire starts off with general information about the questionnaire. This includes the current version, name, and description of the questionnaire. Feel free to edit the values to make it your own questionnaire.
Sections
The questionnaire comes with one section out of the box. You can enter a name and description for a section. Sections contain one or multiple questions. When answering a questionnaire, all questions in the same section will be shown.
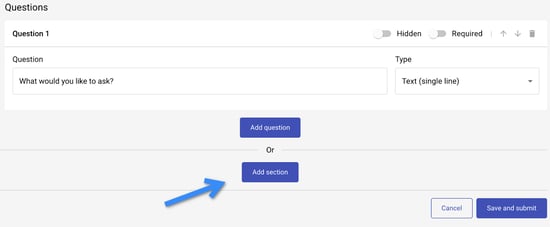
You can create a new section by clicking on the Add section button. This will add a section below the current one sorted by an index.
Sections can be moved or deleted. Moving can be done when there is more than one section. Now each one has this set of buttons to do those actions.

With the arrows, you can move the section up or down the order. Clicking the delete button will show a dialogue asking if you are sure to delete the section. After deleting a section all questions that belong to it will be deleted too.
Questions
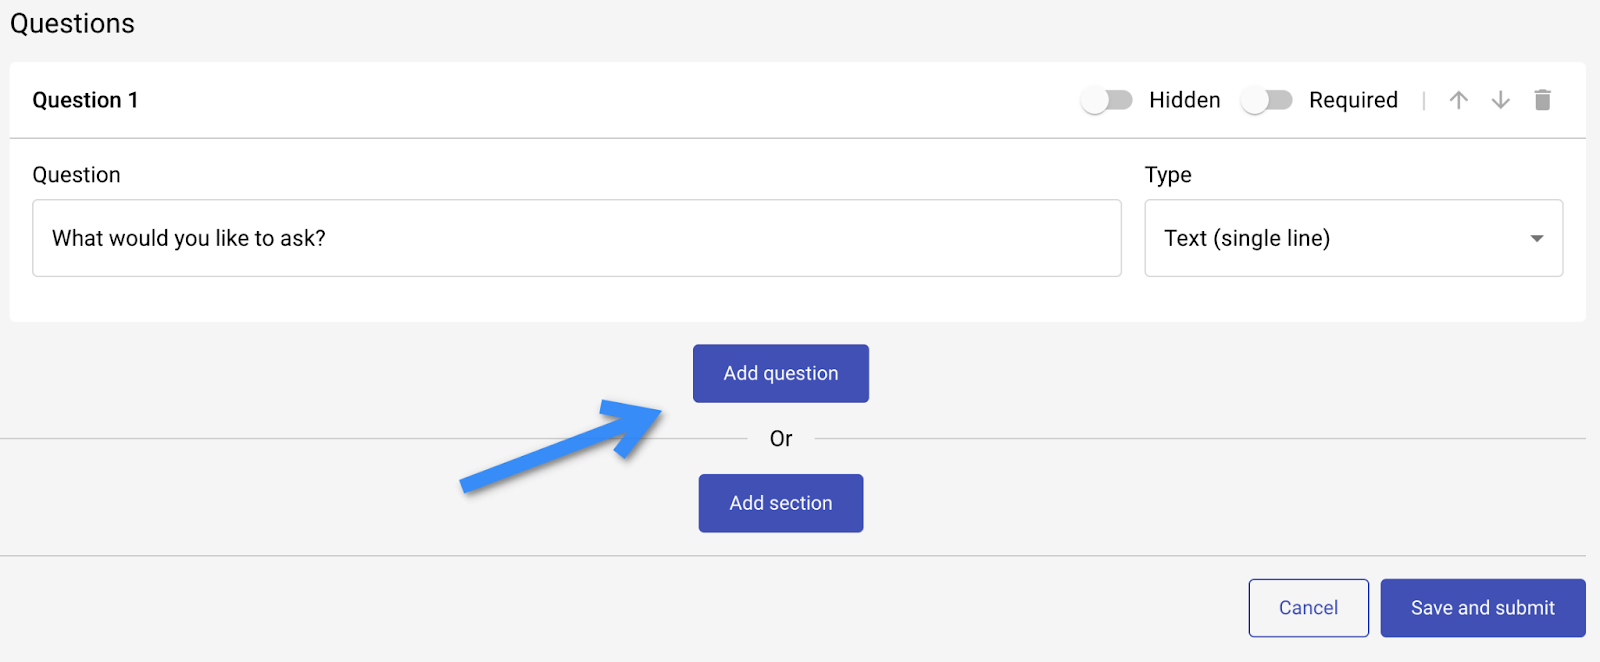
Each section comes with a single question by default. You can add more questions to a section by clicking the Add question in the corresponding section.
A question has multiple values that can be set. These values are:
-
Question: the actual question you would like to ask the user
-
Hidden: will hide the question when it is set to ‘true’ (toggle to the right and blue)
-
Required: will make the question required to be answered by the user. Will do so when it is set to ‘true’ (toggle to the right and blue)
-
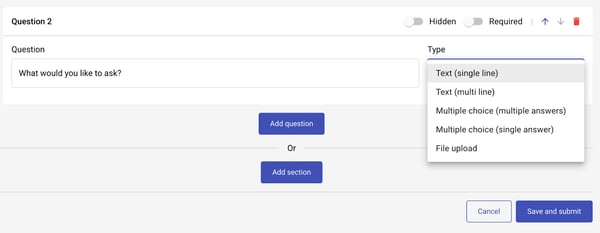
Type: the type of question that you want to ask. There are 5 different options to choose from:
-
Text (single line): A text input where the user can enter up to 255 characters as their answer
-
Text (multi-line): A text input where the user can enter their answer without a maximum amount of characters
-
File upload: An input where the user can upload a file or image
-
Multiple choice (single answer): A set of predefined answers (answer options) from which the user can only select one answer
-
Multiple choice (multiple answers): A set of predefined answers (answer options) from which the user can select multiple answers
-
Questions can be moved or deleted. Moving can be done when there is more than one question. A question has this set of buttons to do those actions:
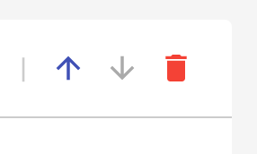
With the arrows, you can move the question up or down the order. Clicking the delete button will show a dialogue asking if you are sure to delete the question. When deleting a question, all answer options that belong to it will be deleted too.
Answer options
The multiple-choice question types have answer options. When selecting one of the multiple-choice types, the first answer option will be made for you. An answer option looks like this:
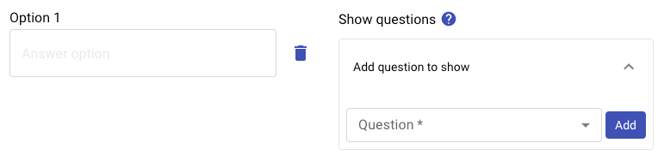
The first input field is the name/value of the answer option. This could be something like a ‘Yes’ or ‘No’. Clicking the trash can icon will show a dialogue asking if you are sure to delete the answer option.
The part below Show questions contains the interactions that can be set for an answer option. More on this in the next heading.
A question can have up to 20 answer options by default. If you want to set more than twenty answer options, you need to go to the page builder and open the Admin - Questionnaire Edit page.
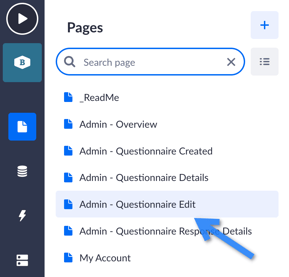
Then open the component tree and type in AnswerOptionDataList into the search component field. See it highlighted in the list of components below.

Click on AnswerOptionDataList twice. In the field Rows per page, you can increase the number up to 50. Recompile the page and you can have more than 20 interactions.

Interactions
As stated in answer options, you can add an interaction to an answer option. This interaction enables you to show a hidden question when the corresponding answer option is selected. Unselecting this option while answering the question will hide the corresponding question again.
So when you have a question that is hidden by default, you can show that question when the user has selected the right answer.
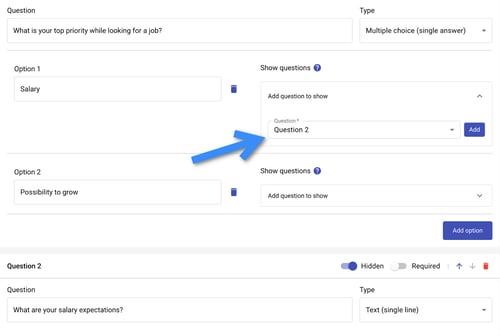
To set a question to show on the select of the answer option, you need to select the question you want to show in the Add question to show dropdown as shown in the image above. Click Add to save the interaction.
Let’s look at this example to make things more clear. There are two questions within one section. The second one is set to Hidden:
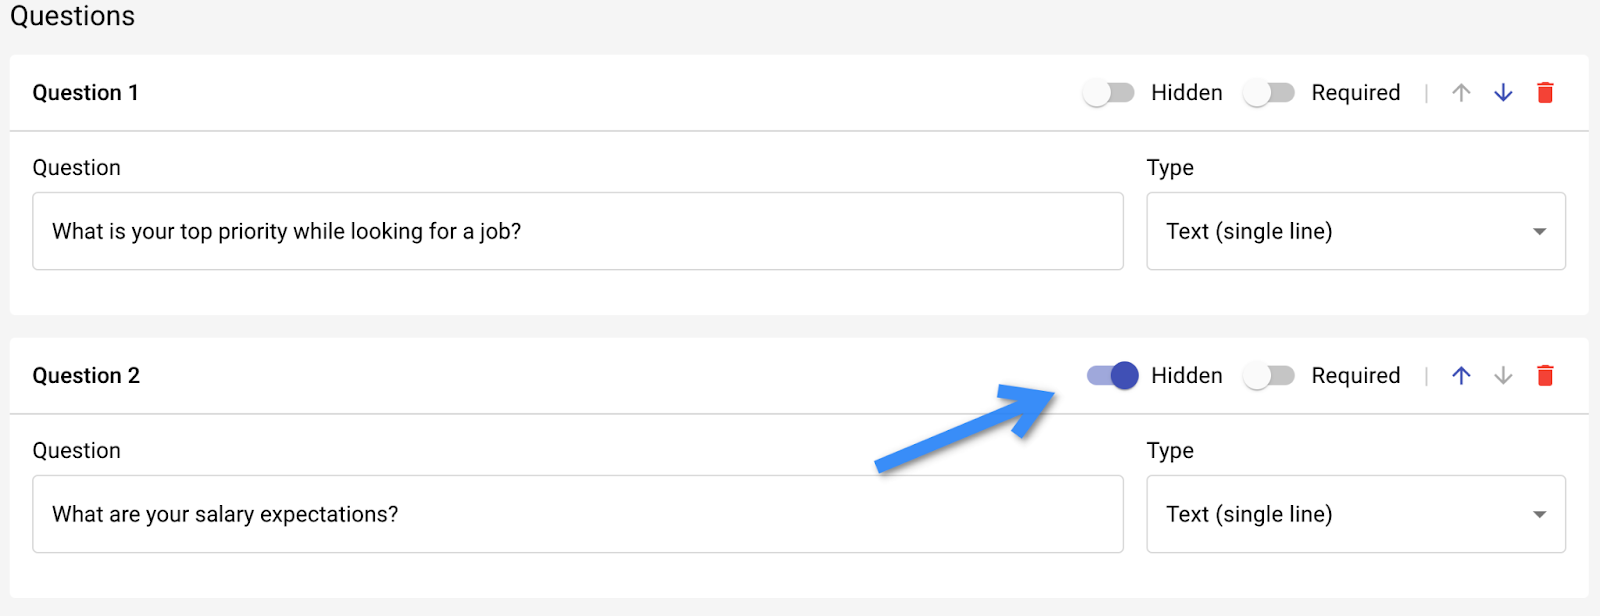
We need to select the first question’s type. Choose Multiple choice (Single answer). Then you will have to fill in a few options. As my question is “What is your top priority while looking for a job?”, I will make up a few answer options: “Salary” and “Possibility to grow”. In the ‘Add question to show’ choose the “Question 2” option. Click on Add next to it.
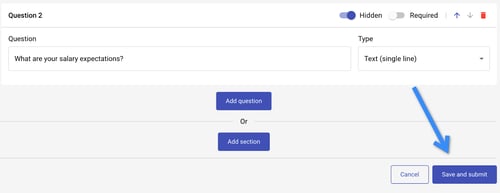
Now question #2: “What are your salary expectations?” is going to be shown as the next question for a user to answer.
Inviting users
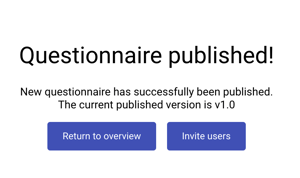
Once you click on Save and submit, the questionnaire will be created and published. Now you can invite users to answer the questionnaire. There are two ways of doing this: inviting them by email or copying the link and sending it to respondents (for them to answer anonymously).
When you invite a user by email, two things happen. First, their email address is being saved in the application so the next time you want to invite them for a new questionnaire, the autocomplete will suggest the full email address to you. Secondly, a questionnaire to answer is being created for them. A unique link to this questionnaire is being sent to them by email.
The newly created questionnaire will appear on your home page. You can also invite users to participate in it at any time by clicking on the Invite users in the appropriate column.

Managing your questionnaire
After you have created your first questionnaire and invited some users to answer it, you can do a couple of things about it. All your created questionnaires are visible on the home screen of the application.
Questionnaire details
Click on Details to be redirected to the details page of the questionnaire.
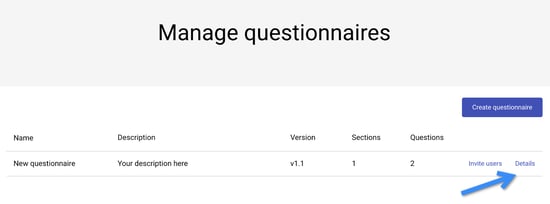
The questionnaire details page shows you the name, description, and current version of the template. The rest of the page is separated by tabs: Received responses, Pending invites, and View questionnaire.
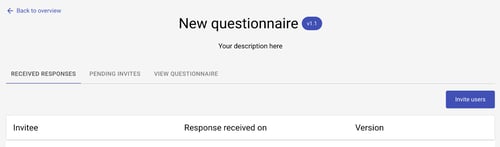
Received responses
This tab contains a button that brings up a dialog to invite more users to answer the questionnaire and the data table showing you all the responses you have received on the questionnaire.
When a user has been invited via email, their email address will be shown in the response. If the user has answered the questionnaire via the link, the value shown will be anonymous.
The version shown on a response is the version of the questionnaire that the user has answered. More on versions in a bit.
Clicking on View answers will bring you to a page that shows you all the answers the user has given to the questions in your questionnaire.
Pending invites
In the Pending invites tab, a data table is shown with all the invites you have sent out to users who have not yet answered the questionnaire or are in the process of answering the questionnaire.
View questionnaire
In the View questionnaire tab, the whole questionnaire is shown in the way you have created it. All fields are not editable on this page. If you would like to edit the questionnaire, click on the Edit questionnaire button at the top.
Editing your questionnaire
After pressing the Edit questionnaire button, you will be redirected to the page where you can make changes to the questionnaire. The page is very similar to the create questionnaire page. The only difference is that on the edit questionnaire page fields are filled with the values of the questionnaire. The rest of the options are available to you like it was described in Creating your first questionnaire.
After you are done editing the questionnaire, click on Save and submit to publish your changes and release a new version of the questionnaire.
Questionnaire versions
As mentioned earlier, every questionnaire has a version. When a questionnaire is created, the version will be 1.0. Each time you save updates to it, the version gets increased by 0.1.
When you invite a user by email, a questionnaire is created for them. That questionnaire will be a direct copy of the newest version that is available.
Respondents who answer the questionnaire via the link will answer the version that was the latest at the moment the link was sent.
That is the reason why the version of the answered questionnaire is shown in the ‘Received responses’. Versions might help you track the changes you've made to your questionnaire and see which exact version was sent to a particular user.