After reading this article you’ll know:
-
The difference between XML and JSON
-
Why we should recode XML to JSON
-
How the XML to JSON action step works
Since many old applications are built using XML programming format, which is not as well readable as the newer one - JSON, we had to devise an easy solution of recoding one into another. In this article, we will explain the primary differences between these two formats, answer why we should recode XML to JSON, and explain how the special XML to JSON action step works.
XML vs JSON
XML and JSON are data interchange formats used for structuring and storing data and both can be read by people and machines. XML (Extensible Markup Language) uses tags to define elements and attributes to provide additional information about those elements. It uses a lot of text-based markup, making it relatively easy for people to read and understand it. On the other hand, JSON (JavaScript Object Notation) is a lightweight data-interchange format that uses key-value pairs to represent data. It is more compact and primarily used for machine-to-machine communication.
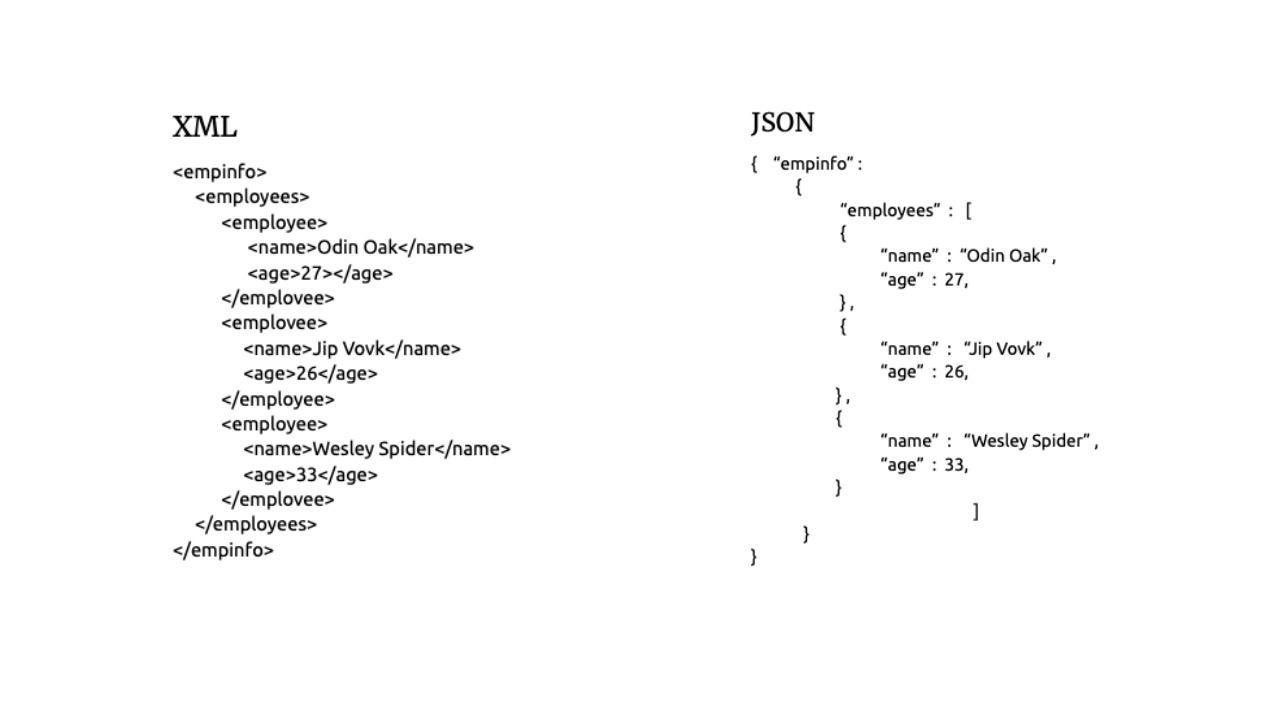
Each one has its own advantages. For example, XML supports more complex data structures, while JSON is easier for computers to process. JSON has grown in extreme popularity since the start of web application development because of its simpler syntax which is parsed much faster than XML. All in all, if XML can be compared to reading a detailed description, JSON is a list of facts written in a concise manner.
Using XML to JSON step
As mentioned above, lots of old applications were built using XML, but right now most Betty Blocks applications are using JSON format, and therefore all the data that was stored in XML should be converted into JSON before being further processed.
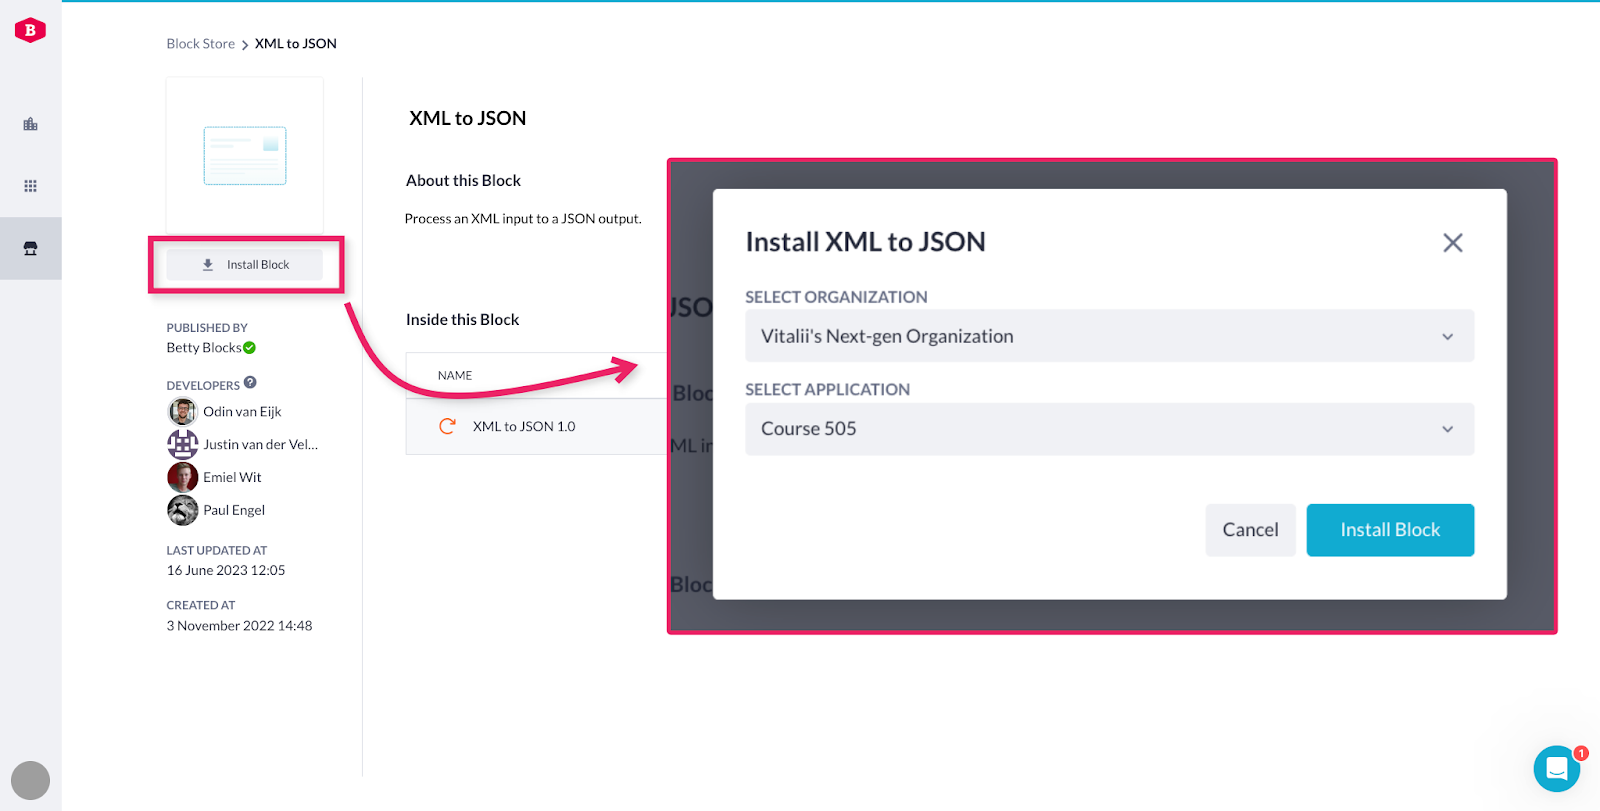
The first thing you need to do is go to the Block Store and type in ‘XML to JSON’, you’ll find the needed step and install it to your application.
To demonstrate how the converting process works, let’s take a bit of XML text with a cafe menu.
<breakfast_menu>
<food>
<name>Belgian Waffles</name>
<price>$5.95</price>
<description>Two of our famous Belgian Waffles with plenty of real maple syrup</description>
<calories>650</calories>
</food>
<food>
<name>Strawberry Belgian Waffles</name>
<price>$7.95</price>
<description>Light Belgian waffles covered with strawberries and whipped cream</description>
<calories>900</calories>
</food>
<food>
<name>Berry-Berry Belgian Waffles</name>
<price>$8.95</price>
<description>Light Belgian waffles covered with an assortment of fresh berries and whipped cream</description>
<calories>900</calories>
</food>
<food>
<name>French Toast</name>
<price>$4.50</price>
<description>Thick slices made from our homemade sourdough bread</description>
<calories>600</calories>
</food>
<food>
<name>Homestyle Breakfast</name>
<price>$6.95</price>
<description>Two eggs, bacon or sausage, toast, and our ever-popular hash browns</description>
<calories>950</calories>
</food>
</breakfast_menu>
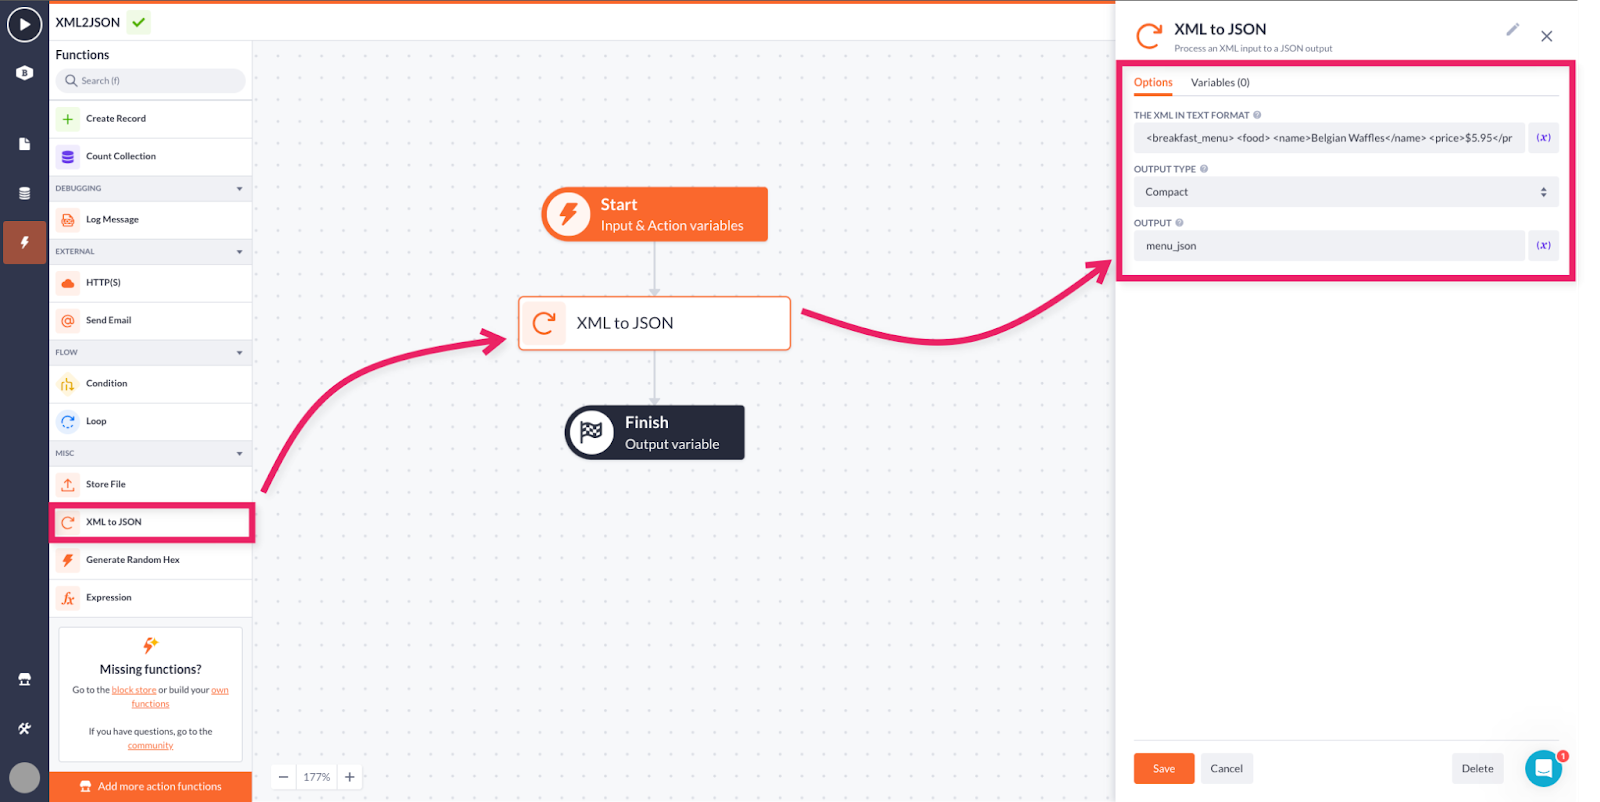
Now we proceed to an application, go to actions overview and create a new action. Then we’ll find the ‘XML to JSON’ step that we previously installed from the Block Store, and drop it into the action flow.
By clicking on the XML to JSON step once, you’ll open its options:
-
The XML in text format: the place to drop your XML text as input
-
Output type: here you choose the output format to be either compact or non-compact. The compact type will leave only essential values, while the non-compact will produce more information and the same order of values that appear in the original XML input text. For example, not just values themselves, but also their types.
-
Output: come up with a name for your new JSON output to be further iterated
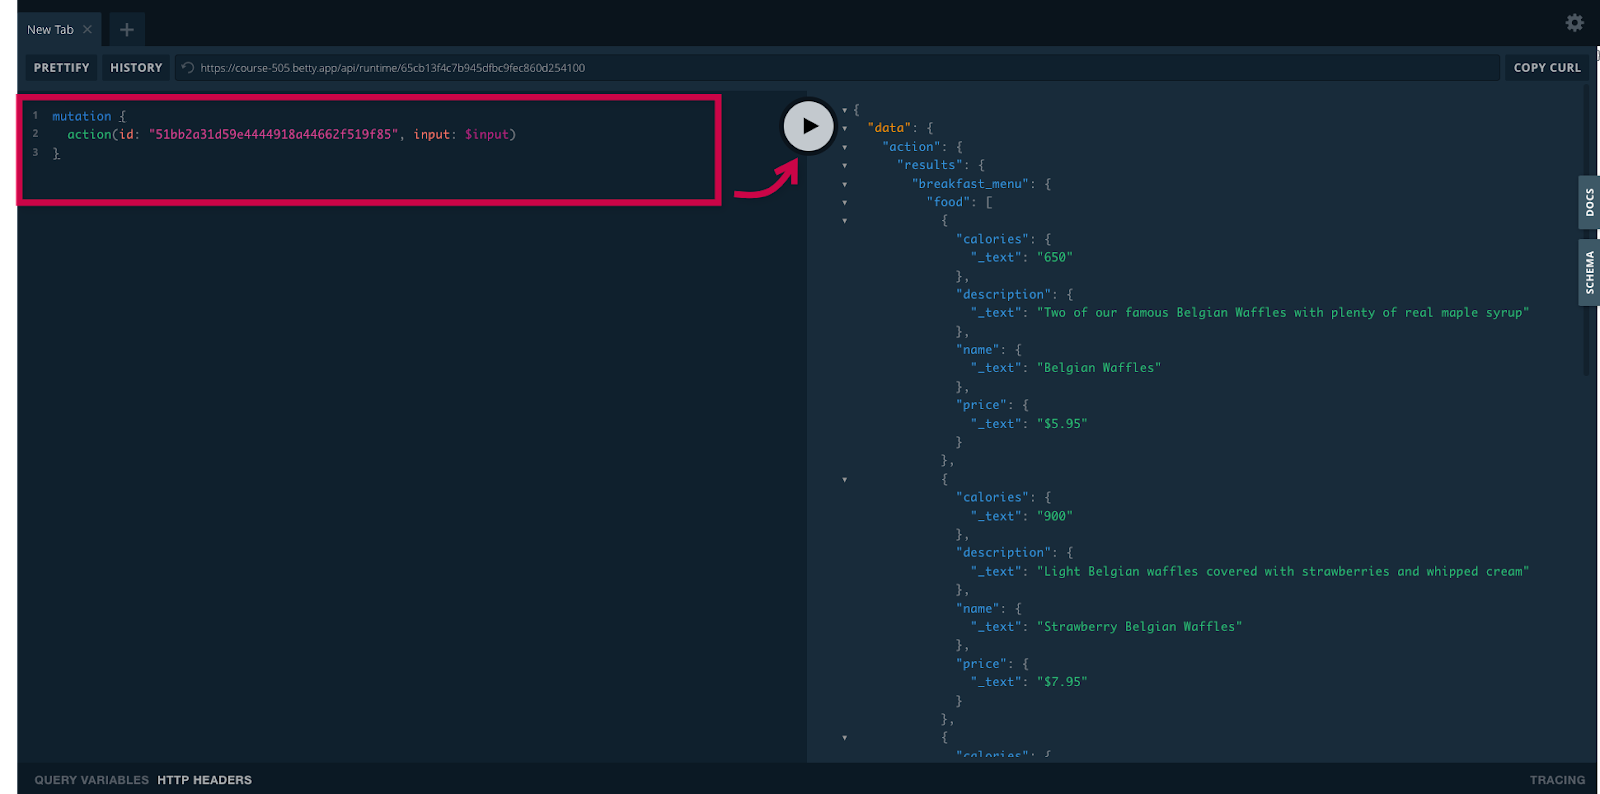
As we would like to demonstrate how the XML input will be turned into JSON output, let’s open the test action menu. Click the Test run button in the top right corner of the action overview. In the newly opened menu, copy the bit of code from ‘Mutation’ and press Go to playground
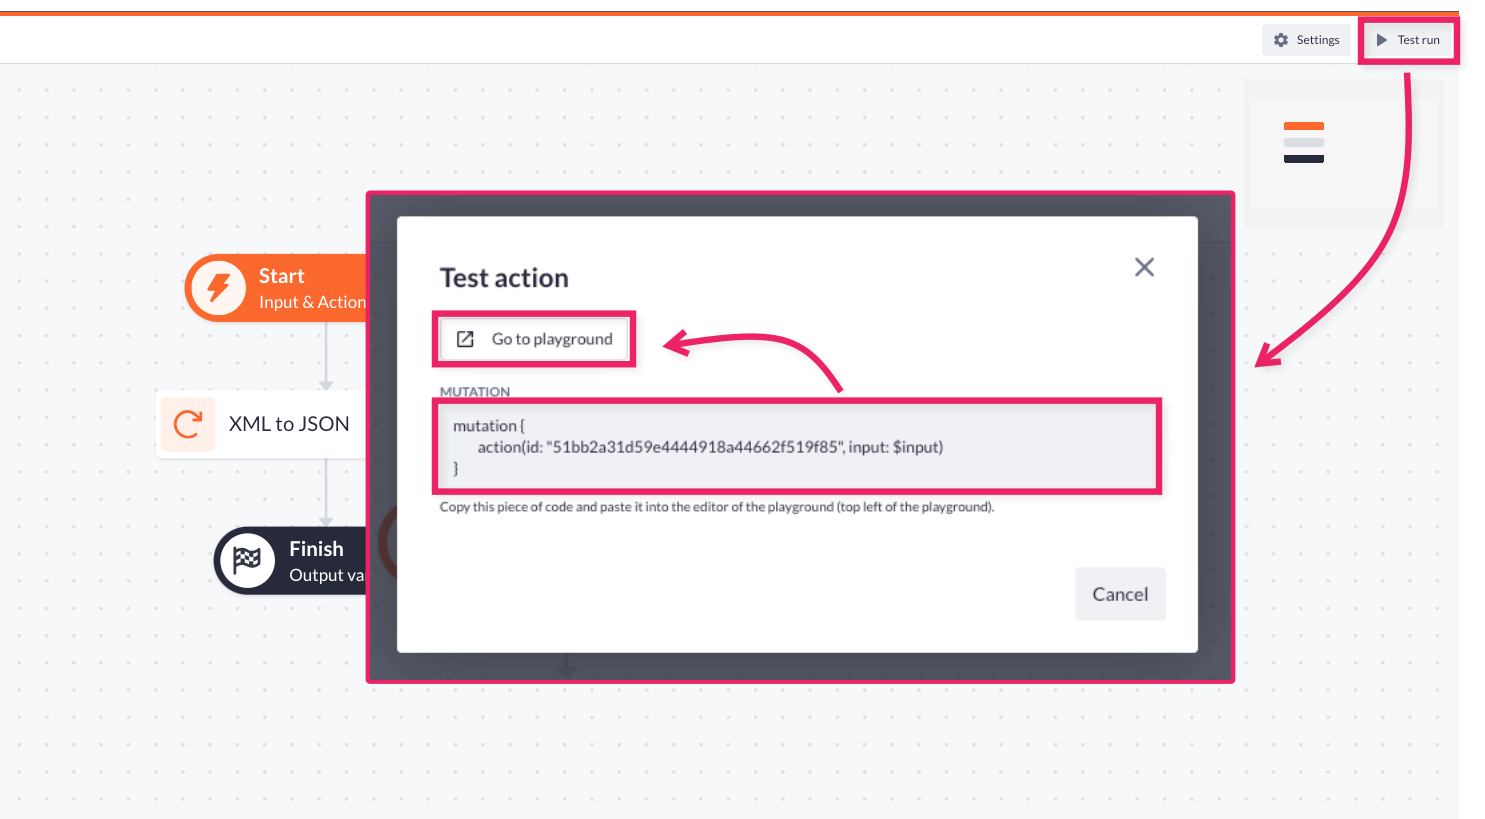
The playground editor is open and now you have to paste the code and press the play button. Here you go - on the right, you’ll see the XML text with the menu turned into obviously more readable JSON format.
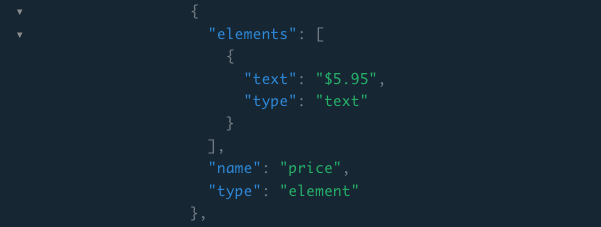
If we chose a non-compact output type, it would show not only the property (“price”) and its value (“$5.95”) but also the property and value types.
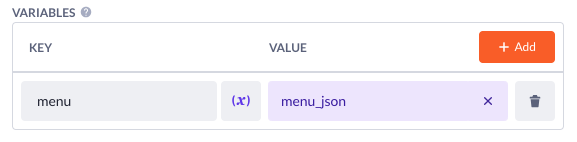
Now that you have the JSON output value, you can continue working with it in the same or a separate action flow. For example, by adding the Expression step.
If something isn’t working, you can always throw a Log message step after the XML to JSON and check what went wrong in the logs.