After reading this article, you’ll know the following:
-
Use and options of the Log message step
-
Best practices when applying this step in your actions
What is Log message step?
During the application development, issues can arise, requiring testing and debugging tools to find the root causes of problems. The Log message action step helps pinpoint errors in your flow, providing insights through logs.

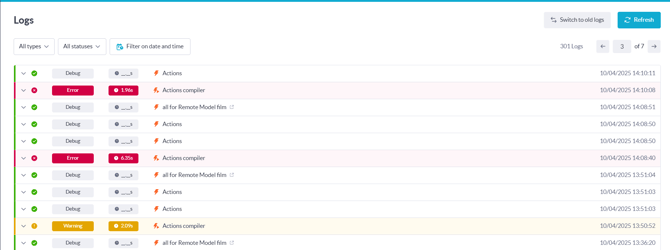
This step can be applied anywhere in your action flow by dragging and dropping it into the desired position after a specific action step to verify functionality. The results will be visible in your application Logs, accessible via the Tools section on the builder bar.
Options
When setting up the Log message, you can specify the log severity by choosing Debug, Info, Warning, Error types to categorize and track the information reflected in the logs.
-
Debug: Detailed info for developers during debugging
-
Info: General details on the application state or events (given by default with an action compiler)
-
Warning: Alerts for potential issues needing attention
-
Error: Critical problems causing failures in the application
When selecting variables to log, you typically choose key and value pairs. Keys are identifiers while values are the associated data. Tracking key data points helps troubleshoot issues, detect errors, and understand your application's behavior.

Log message use
The best way to understand the use of a certain feature is to try it out in practice. Thus, we will build a simple action flow and take it as an example.
Let’s say there is a number of tasks with statuses ‘To do’, ‘In progress’, and ‘Done’, and we want users to be able to update those (setting to ‘Done’). For this reason, the Condition step will be added, followed by the Update record in the true flow. Records will be updated in case they exist and have statuses ‘To do’ or ‘In progress’.
We are going to include log message steps in our process. Without them, we cannot track the outcome of individual action steps or ensure that our action flow progresses as intended.
1. The first Log step will be added right after the Start step. We have to do this to make sure that action actually starts (triggers) and the right task gets passed to the Condition step.
The Log message options:
-
Severity: Info
-
Variables:
-
Action start - True - see if the action has started using these two static values
-
Task object - task_object:Task - tracks the task-related data
-
Note: It’s worth giving the Log message the name of the particular action so that when you have multiple actions running, it's easy to identify which action a log message belongs to.
The result of all action steps is visible in Tools > Logs. Let’s check if what we set gets the right output in the logs.
You can see, there are three latest log items:
-
All actions have been compiled
-
Our action was triggered
-
Two items were logged: ‘Action Start: True’ and ‘Task Object: Do Laundry’
It’s working!
2. Next, add one more Log message step after the Update record step in order to check if the status of our task gets changed (from ‘In progress’ or ‘To do’ to ‘Done’). To do this, we need to pick up the variable value taken from the updated task.
Again, in the Log overview we get the updated task, and the status of ‘Do laundry’ is set to ‘Done’.
3. Finally, let’s add a Log message to the ‘Else’ flow. This time as we would like to see some users trying, but failing to update a record, we set a variable value to ‘task_object’: Task’ and choose the error message with a specific name to be shown.
If a user tries to update the record with an ID that doesn’t exist or the record’s status was already changed to ‘Done’, we will instantly receive a ‘Failed to update’ message popping up in Logs.
So that’s how the Log message step can be applied in such use cases, and after getting to know how and why it is used within your actions, you will be able to find errors and bugs and make sure your application runs according to your plan.
We also recommend looking into Testing and debugging article on how to run tests in your application and undertake debugging with the help of log message step functionality.
Also, see this video explaining the Log step use: