After reading this article, you’ll know the following:
-
Condition action step and its functionality
-
How to use this step in your application
-
Expand your condition step by grouping and multi-conditioning
What is Condition step?
Condition step is a Flow action step and a fundamental feature of the platform that controls the logic and flow of actions within an application. It allows developers to implement conditional logic with various paths (True, False/Else, etc.) resulting in different outcomes, such as updating or creating records which is essential for creating dynamic and user-specific behaviors.

For example, take validating form submissions case in a customer service application. The Condition step ensures all required fields are filled before processing the form. If the condition is true, the data is stored; if false, an error message prompts the user to complete the form.
Options
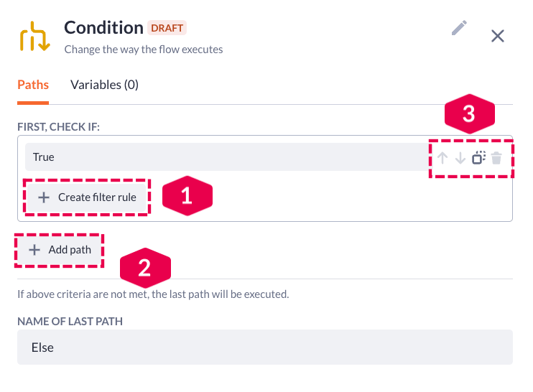
From the Condition step options, Paths tab is open by default. Here you can manage the following options:
-
First, check if: This is where you define the initial condition. Name it in a clear and simple way
-
After filling out the name, you can use Create filter rule button (1) to set up the rules for the first path (condition). Example: Variable 'status' equals 'Active'.. Read more about how filtering works here.
-
Add path button (2) will extend your step with one more condition
-
In a path menu (3), you can move your paths up or down the list, duplicate an existing path to create similar conditional branches with slight modifications, or delete it
-
Name of last path can be customized and it’s executed when all the paths (conditions) above aren’t met. You can view it as a ‘False’ flow.
Using Condition step
Let us begin by explaining the action flow we are going to create in this example. It will be an action with a condition step that will give two users with certain emails (text variable that is pre-created) access to updating records. The ‘Email’ will serve as a variable and we need to filter it in a certain way so that only these two users are able to make changes.
1. Create a new action in your application and add the Condition step to the action flow.
2. Open the step options by clicking on it, and see the Paths tab that is opened by default.
3. Add some rules for the ‘True’ flow:
Email equals jip@bettyblocks.com
OR
Email equals odin@bettyblocks.com
4. Press Save when you’re done.

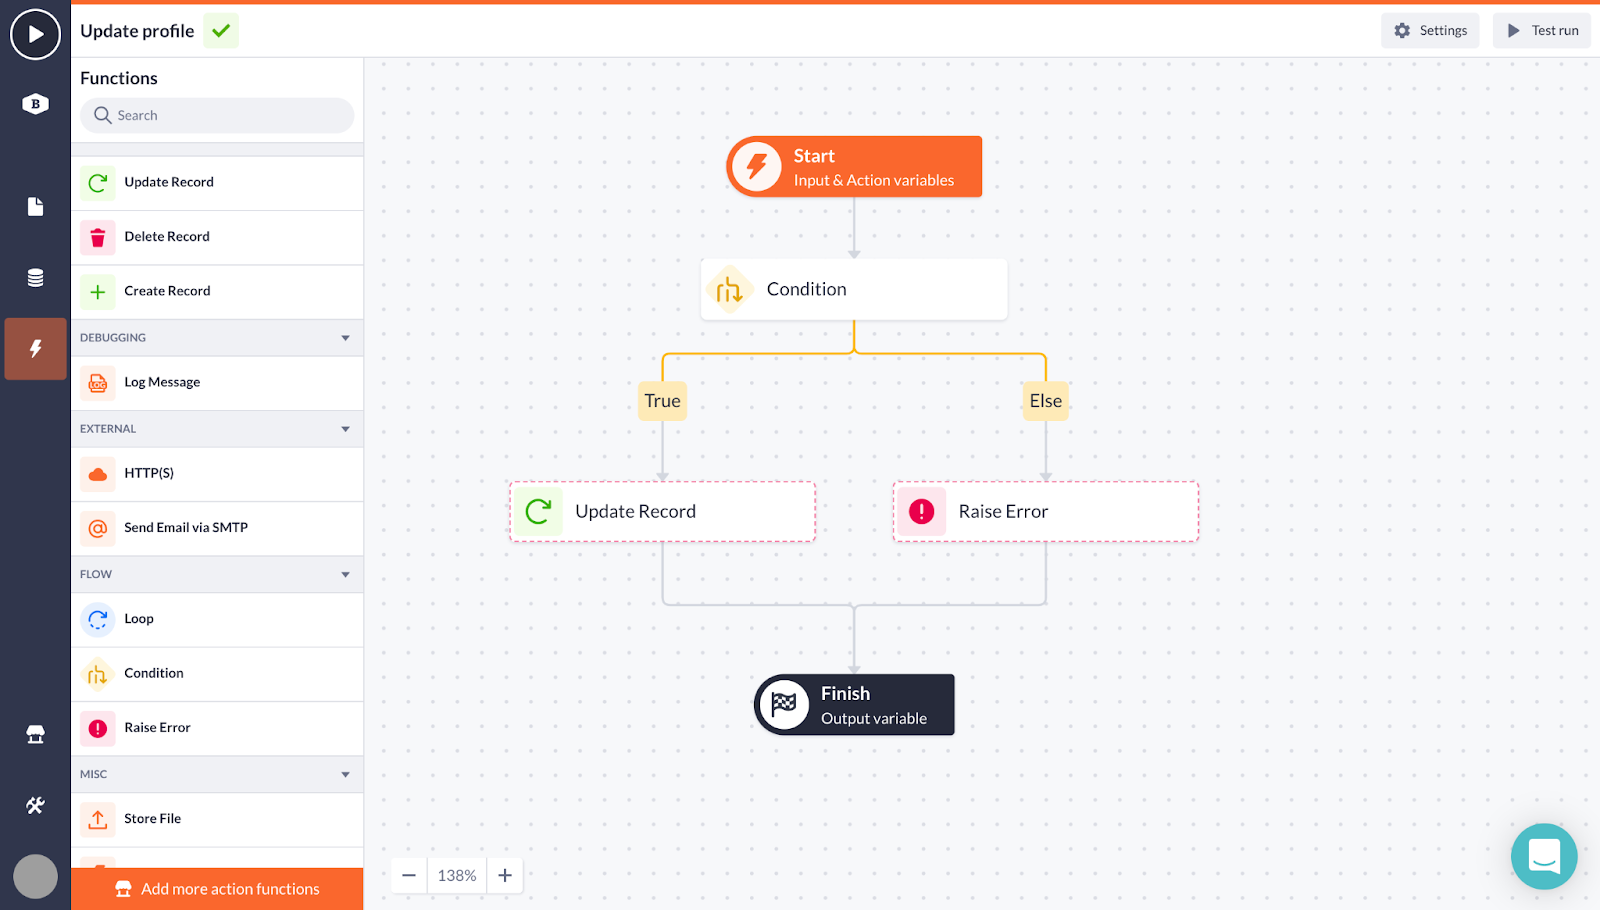
After the filtering is complete, you can add some more steps on top to finish the action flow. In our example, we’ve added the Update record step after the condition is true. That will enable our users with the defined email addresses to update the record that belongs to a certain model.
If users with other emails try to update the record, the condition will fall into ‘Else’ and they will receive an error message saying “You have no access to updating this data!”.
Condition grouping
The next few cases are used to expand your condition step. The first of them is grouping (‘Add group’). It’s used when the ‘OR/AND’ rule like in our previous example is not enough and you want one more ‘OR/AND’ rule on top of it.
In the following example, we would like users to be able to update the record when the task status is either ‘To do’ OR ‘In progress’ AND the user profile is active. In order to do this, proceed with the following steps:
1. Open the Condition step options, and see the Paths tab that is opened by default.
2. Next, add two rules for the ‘True’ flow:
task_status equals To do
OR
task_status equals In progress
3. Add group:
active_user equals true
4. Press Save when you’re done.

Multi condition
This feature comes in handy when you want to create not just a simple ‘True/Else’ flow, but multiple flows that need to be taken into account within your action.
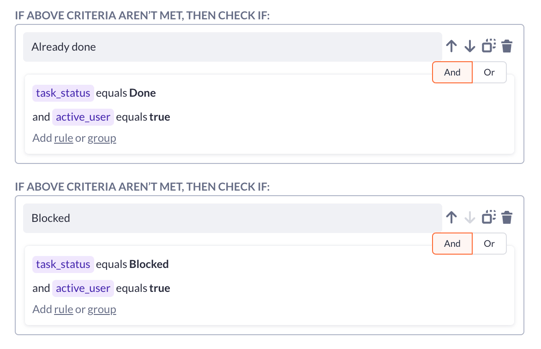
As an example, let’s add two more condition flows on top of the previous one because our tasks also have two more statuses: ‘Done’ and ‘Blocked’, and we want users to receive different outcomes as the result of these flows.
1. Below the 'True’ flow, find the button Add path and click on it. One more flow is created.

2. Come up with a proper name (‘Already done’ in our case) and add a few rules:
task_status equals Done
AND
active_user equals true
3. Add one more path (‘Blocked’ in our example’) and add the rules to it:
task_status equals Blocked
AND
active_user equals true
4. Save your progress.
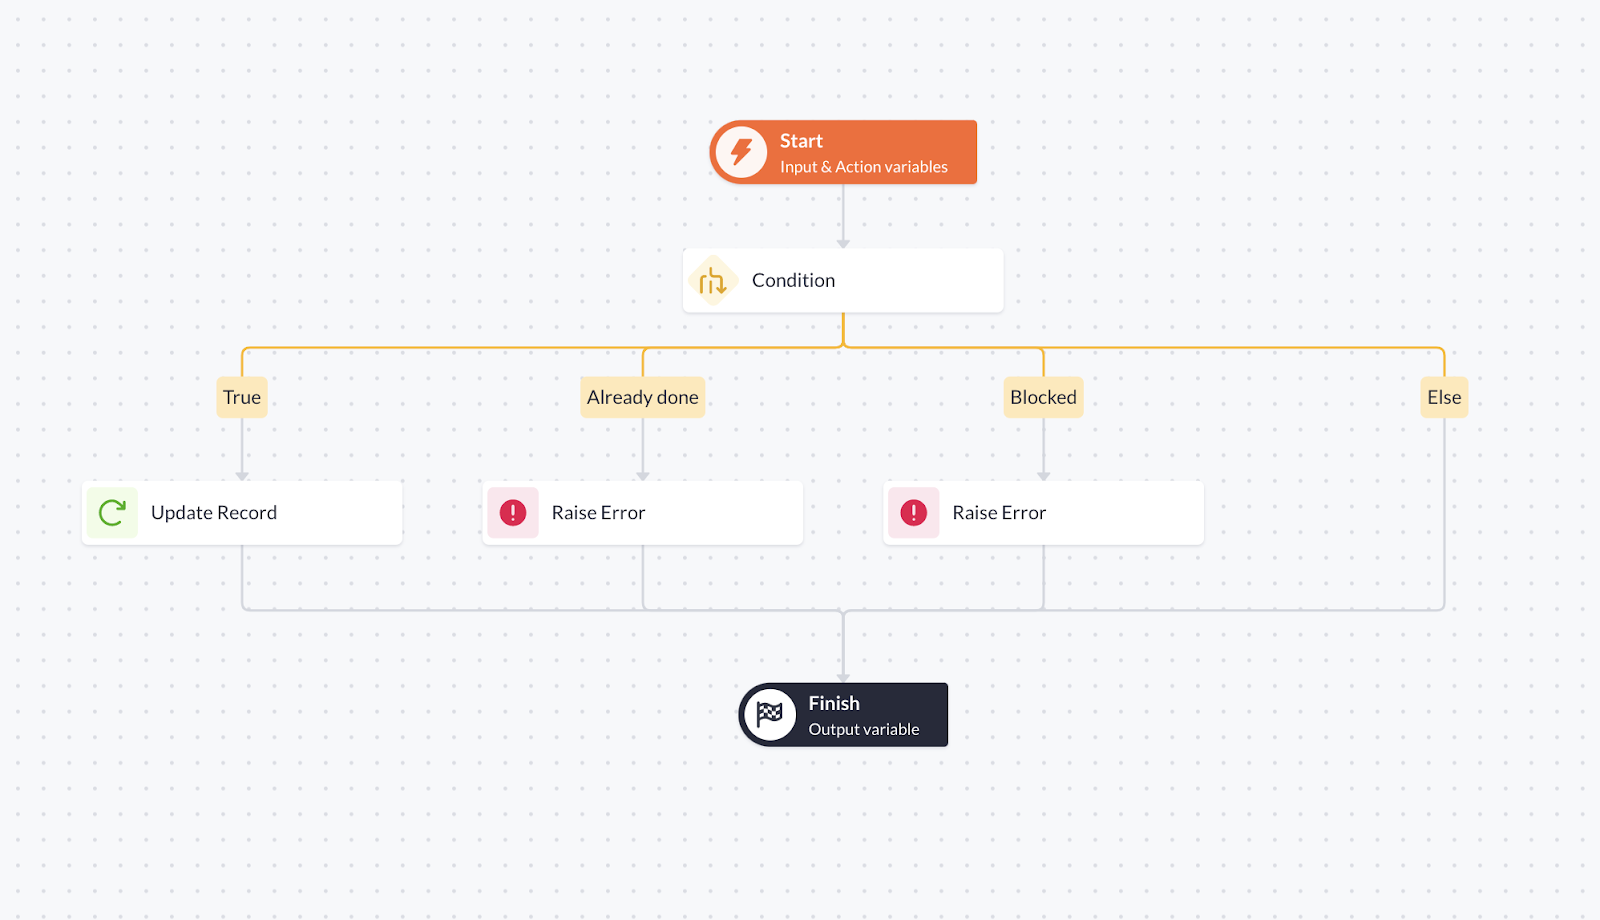
In order to get the desired result of the whole action, we’ve also added a few more steps on top of what we already have. Eventually, there are four condition flows for different cases:
1. True flow leads to the user being able to update a record when:
Task status is either ‘To do’ OR ‘In progress’
AND
User is active
2. Already done flow finishes in an appropriate error message when:
Task status is ‘Done’
AND
User is active
3. Blocked flow leads to the user getting an error message when:
Task status is ‘Blocked’
AND
User is active
4. Else flow leads to the action’s finish if the above-mentioned criteria aren’t met.
Lastly, it’s worth mentioning that these are very basic examples of new filtering in condition steps, but it’s obviously applicable for more advanced cases.
Make sure you've also followed our video guide on working with Loop and Condition steps: