After reading this article you’ll know how to:
-
Install different types of blocks
-
Set up and start using the blocks within the sections of your application
Installation
Users of the Betty Blocks platform can install various types of blocks: data sources, functions (action steps), pages & page components, and themes. In this article, we will go through the settings of each of them, but first, let’s dive into the part of the installation that all these blocks share.
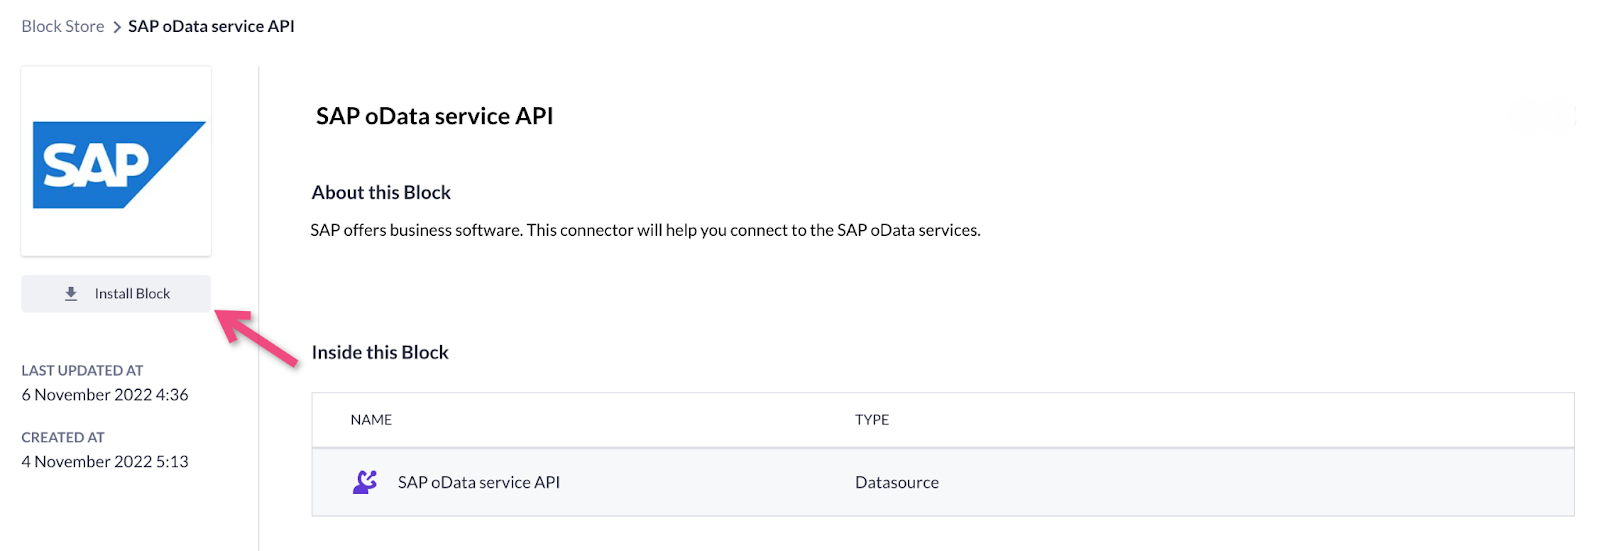
Once you open the block store by reaching My Betty Blocks, you can see the number of blocks available to you at the moment. Choose the block you want to install and click on the Install Block button.

You can also click on the block itself and look through its detailed overview. Find the same Install Block button here.
In the next step, you must choose the application you want the block to be installed. In this list, the applications of all your organizations are available. Click on the ‘Install Block’ after you chose the needed application. In case you navigated to the block store from within an application, that one will be pre-selected.
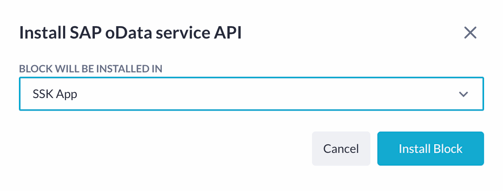
You can also install a block for all applications that belong to one organization.

Setting up and using blocks
In this section, we are going to show you what happens after installing the block into your application. Because of the different types of blocks you can install - data source, functions, and (pages) components, they will be divided into three parts.
Data source
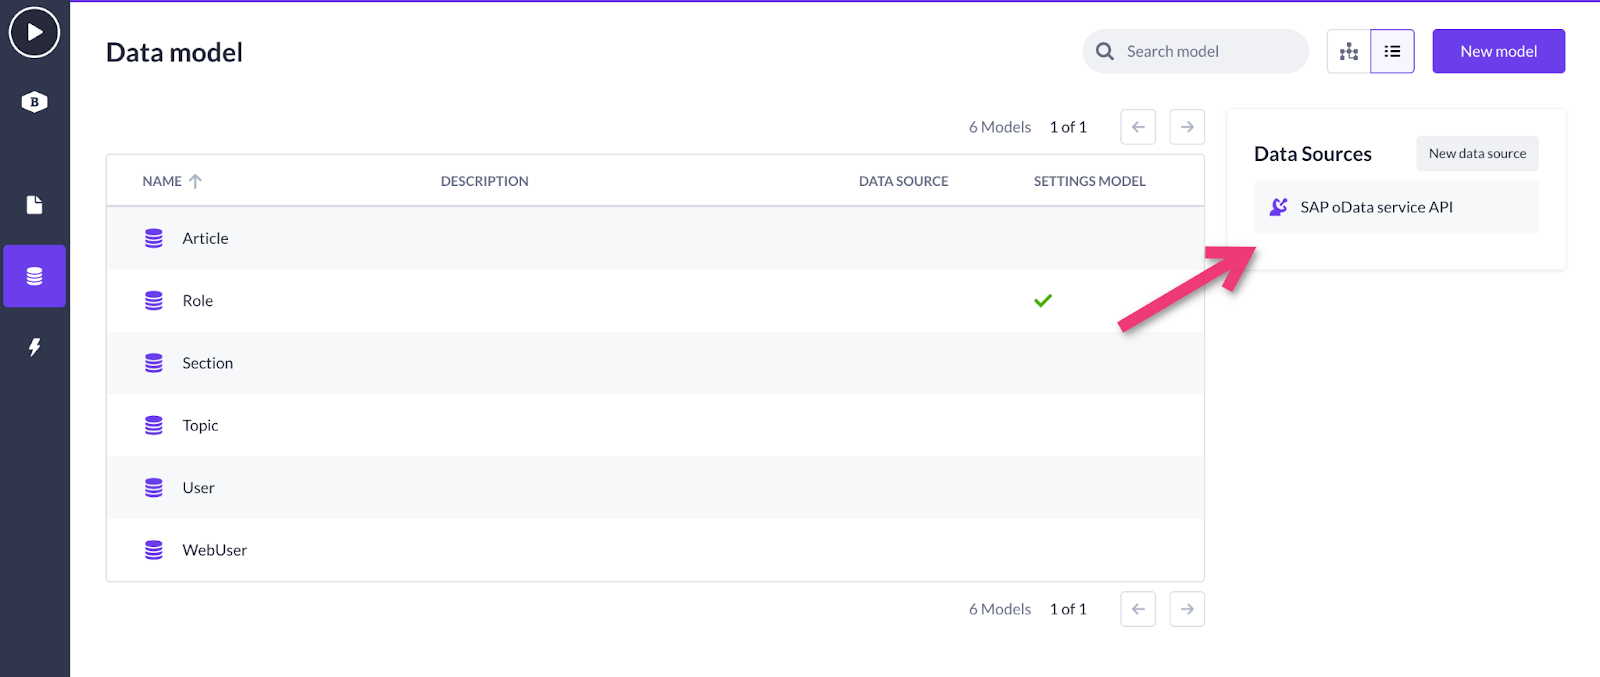
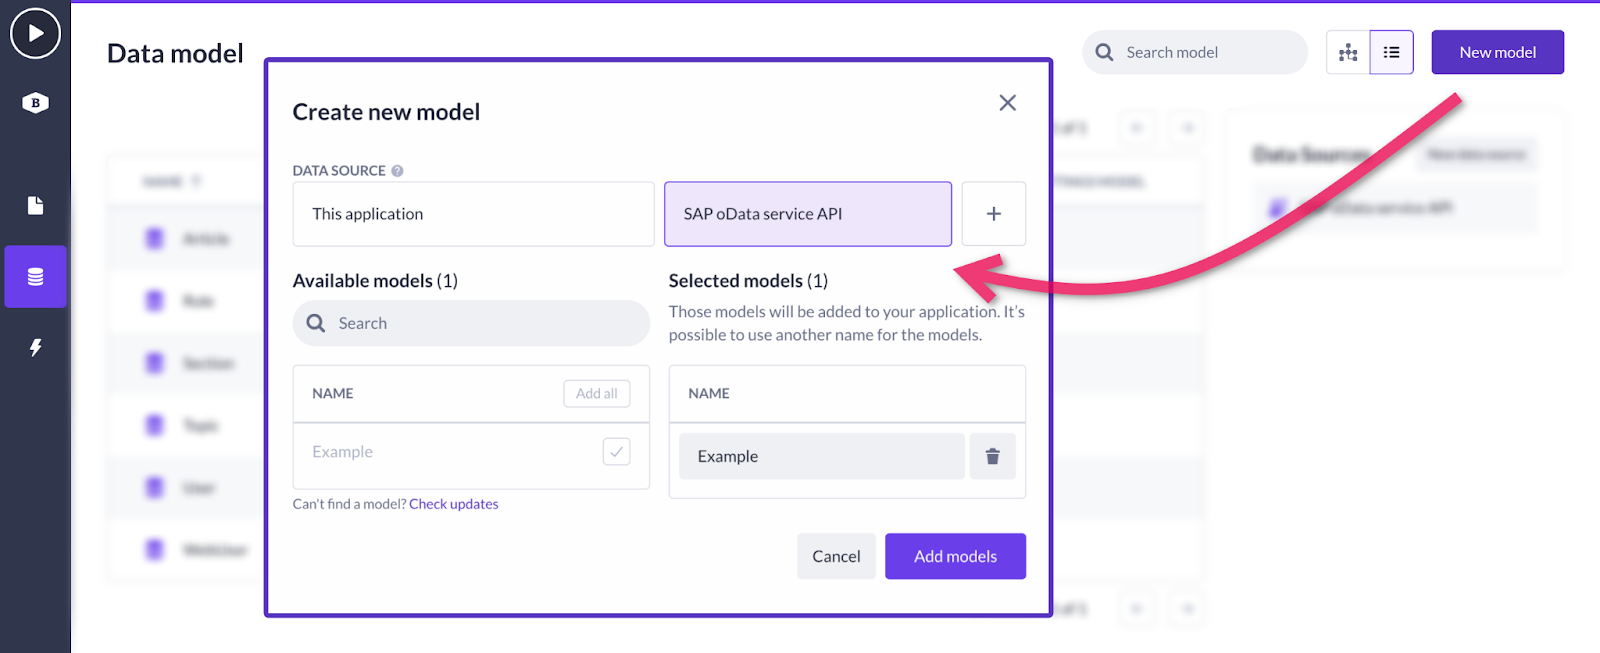
Let’s start with the data source block that we installed in the previous chapter. Open your application and go to the data model. There you will see the data sources section on the right, and within it - our newly created data source block. It means that we can connect to SAP oData service API database easily.
As you open this data source, notice that all information, like name, URL and host have been automatically filled, while you only have to insert your retrieved API key to finish the setting and work with the current database.
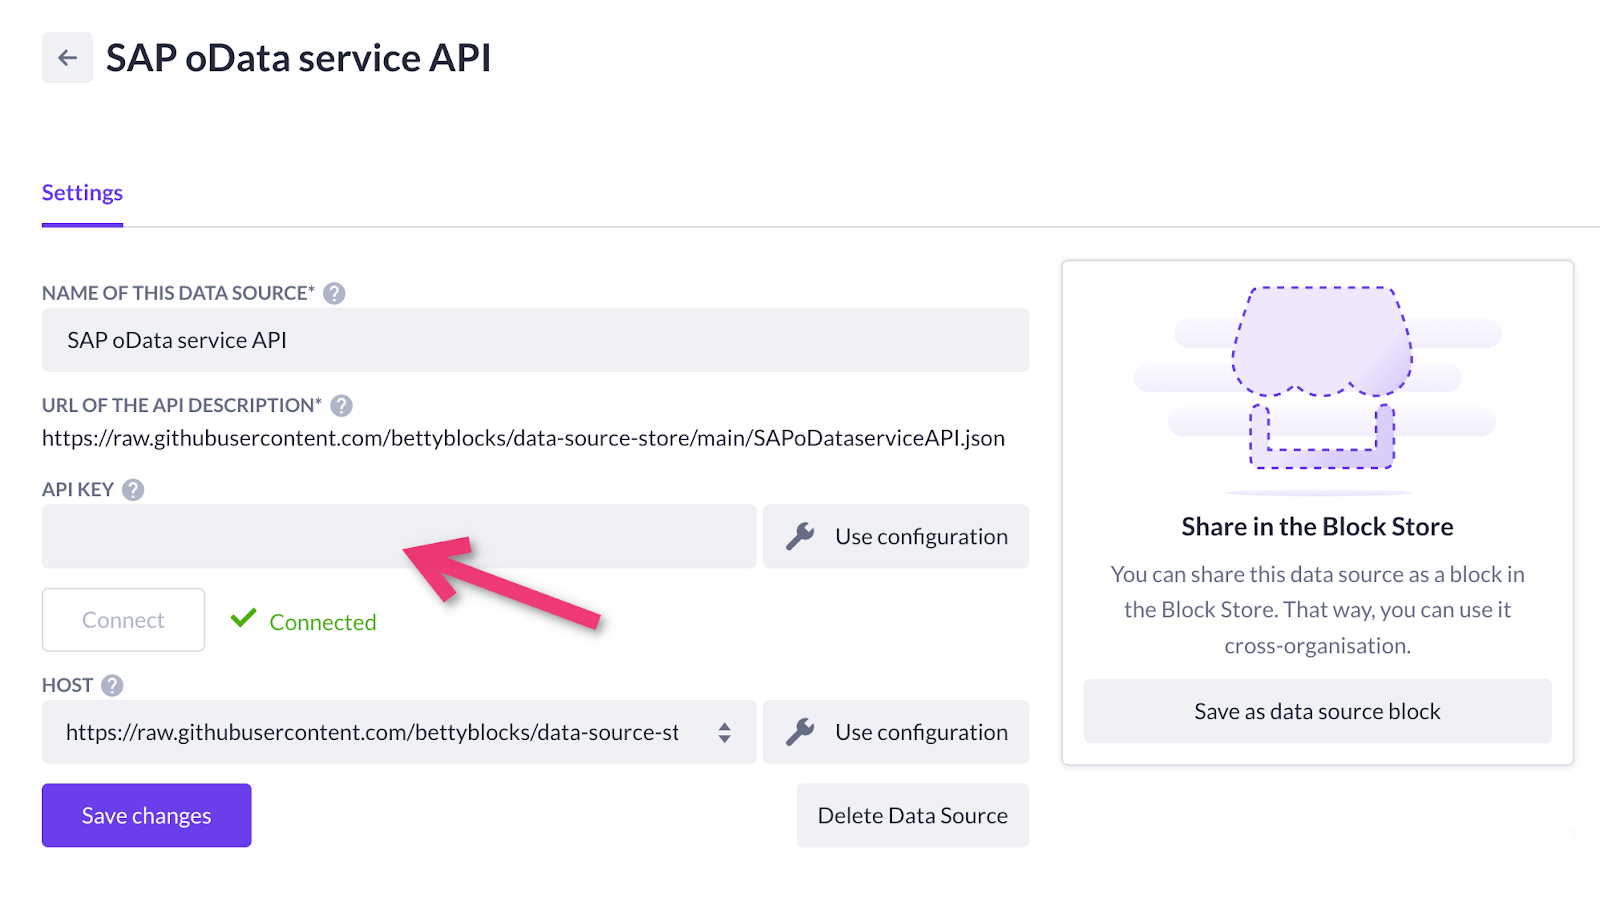
So, after you’ve pasted an API key and saved changes, come back to the models overview and create a new model. In the 'Create new model' menu, you’ll see one more extra option for using a data source - our SAP oData service API. Select available models within it and click on Add models button.
Functions (action steps)
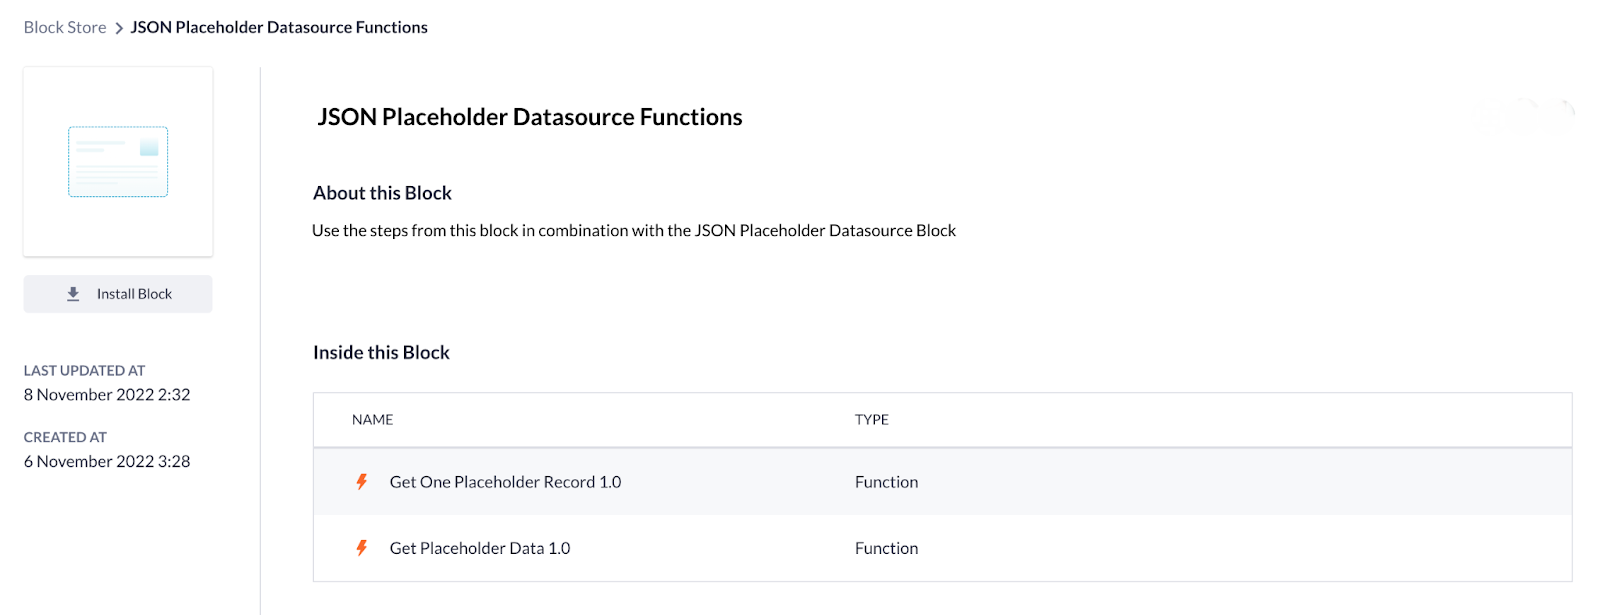
The installation of a functions block from the Block Store is basically the same as for data source, with the only difference being that you will have to choose the organization your application belongs to, and you can also install the function block you chose for all applications within one organization (existing and the ones created in future). For this example, we will install the JSON Placeholder Datasource Functions block that contains two functions you can see in its description.
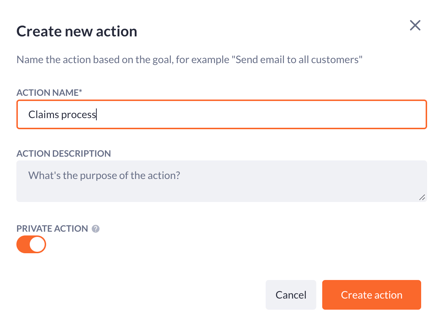
After you’ve done that, go to the actions section in your application. Create a new action or use the existing one.
Scroll down the functions overview on the left side and you’ll see that the two functions of JSON Placeholder Datasource Functions block functions have appeared at the end of the list in Miscellaneous. Drag one of these functions onto the canvas to use them in your action flow after configuring.

Note: Currently, you cannot uninstall the function you’ve installed from actions.
Page components
The next in our tour across setting the types of blocks are components and pages. Again, the installation of these blocks resembles the ones of the previous blocks.
-
Components
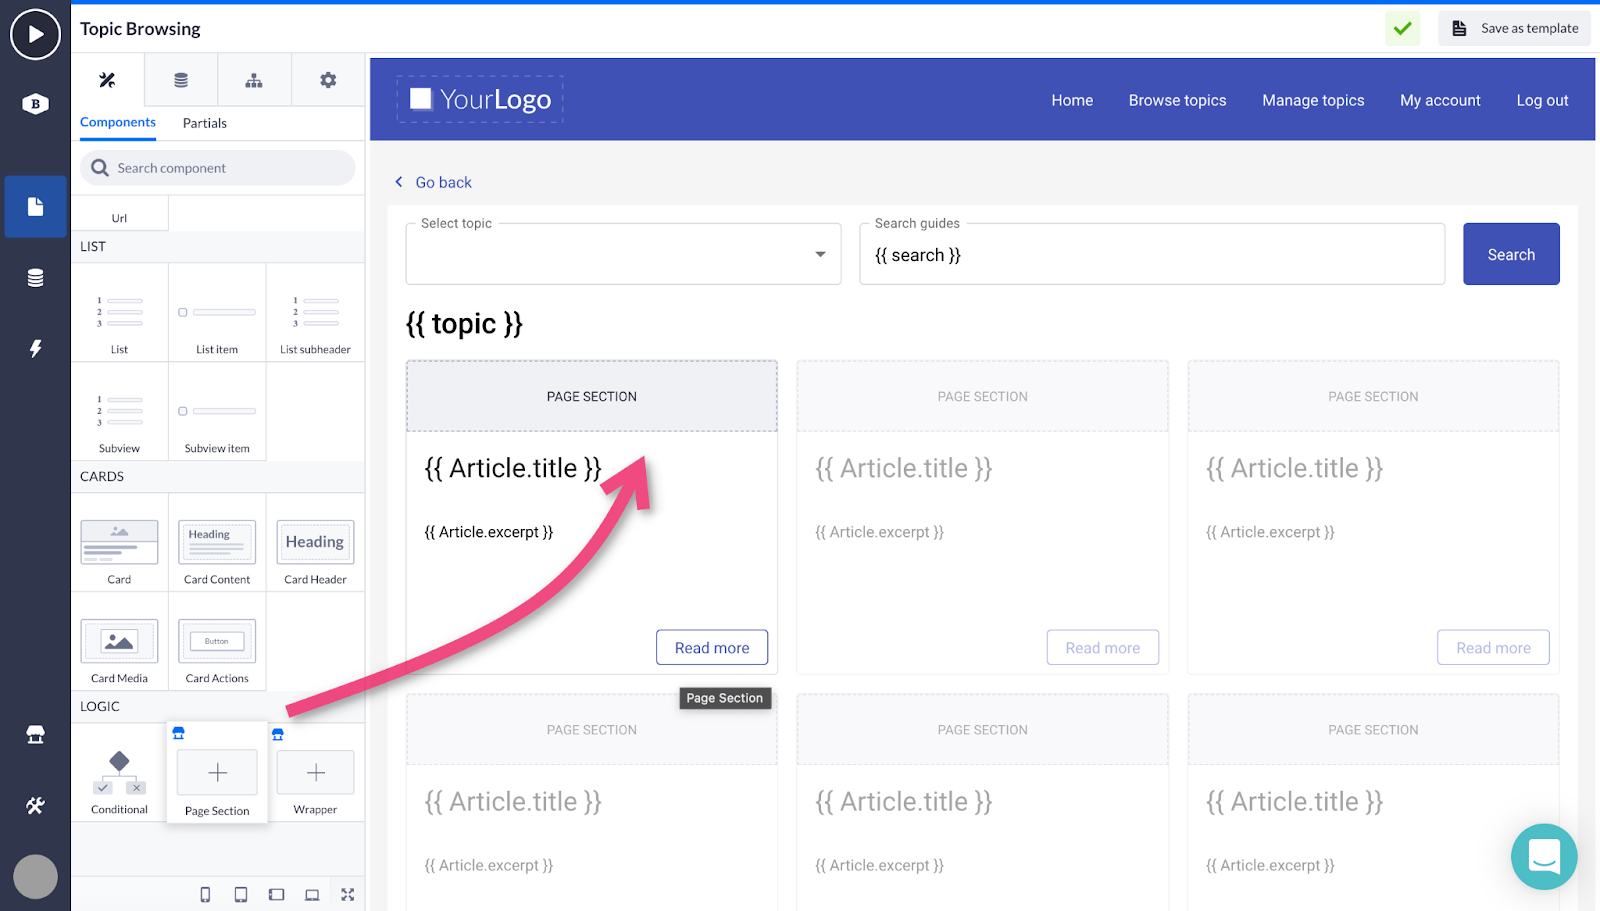
After you’ve chosen the block itself and the application you want it to be installed to, proceed to this application and find the installed component among others in the components overview. In order to make it work, simply drag and drop it onto the page’s canvas of your application.
-
Pages
Besides components, you can also install the whole page that was previously saved as a new template and shared via the block store. After you have installed it from the block store, you will be able to find it in My Templates section as you create a new page. Choose the page you want to use as your starting template and proceed with a standard configuration of creating a new page.

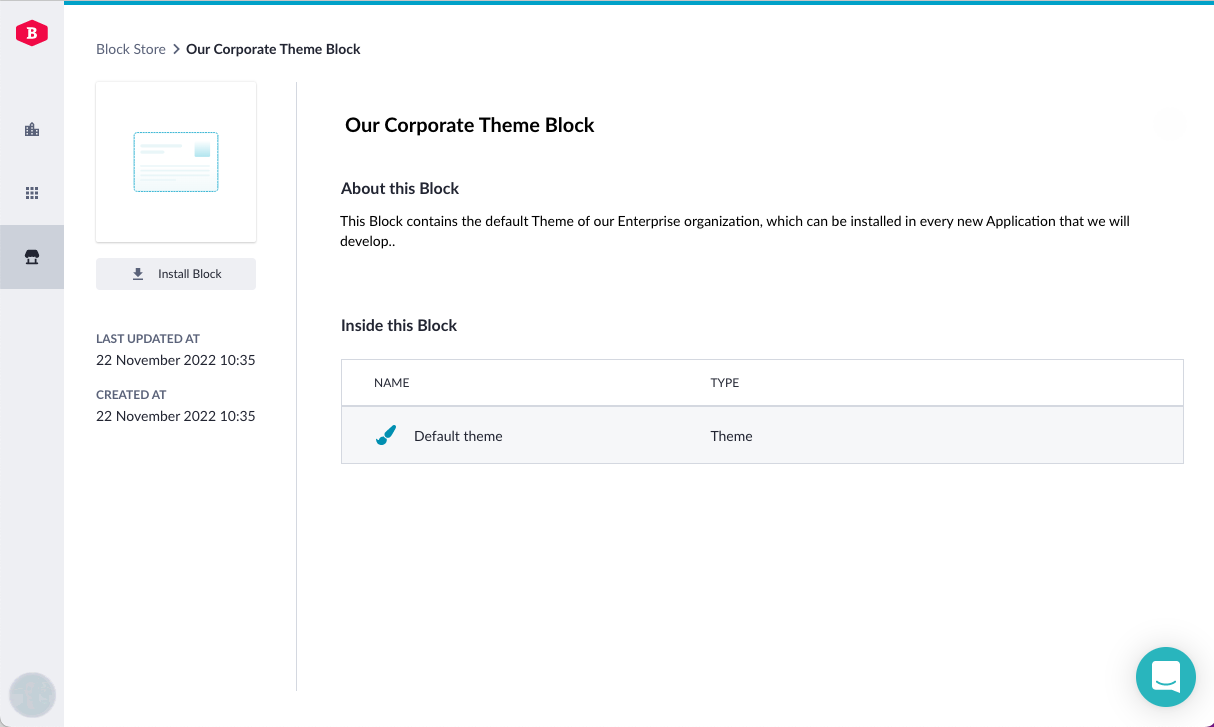
Themes
When you’ve chosen the desired theme among the ones shared with you or available in the block store, you should proceed with the installation process explained in the first chapter of this article. The detail page will show you the contents and description of a particular theme block and once you select the Install Block option, you will be able to select the application you want the theme to be installed, and this theme will be updated automatically.
Note: Be aware that installing a theme block will overwrite the current application’s theme!
In the conclusion, it’s worth mentioning that our ‘block system’ is certainly going to improve the overall reusability and accessibility of various features among different developers and their applications. The new Block Store experience enables builders to find, manage, install and share blocks easily. Good luck!