After reading this article you’ll know:
-
How to create and set up the profile details page using the template
-
Some tips on customizing the styling of the page
The profile details template enables registered users to edit their profile details in the application. It includes uploading a profile picture, filling in personal information and changing password options.
Mind that this template is not a standalone one and if you want the full registration, login and personal profile features within one template, try out the Login flow application template.
Getting started with Profile details template
Creating new page
Note: Before creating a new page using this template, make sure you have an authentication profile in your application. Find out more about creating such a profile here. For this template, you will need to create a ‘Username/password’ kind of profile
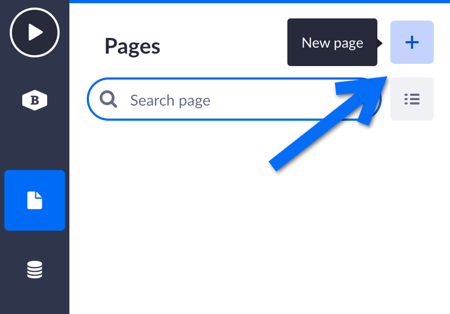
Once you open your application’s dashboard, go to the Pages section and choose the + button to add a new page.
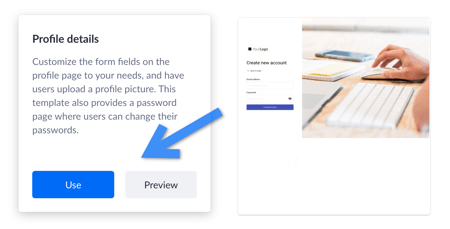
The next thing you will see is the “Choose a page template”. Here you need to find the “Login form with image template” template and click on the ‘Use’ button (or ‘Preview’ if you want to see the interactive example of use).
Configuring profile details
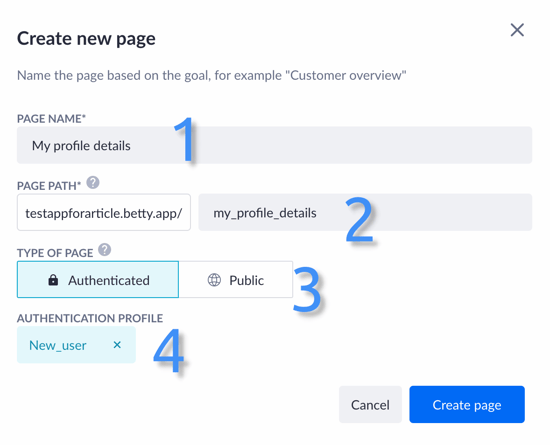
Now you need to go through the three steps to configure your profile details:
Step 1: Fill in the page’s name (1) and edit the page path (2) to your liking (use an underscore instead of a dash, for example). “Authenticated” type of page will require users of your application to log in, whereas the “Public” option will allow the page to be accessible by everyone (3).
If you had created an authentication profile before you created a new page and you choose the “Authenticated” option, the pre-created authentication profile will automatically appear at the bottom of this configuration window (4).
Click Create page after you have finished with the configuration.
Step 2: In the following window you will have to select the header and footer partials of the existing ones (1) or use partial auto generator (2).
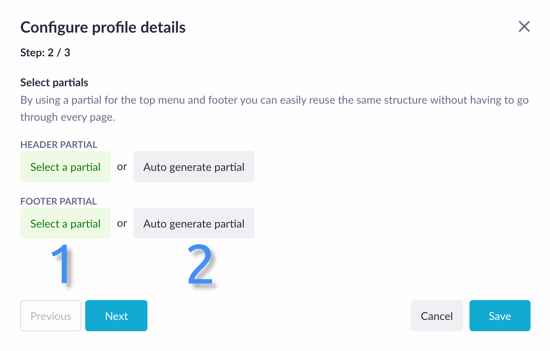
Press the Next button to proceed to the next configuration step.
Step 3: Select an authentication profile (1) for the particular users to be able to log in to their accounts (there is also an option of creating a new authentication profile). Pick up the data model you will use and add properties shown in the personal detail tab (2). There’s also a possibility to add new properties in case you miss some of them (3).
Note: If you want the name of a user to be shown, you need to select the checkbox and set the property that is being shown. The same process applies to a profile picture.

Click Save to finish configuring profile details or click ‘Previous’ to come back to the second step.

Main features
The personal details page template consists of two tabs: ‘Personal details’ and ‘Change password’. You can find them below the profile image and switch between them.
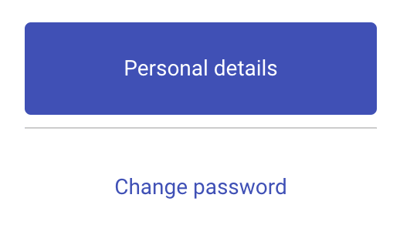
Update personal details
The user’s profile details are displayed by default when you open the page. One can update the profile information on this page by filling out the personal details (fields shown based on which of them a user had chosen). Typically, they are the following:
-
First name
-
Last name
-
Email address
-
Profile image

Change password
Another tab within the profile detail page is meant for updating passwords. The fields to fill in:
-
Current password
-
New password
-
Confirm password
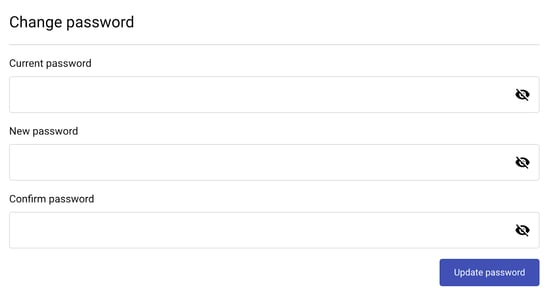
Mind that you might need to add some conditional checks in the application’s actions to see if the current password is really the current password and if the new and confirm-password fields match. All of that is done for security purposes and all those conditional checks could be found within, for example, Login flow application template. Find more information about the condition step in the Action step reference article.
Page stylization
After you’ve created and set your page, it’s time to add some custom styling to it.
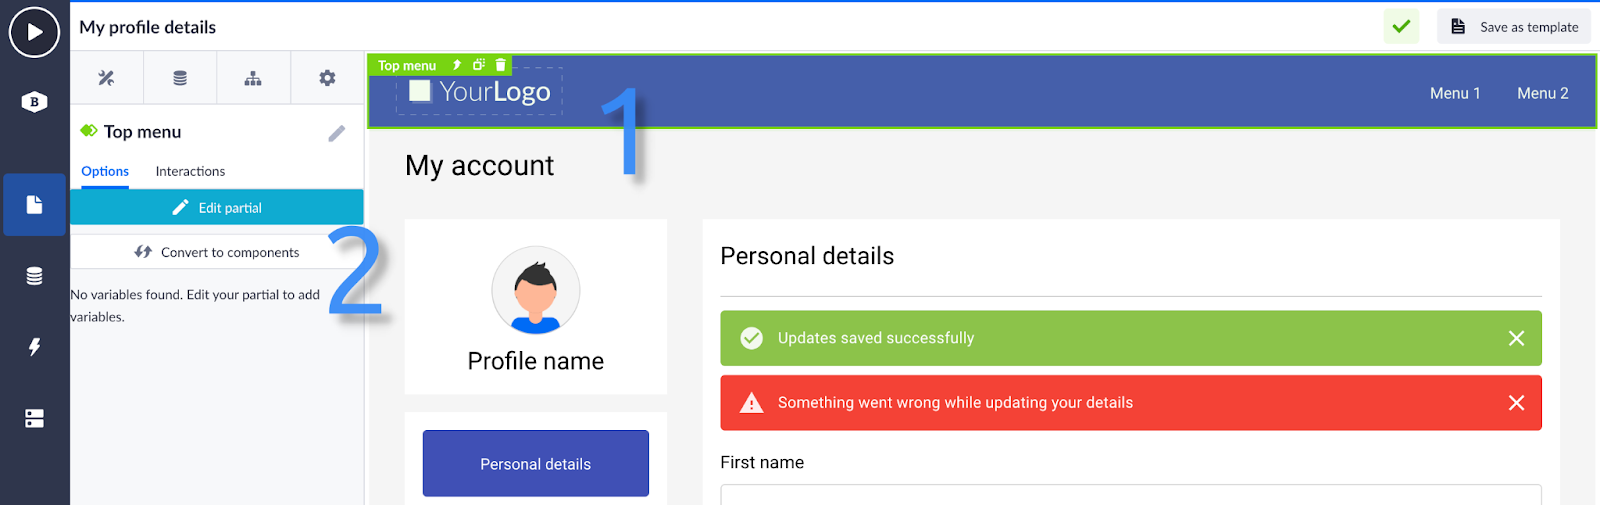
Replacing logo
To make sure the profile details page looks in line with your product’s visual design, you might want to apply some changes. First of all, you can add your logo to the header.
Go to the page builder and click once on the header to select the partial component. Then, in the pages menu, click on the Edit partial option.
When you are in the partial editor, click on the header (‘AppBar’) once again in the options menu on the left and scroll down to the logo section. Here, replace the default URL with one of your own image.
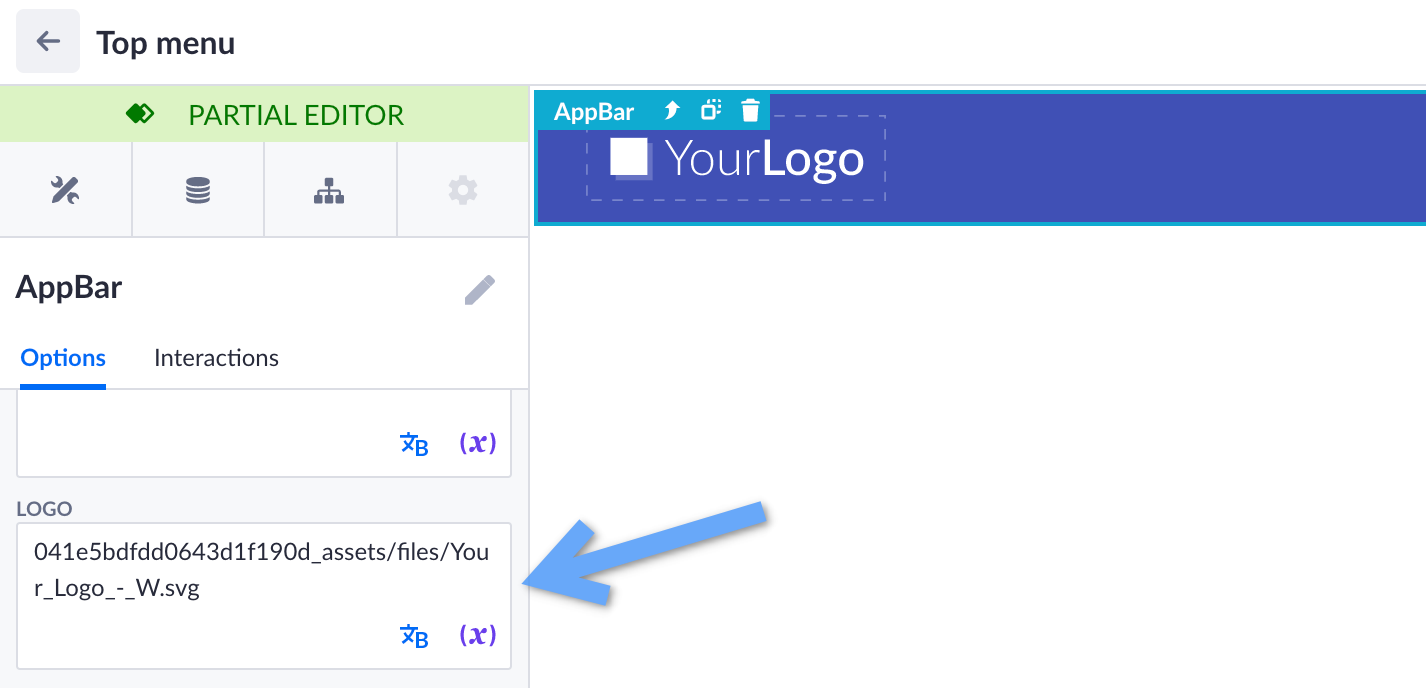
Note: If you haven’t used partials while creating this template, just find the needed component with a logo and replace its URL as in the example above.
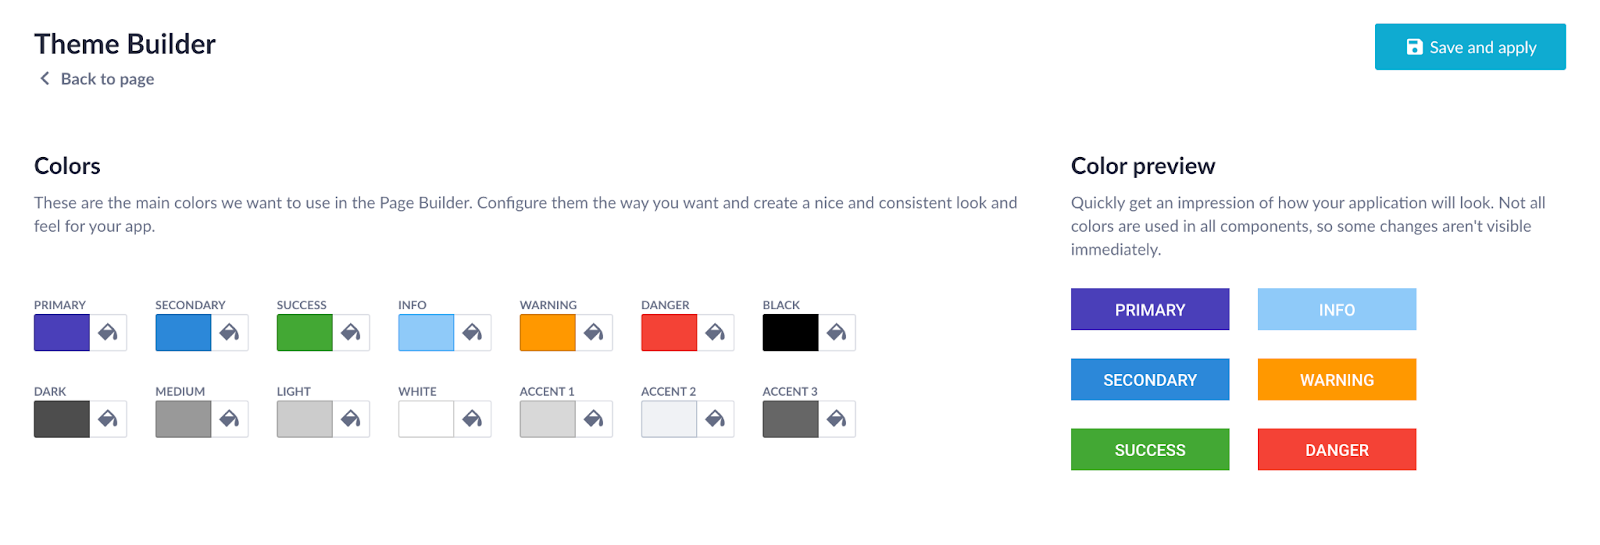
Customization via theme builder
It is also possible to change your page style via the theme builder. You can find it in the tools section.

Here you can pick up the most suitable color scheme for your application.
Also, it’s possible to configure your typography. Choose the fonts for the page titles and body text.

After you’ve finished customizing, don’t forget to click Save and apply.
Customizing your application could be really fun, whether you already have some references or want to do everything from scratch. Play around with styles and find the one you enjoy. More information about the theme builder is available here.