Deleting a task
Use case 3 of a 4-part series. In this article, you'll learn how to delete a task in your application.
Note: Before we start, it's worth mentioning that to illustrate deleting tasks properly, there is a pre-created Task overview page with a data table that contains all our tasks.
The easiest way for users to approach deleting a task would be to have the delete function on the furthest side of your data table. This is because the delete function is a permanent one and should be out of reach but within sight.
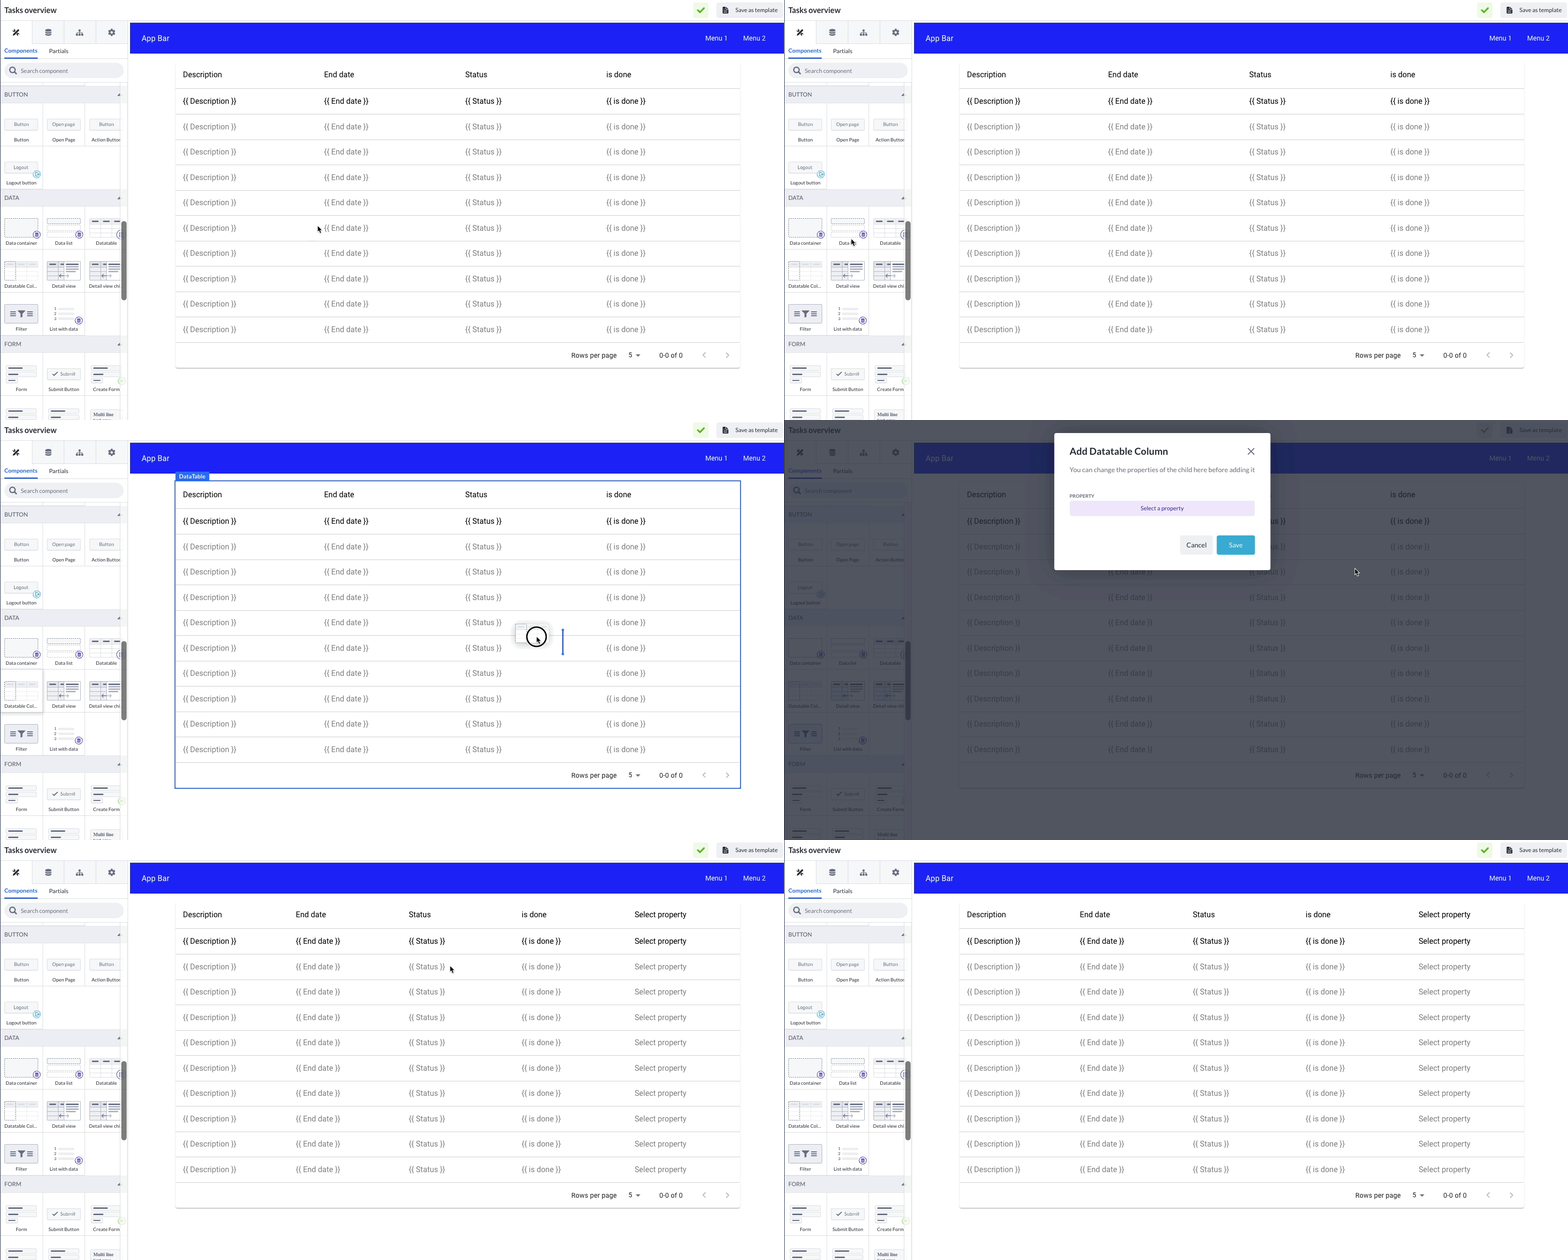
To delete a task from your task overview, you would be to have create a delete function using the action button. To do this, navigate to the Data section of the components and drag a DataTable Column on your Data Table. Click on Add without Configuration to add the new column.

Now that we have an extra column, let's navigate to the Button section of the components. Here, a component called the action button is what we'll be needing. Drag this component on the new column we just created.
To configure the delete function, follow our creating a delete button guide.
Press the Play button in the top left to build the page. When you click on the newly added delete button next to a task, a loading bar appears, and after a page refresh, your task will be removed.
This is, of course, not the dynamic functionality we are looking for, so let's create a dynamic delete that doesn't require refreshing your page by hand.
Dynamic delete
When you click on Delete, it'll delete the task, but you won't see this reflected in the overview, to do this, we need to refetch the data in the Data Table.
1) Select the Delete button.
2) To automatically refetch the data in the Data Table to reflect our changes, in this case, the deletion of a task, we'll need to add an interaction.
3) Configure the interaction: On action success -> Refetch -> Data table
4) Press compile and test your new dynamic delete.
When the action that runs in the background is successful, this interaction will fetch the data and display it in the Data Table in the tasks overview.


