Actions define the logic of your application. This logic is executed after a specific event, called a trigger. For example, a user clicking a button can trigger a predefined sequence of events.
You design your workflow in Actions by adding action steps. These steps form the logical structure of the workflow, and each event is executed based on the conditions you configure.
Create a new action
There are two basic ways of creating a new action in the Betty Blocks platform: you can create it from scratch or use the page components as a starting point. To begin with, we will describe the first way: creating action from scratch.
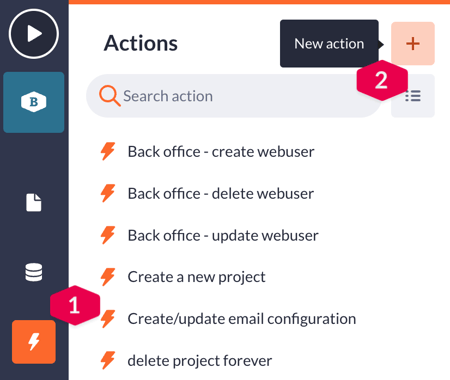
Find the Actions (1) section on the builder bar: Then click on the + button (2) to create a new action:
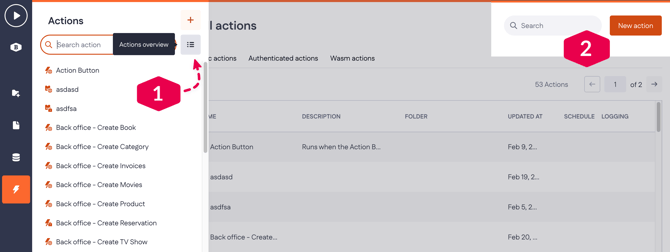
You can also create an action by going to the Actions overview (1) and clicking New action (2) in the top-right corner.
Betty Blocks action
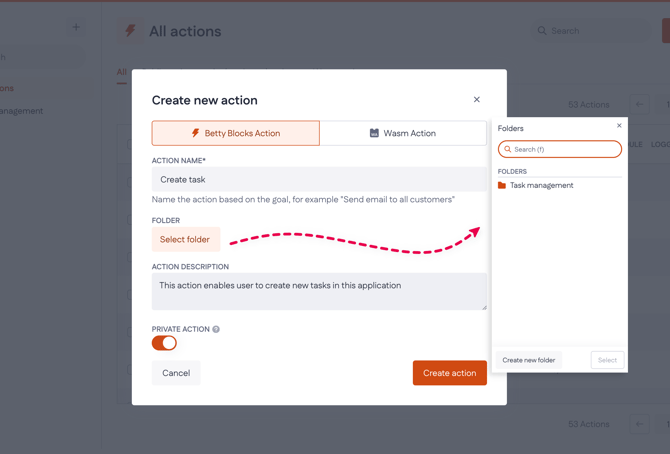
A regular Betty Blocks action is a function that is created and used internally within your application. When creating a new action, provide an action name and description. Choose a singular, descriptive name that clearly reflects the action’s purpose. You can also organize the action by placing it in an existing folder or by creating a new one (click Select folder > Create new folder).
Finally, decide whether to enable Private action. Private actions require authorization and can only be executed by users with the appropriate roles.
Wasm action
Wasm actions are custom server-side actions that execute logic compiled to WebAssembly, enabling you to extend the standard platform with secure, high-performance code. Use them in your action flows for advanced processing or data transformations when built-in steps are not enough.
When creating a Wasm action, you configure the same details as for a regular action: name, description, folder, and whether the action is private or public.
Find more detailed information about Wasm-based action builder in this article.
Actions overview explained
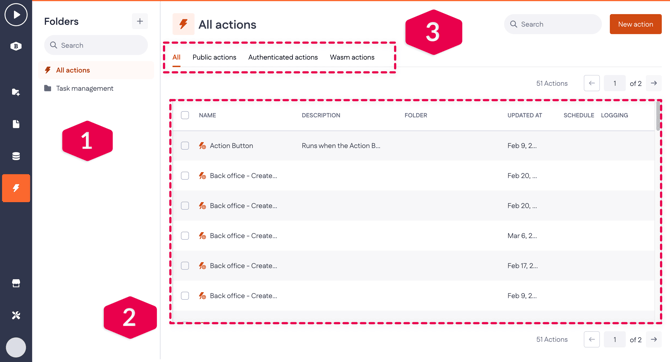
Back in the Actions overview, you’ll see:
-
Folders in the left sidebar (1), which help you organize different types of actions by their purpose.
-
Actions list (2), which shows all actions by default. When you select a folder, this list updates to show only the actions stored in that folder.
-
Action filters (3), which let you refine the list further by action type: all actions, public or private (authenticated) actions, or Wasm actions.
Folders
Click the + button next to Folders in the Actions sidebar to create a new folder. Use folders to organize different types of actions (including Wasm actions) and to configure MCP servers.
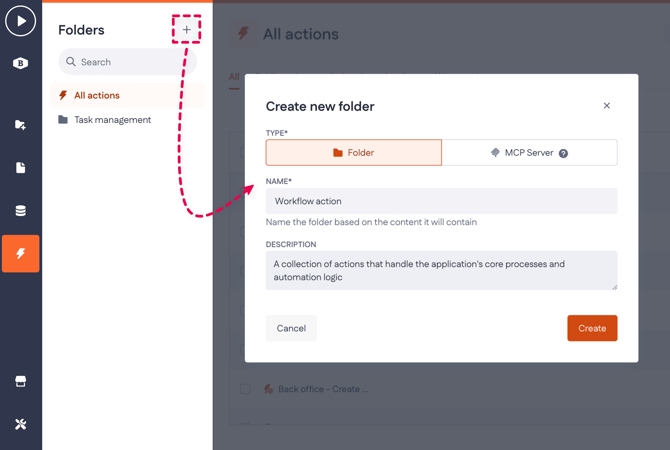
The MCP server feature allows your Betty Blocks applications to securely expose business data and workflows to AI clients such as those provided by Microsoft, OpenAI, and Anthropic.
Find out more about MCP servers.
Building action flow
After you create and open your first action, the action builder workspace appears. Here, you construct actions by linking individual action steps, similar to a flowchart. By default, each action includes two predefined steps: Start and Finish.
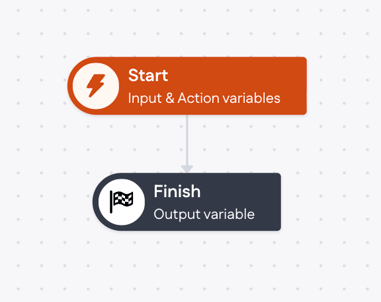
A series of events can appear between those pre-defined steps. The order in which steps are applied provides the logical process in a workflow. Each step has its purpose, affecting the action flow.
The Start step is used to configure input and/or action variables, while in the Finish step you can configure the name of a variable containing the result of the whole action. More about variables here.
Action steps
On the sidebar, you can see a set of action steps one can use within the action builder. Betty Blocks provides a standard set of frequently used steps out of the box: Authenticate User, Update Record, Delete Record, Create Record, Log Message, and Loop. More action steps can be installed into your application via Block Store.
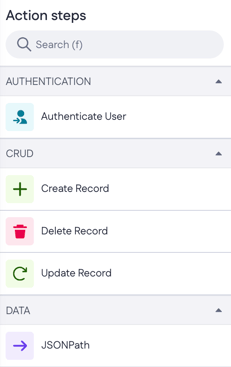
Each step can perform its function - a piece of logic that can be configured individually. For instance, the Create Record step creates and inserts records into the database. For more information on each step, read the Action step functionality article.
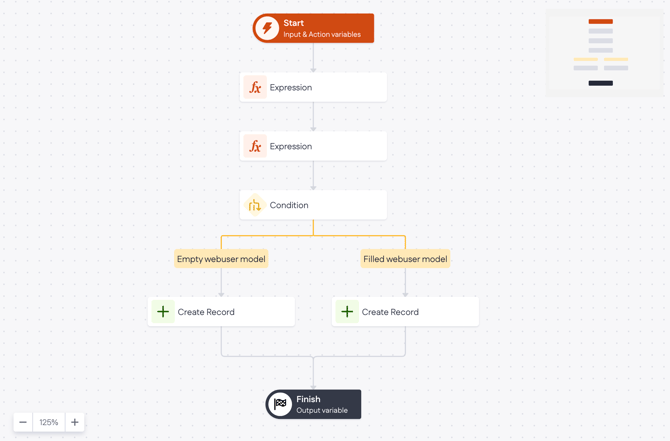
You build an action by simply dragging action steps from the sidebar into the action flow. Using these individual components, you can design even complex logic for your workflow. As you drag a step, the valid drop positions are indicated with small circles.
Once an action step is dropped in the desired spot, the whole action flow is reconstructed.
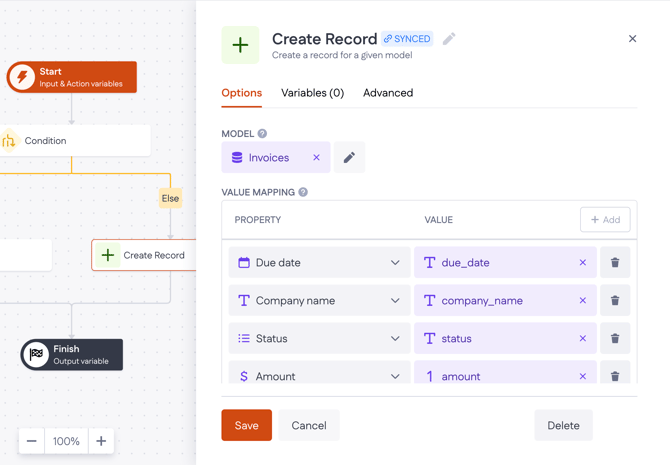
Click any step in the action flow to configure its options logic. For example, in Create Record step, you can choose the model, define value mappings, and add variables that are available within that step. When you’re done configuring, click Save button at the bottom.
Any step can be removed from your action flow using the Delete button in the bottom right corner of the window.
Creating new actions via Pages
So far, we’ve covered the basics of building an action flow from scratch. In practice, however, you’ll often create actions by leveraging components in the page builder. Let’s walk through an example of how this works.
First, open the Pages on the builder bar (1), and from the Components tab, pick up Create Form (2). This component will serve as an example here and later in this article. Mind that it’s also possible to get to actions using other components of the page builder.

Drag the Create Form component onto the page canvas. In the pop-up window, you will have to configure form fields: select a model from existing data models (3), choose properties by clicking on the + beside them (4), and click on Save (5).

The Create Form has been created on your page. Now choose any field within this form and click on Select parent component.

When the parent component Create Form is chosen, its options menu will open. There, you need to click on the pencil icon to start editing the action that was created behind this page form. You can also jump into editing permissions from this menu.

After clicking the Edit button, you will be redirected to the action builder overview. As you can see, the action step Create Record has already been added between the Start and Finish steps. It has been automatically filled with the chosen model and its properties.

Let’s have a look at how it will interact with the front-end side of the application. Come back to the page builder, choose the page with the Create Record form, and click on the Play button. This is what the form will look like from a user’s perspective.
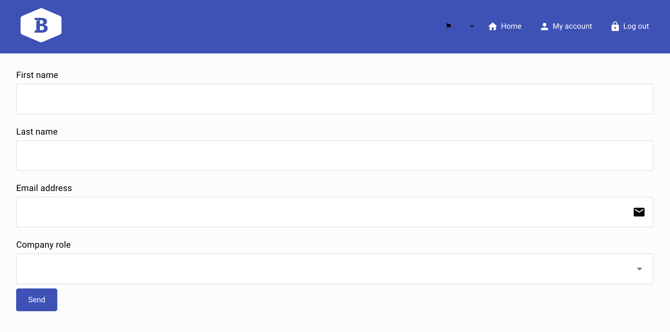
After filling in this form, a user will click on Send - it will serve as a trigger for the action to be launched. At the end of this action flow, we get a new record with a user’s name and email in our database.
Tips
-
Make sure to always test-run your action in every sandbox environment. A sandbox might have different configurations and data and might cause a different end result than anticipated.
-
Action duration has a maximum of 1 minute, if your action takes more than a minute we recommend splitting the action into batches or using less data.
-
The default maximum amount of records for an action collection is 200, we recommend splitting your action collection into batches when you work with more than 100 records at a time