Working with application settings
Adjust the settings for your application via the settings tab at the application level.
Once you have created an application, you can manage its settings from the application settings available via the My Betty Blocks dashboard. You navigate there to work with the settings of an existing application as well as the settings specified when creating an application are explained below.
Additional summary details on the individual tabs for managing applications are provided below in the managing application settings.
Navigating to application settings
You can navigate to the settings for the current application on which you are working. Open the Account menu (bottom left corner) and select My Betty Blocks (1). Click on the ... button to open the menu and select Settings (2). The settings for the application are displayed.
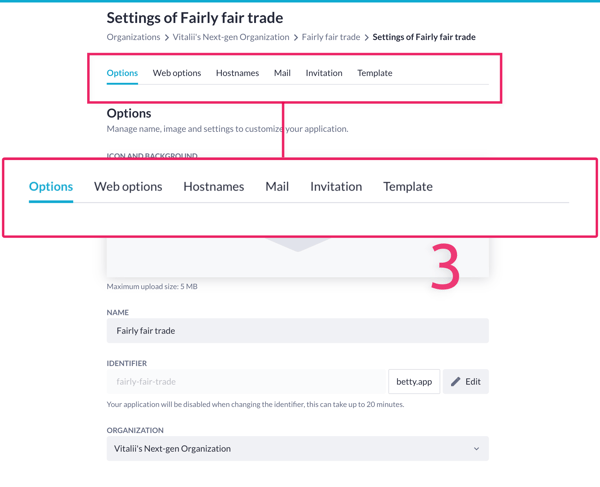
You can navigate to the different pages (Options, Web options, Hostnames, Mail, Invitation, Template) using the tabs (3).
Settings applied when creating a new application
You can create a new application for your organization by clicking on the Applications (1) button and selecting the Create application (2) button. The application templates page is opened from which you can select a template or choose Start from scratch button (3). The Create new application (4) dialog is opened.
Complete the fields requested:
Organization: Open the menu for selecting the organization in which you want to create the new application. (The current organization is applied when you create an application within an organization, this field is not then presented in the dialog).
Name: Assign a name for your application.
Identifier - Specify an appropriate identifier. The identifier is the unique part of an application’s URL that is used to reach your application. For example, if you assign the identifier of your application as task-manager, the URL is https://task-manager.bettyblocks.com.
When you have completed the required fields, the Create application button can be selected.
The process for creating your application is initiated. This includes building the DNS configurations. A progress bar and percentage-built message inform you of the progress.
Once complete, you can click on the application and then apply additional application configuration settings or click again to open and start building your application.
Managing application settings
Here's a video that also dives into application settings, note that it's also about sandboxes:
Once you have created an application, you can adjust the settings as required. The different tabs:
Options tab
Icon - choose an icon for your application. The icon is only visible within My Betty Blocks and the login page.
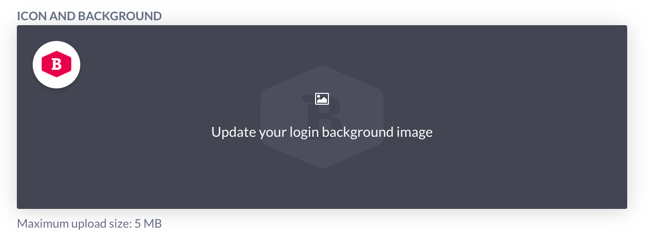
Background - choose a background for your application. Just like the icon, the background is only visible within My Betty Blocks and the login page.
Name - choose a name for your application.
Identifier - a unique part of an application’s URL, used to reach your application. For example, if the Identifier of an application is task-manager, the URL is: https://task-manager.bettyblocks.com.
The following advanced options are also available:
Logging - you can log details for actions and endpoints within your application. This setting overrules any logging options set within the application. For example, if this option is disabled, other logging settings are not activated.
Usabilla script identifier - specify the Usabilla script identifier to enable Usabilla functionalities on your endpoints.
Application UUID - a 128-bit value used to uniquely identify your application on the web.
Press the Save changes button to save any changes you make.
Moving your application
Applications reside within the organization in which they have been created. Sometimes, however, it might be that you want to move the application to another organization if a copy based on an application template does not suffice.
You can move your application by being an admin of the application with sufficient permissions and opening up the advanced settings of your application.
Here you have the option to move your application to another organization of which you are also an admin.
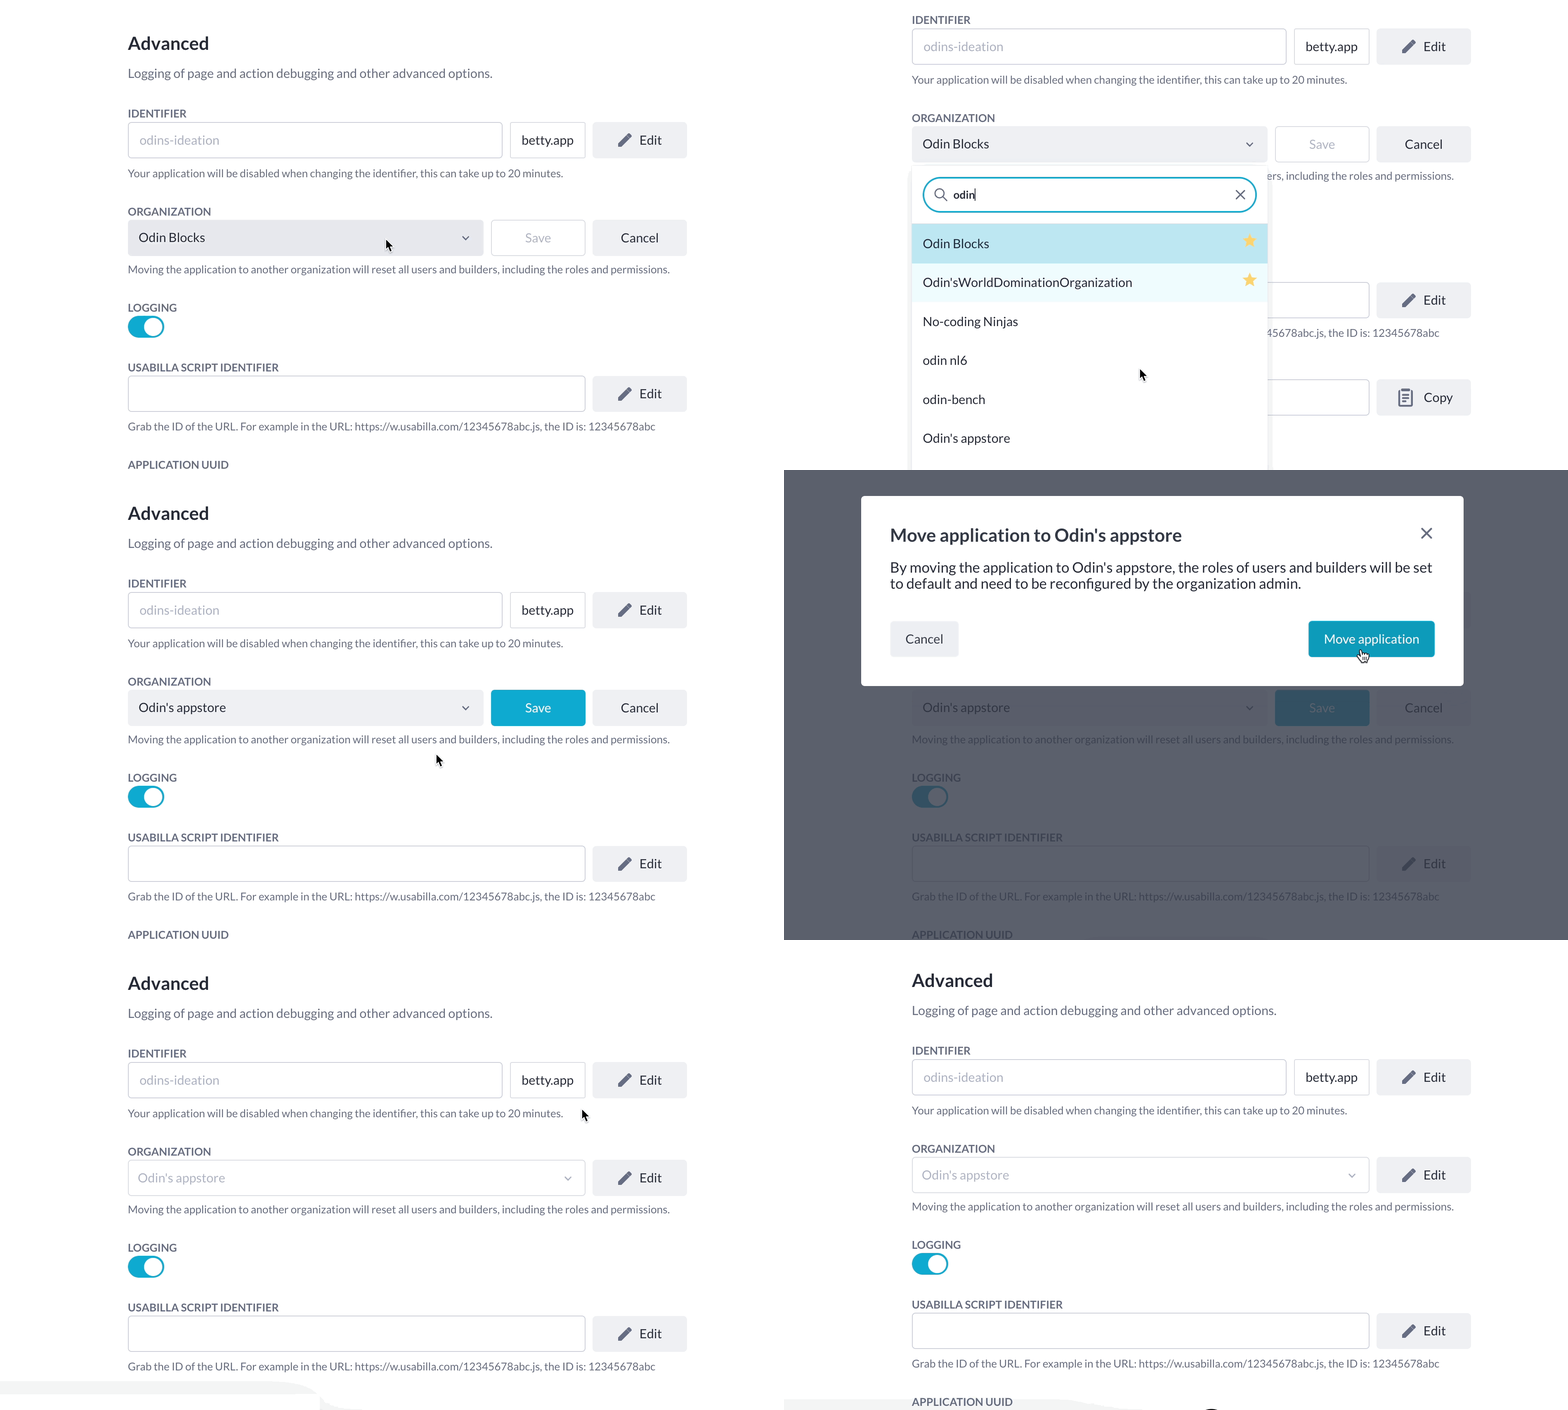
Note: It is important to look into the organizations' roles and permissions, as you need corresponding ones to move applications from one to another organization.
Adding an icon or background image
Click on each of the images to activate the dialog for uploading an image.
Tables can't be imported directly. Please insert an image of your table which can be found here.
Icon. Click on the icon and select the Upload button for navigating to a folder and selecting a suitable image file in one of the custom formats (jpg, gif, png...).
Background. Click on the image to display the message Upload your login background image. Click and navigate to an image file in one of the custom formats. Select the image to upload.
When the background image is added, you can delete it or upload a different image as needed.
Recommended image size
We advise using different image sizes for the icon and the background image, to make sure their quality is optimal for your average viewport. The maximum upload size of the file is 10MB.
-
Recommended icon size: 416 x 188 pixels
-
Recommended background-size: 800 x 1080 pixels
Web options
Use the web options for customizing the following options:
Maintenance mode - turn on to enable the maintenance mode. This temporarily disables your application until you turn this option off.
Cross-origin resource sharing protection - turn on to enable cross-origin resource sharing protection. This mechanism allows restricted resources on a web page to be requested from another domain outside the domain from which the first resource was served.
Allow in iframe - allow your application to be embedded in iframes from external applications, deny your application to be embedded in iframes from external applications, or allow your application to be embedded in iframes from only the same application.
Content security policy - specify the content of your content security policy headers.
Custom 404 page - select an existing template to render when a user encounters a 404 error.
Custom 500 page - select an existing template to render when a user encounters a 500 error.
Custom page for maintenance mode - select a custom page from your application to render when maintenance mode is enabled.
Press the Save changes button to save any changes you make.
Adding hostnames settings
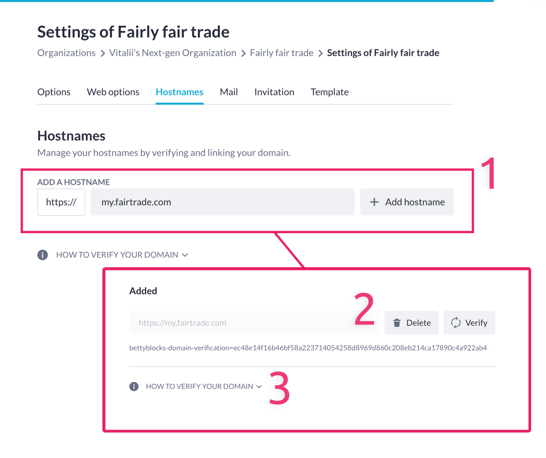
Add a hostname: Fill in your own domain. Your application can be accessed from added hostnames. Specify the hostname and click on Add hostname (1).
A hostname can be deleted/verified (2) by clicking on the associated button.
For more information about verifying your domain, click on HOW TO VERIFY YOUR DOMAIN (3).
Adding mail settings
Set the mail configuration settings for your application. See Applying and updating mail management configuration for details.
Invitation
Manage the invitation to users of your application and set up a mail template with additional details.
Tables can't be imported directly. Please insert an image of your table which can be found here.
Invitation reply to - choose the email address from where the invitation is sent.
Invitation subject - specify the subject related to the invitation
Invitation text - compose a message explaining and inviting users to your application
You can save changes to the template provided or reset to default.
User management settings
Access the Users management tab from the application menu. Open the menu (...) and click on Users management. The User management tab is displayed detailing the users of the application. The rights assigned can be selected for the individual users.
An application user can be a user, citizen developer, business technologist, or low-code developer, and can also be an API user by enabling the API toggle button. Application users can also be removed from your application by clicking the bin icon on the right of an application user.
To invite a new user to your application, click the Invite members button.
You can invite multiple users by filling in multiple email addresses and pressing enter. When you have entered all the users to whom you want to send an invite, you, click Send invite .
Delete application
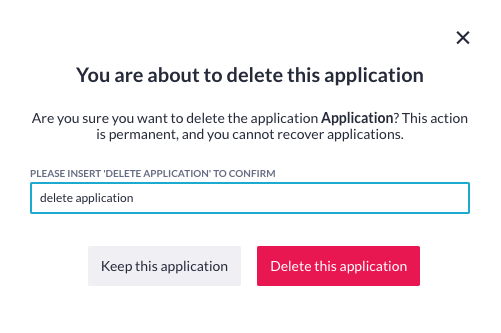
To delete your Application, you can click the Delete this application button.
A modal is displayed and you are requested to confirm the delete request. Follow the instructions displayed to process the delete request.

