Creating custom action steps allows you to customize the workflows of your Betty Blocks applications further. With custom steps, you can define your logic to meet the unique needs of your project. In this guide, we’ll walk you through the basics of action steps, the requirements for creating them, and a step-by-step tutorial on how to get started.
What are action steps?
Action steps are the building blocks of logic within Betty Blocks applications. They represent the events and operations that define the application’s behavior. The standard action steps are categorized as:
- Authentication
- CRUD (Create, Read, Update, Delete)
- Debugging
- External
- Flow
- Miscellaneous
When Betty Blocks’ default action steps aren’t enough, you can create custom ones to suit your application’s specific needs.
Getting started with custom action steps
To create custom action steps, you’ll need some basic knowledge of:
- JavaScript (ES6)
- Command-line tools (Terminal or Command Prompt)
You’ll also need the following:
- Betty Blocks CLI is installed and running, see our ‘how to set up’ article in case you haven’t installed it
- A Code Editor, we recommend Visual Studio Code (VS Code).
Once ready, follow these steps:
1. Initialize your application
Run the following command in your terminal to initiate a new application:
bb functions init [identifier] --app
From version 26.0 onwards, --app is no longer a necessary part of the command.
For example, if your application’s domain is cli-wiki.betty.app, use cli-wiki as the identifier.
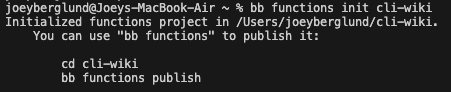
Navigate to the created folder:
cd [identifier]
If you’re using VS Code, open the project:
$ code .
2. Create a new function
To add a new custom action step, initialize a function using:
bb functions new [name]
For example:
bb functions new hello-world
This creates a folder for the function, containing two files:
- function.json: Defines the structure of the action step.
- index.js: Contains the JavaScript implementation of the function.
Configuring your custom action step
3. Configure function.json
Open function.json and provide details about your action step:
- Label: Name of your action step.
- Description: Short description of its functionality.
- Category: The category under which it appears in the action builder. You can choose between:
- Authentication
- Crud
- Debugging
- External
- Flow
- Misc
- Icon: The icon shown that represents your step. Choose from the available icons here.
- Options: Inputs, outputs, and validations for your action step.
- Yields: Determines the function’s ability to execute nested steps. Supported values:
- NONE: No nested steps.
- ALL: Executes all nested steps.
- PATHS: Executes specific paths.
For some examples, take a look at our wiki!
4. Implement index.js
Define the logic of your custom step in index.js. Ensure input variables in index.js match those defined in function.json.
For easier development, we have a JSON schema available. Check it out here.
Example index.js:
import join from 'lodash/join';

const sayHello = async ({ name }) => {

  if (name === 'oops') {

    throw new Error('Ooops. Something went wrong.');

  } else {

    return {

      greet: join(['Hello', name], ', ')

    };

  }

};

export default sayHello;
For the custom action to work, the variable name used inside your index.js function (e.g., name) must exactly match the value assigned to the "name" property (e.g., "name") within the corresponding input/output definition in your function.json file.
Learn more about creating custom action steps on our GitHub page
Publishing and testing your function
5. Publish the function
Before publishing your function, you need to add a file called config.json. This file has to be created in the parent directory of your functions project. The file will look something like this:
{

  "host": "https://your-application.bettyblocks.com",

  "applicationId": "your-application-uuid",

  "zone": "nl6"

}
Once your config file is complete, publish it to your application:
bb functions publish
6. Test the function locally
The Betty Blocks platform has a built-in function to test your actions on our platform,
If you want to test your new action as you normally would on our platform, you can skip this last part. But if you are interested in testing your custom action locally, you can definitely do that.
- Download isolatedVM. see the requirements and how to install them here.
If you don't have isolatedVM installed and try run the $ bb functions test command you will see this output:
Unable to run tests (isolated-vm is not installed). If you want to install isolated-vm, you will need to install the following requirements: (make, g++ and python) and run:
npm update -g @betty-blocks/cli
- Test away
Use the following command to test your function in an isolated environment:
bb functions test
Place test files in your project's/test folder and ensure they follow the *.test.js naming convention; the testing code won’t work otherwise.
Editing or deleting functions
Editing custom action steps
When iterating on custom action steps, you must version your changes using the CLI before they can be recognized by the Betty Blocks platform.
1. Versioning via CLI
Once you have modified the code for your custom action step, you need to "bump" the version. This signals to the platform that a new iteration of the component exists.
-
Open your terminal and navigate to the directory of your custom action step.
-
Run the bump command:
bb functions bump <your action name> -
Select the type of version upgrade (Patch, Minor, or Major) based on your changes.
2. Updating in the IDE
Once the CLI command is successful and the changes are published:
-
Navigate to the Actions section in the Betty Blocks IDE.
-
Open the action containing the custom step you just modified.
-
You will notice an indicator on the step showing that a new version is available.
-
Drag in the same custom action step to update it to the newer version

Deleting custom action steps
Removing a custom action step requires deleting the source files locally and syncing the changes to the platform. However, the Betty Blocks platform enforces dependency checks to prevent breaking existing applications.
1. Pre-deletion check
Crucial: Before attempting to delete a function, ensure the step is not currently in use in any of your actions.
If you attempt to delete a step that is still active in a flow, the CLI will reject the change to protect the application's integrity.
2. Deletion workflow
To remove a custom action step from your application:
-
Remove local files: Navigate to your functions folder on your local machine and delete the specific folder containing the step you wish to remove.
-
Publish changes: Run the publish command to sync your local environment with the Betty Blocks platform:
bb functions publish -
Verify: The CLI will process the directory. If successful, the function will be removed from the IDE.
3. Troubleshooting: "Step couldn't be deleted"
If you receive an error message during the publish step stating that the "Action is still being used," the deletion has failed.
How to resolve this:
-
Go to the Actions section in the Betty Blocks IDE.
-
Locate the actions that are currently using this specific step.
-
Remove the step from those flows or replace it with an alternative.
-
Run the
bb functions publishcommand again.

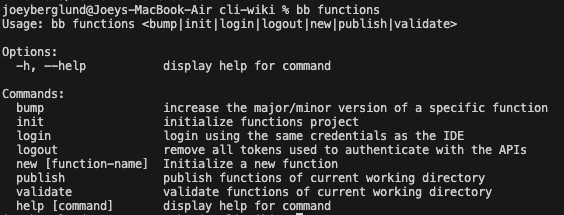
Key commands reference
bb functions init [identifier] --app
bb functions new [name
bb functions validate
bb functions publish
bb functions test
bb functions bump
By following these steps, you’ll be able to create, configure, and deploy custom action steps that extend the functionality of your Betty Blocks application. Happy building!
Do you want to discuss the creation of your action step with other developers? Check out our community!