Sometimes data lives in one Betty Blocks application but needs to be used in another — maybe you've split a large app into smaller ones, you have a central app that holds shared data for a portfolio of others, or a new app needs to display data that already exists somewhere else. Whatever the reason, the way to connect them is a remote model.
Remote models also work for connecting to non-Betty Blocks servers, but the BB-to-BB case has a few specifics worth knowing. This article first covers how remote models work conceptually, then walks through the setup end-to-end.
How remote models work
In application B, a remote model isn’t a regular data model in its own database. It represents data that actually lives in app A. So when you place a Data Table on a page in app B or use a Create Record step in an action, Betty Blocks doesn’t touch app B’s own database. Instead, it automatically runs a remote model action: GetAll, GetOne, Create, Update, or Delete – to read or write the data in app A.
Those actions are where the actual work happens. Each one is responsible for:
- Reaching out to app A
- Running the right query or mutation against app A's Data API
- Returning the response in the format Betty Blocks expects
For BB-to-BB connections, "reaching out" means calling app A's GraphQL Data API over HTTPS. That API requires JWT authentication, so every remote model action follows the same pattern: log in to app A, grab a JWT token, send the actual query with the token in the Authorization header, and return the data.
App B also needs to understand the structure of the remote model: which fields it has and what their data types are. That’s where the Swagger file comes in. You document app A’s models in OpenAPI format, register that Swagger file as a data source in app B, and then generate the remote model from it.
So end-to-end, three things need to be configured:
- A Swagger file describing the data
- A data source in application B pointing at the Swagger
- The remote model actions, wired up with HTTP(S) steps
Step-by-step setup
1. Create a Swagger file describing app A's models
In the Swagger Editor, describe the data models from app A you want to expose, plus their properties. The example below uses a Releasenote model with createdAt, title, and link.
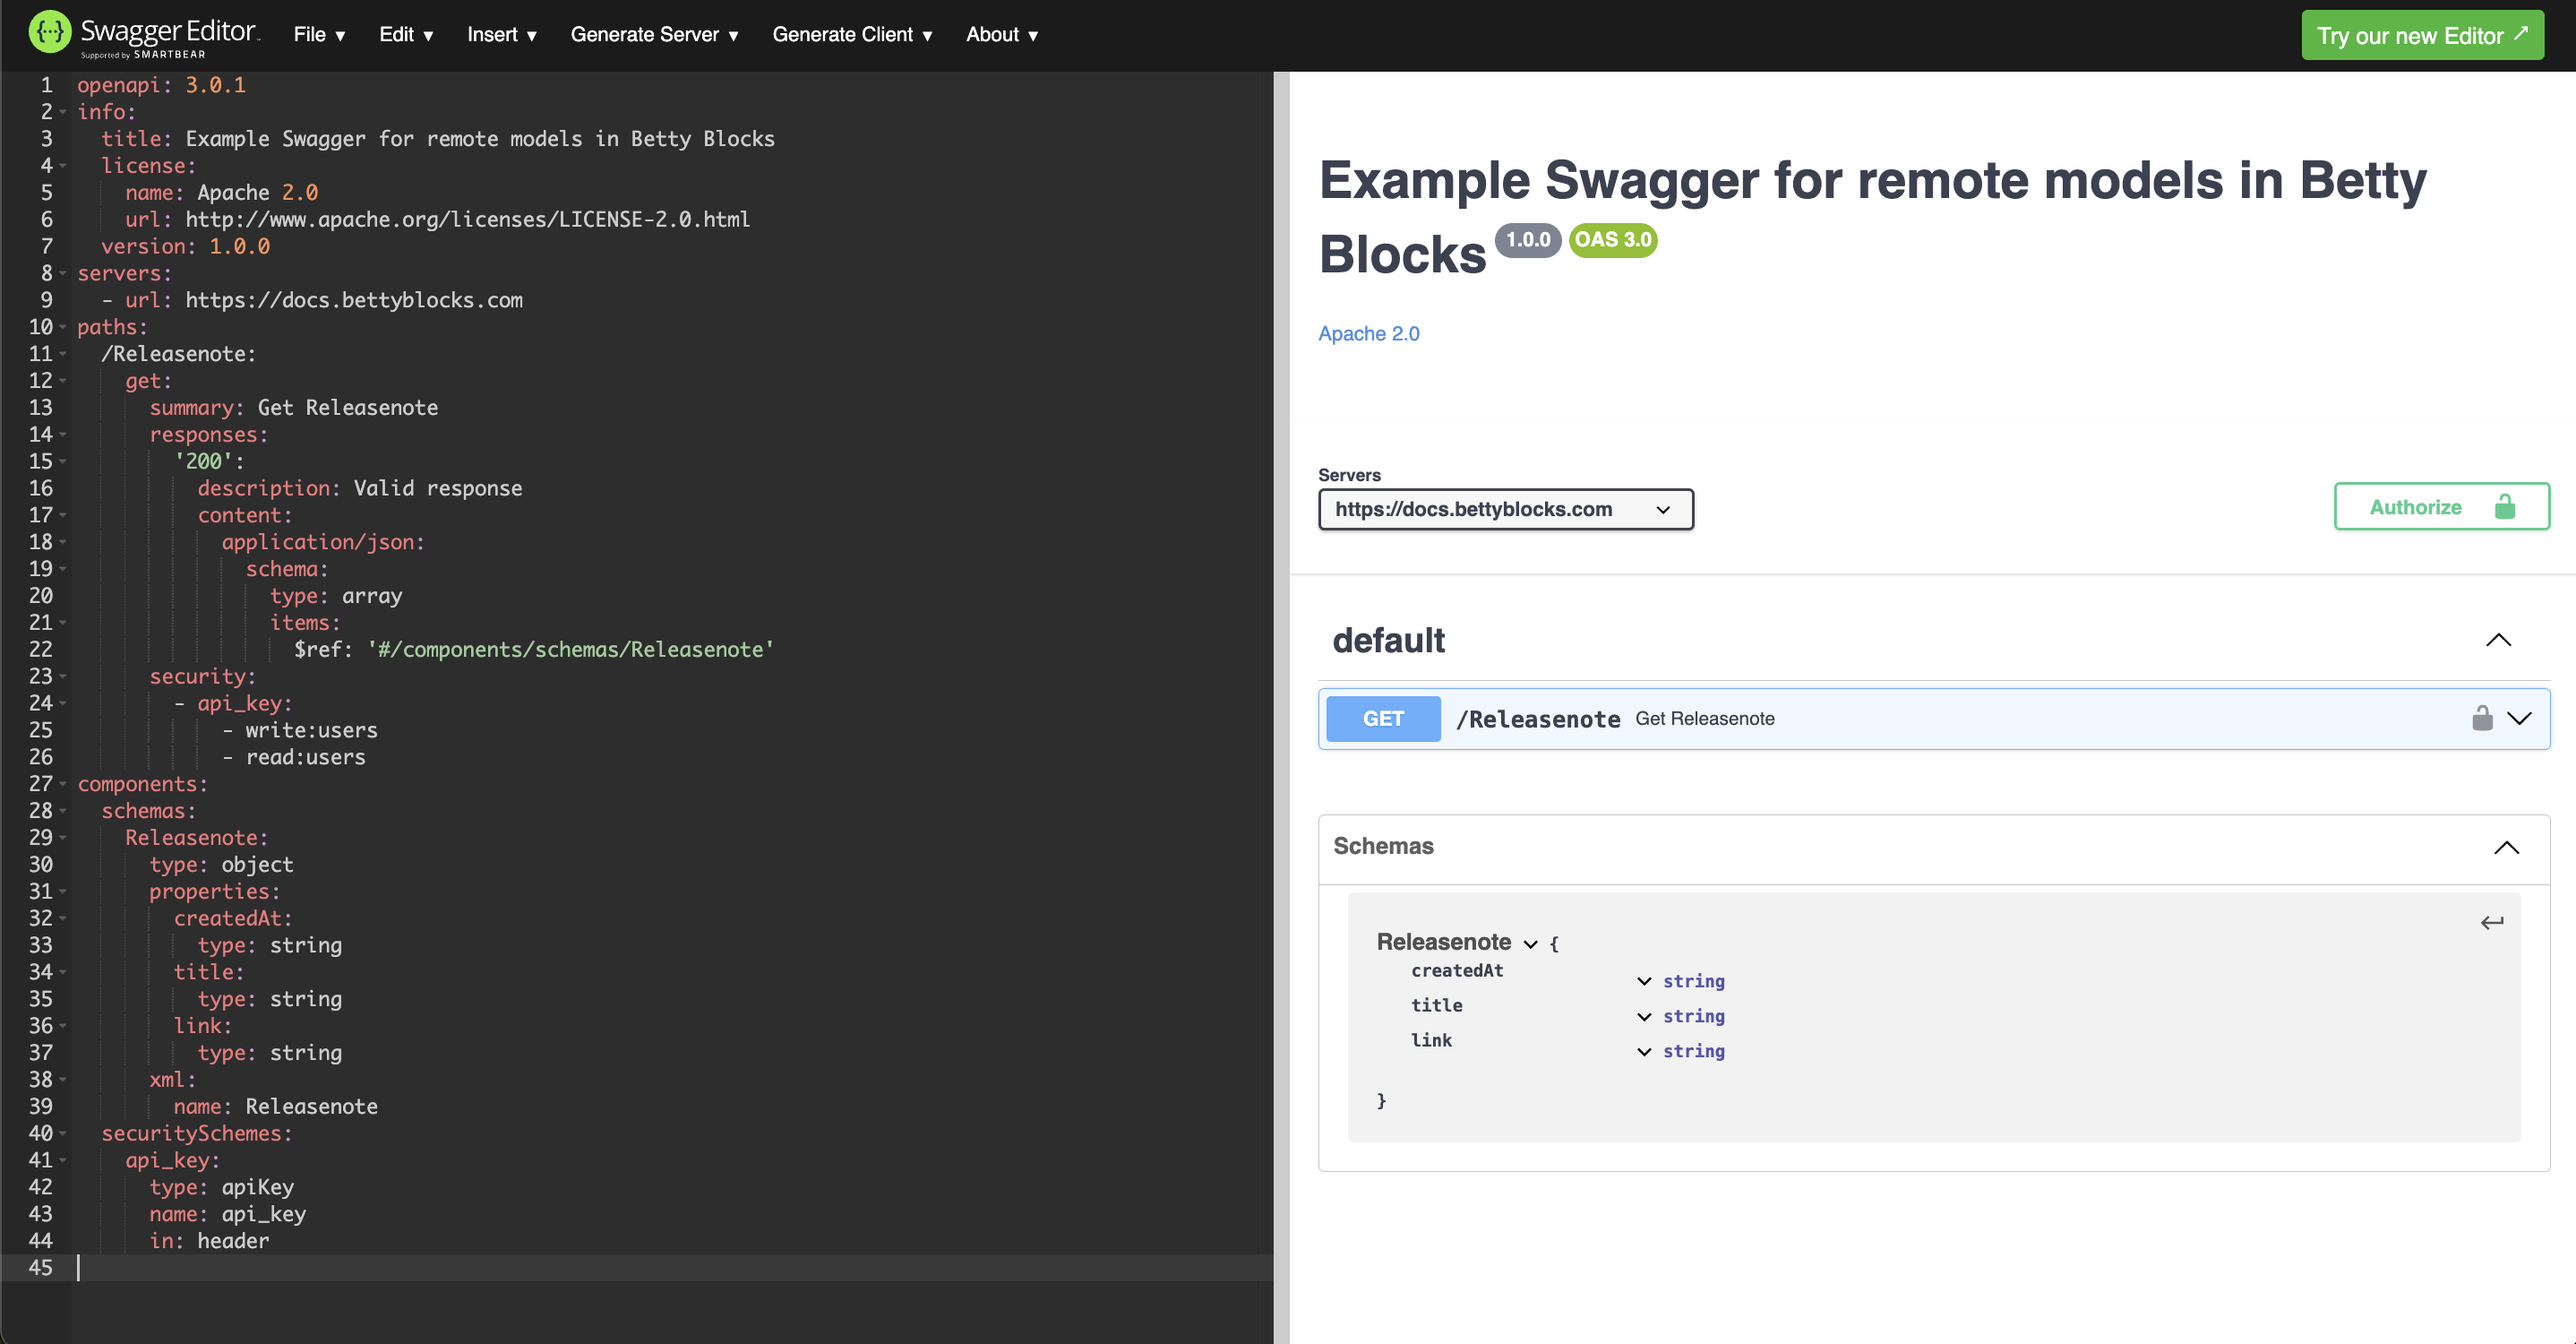
When it's ready, go to File > Convert and save as JSON to export it.
2. Upload the Swagger to application B
In application B, upload the JSON file as a public file and copy the link to the clipboard.

3. Register the data source in application B
Go to the models overview and click New data source > Create data source:
- Name: the name of app A
- URL of the API description: the public file link from step 2
Click Connect, then Create data source.

4. Create the remote model
With the data source registered, create a new remote data model based on it. Betty Blocks auto-generates five remote model actions: all for Remote Model <modelName>, one for Remote Model <modelName>, and the equivalents for create, update, and delete.

5. Wire up the remote model actions
This is where you actually fetch data from application A. Each remote model action needs three steps in sequence – a login HTTP(S) call, an expression to build the Bearer header, and a second HTTP(S) call that runs the query, followed by the Finish step. The walkthrough below covers the full flow for the GetAll action.
Step A: login mutation
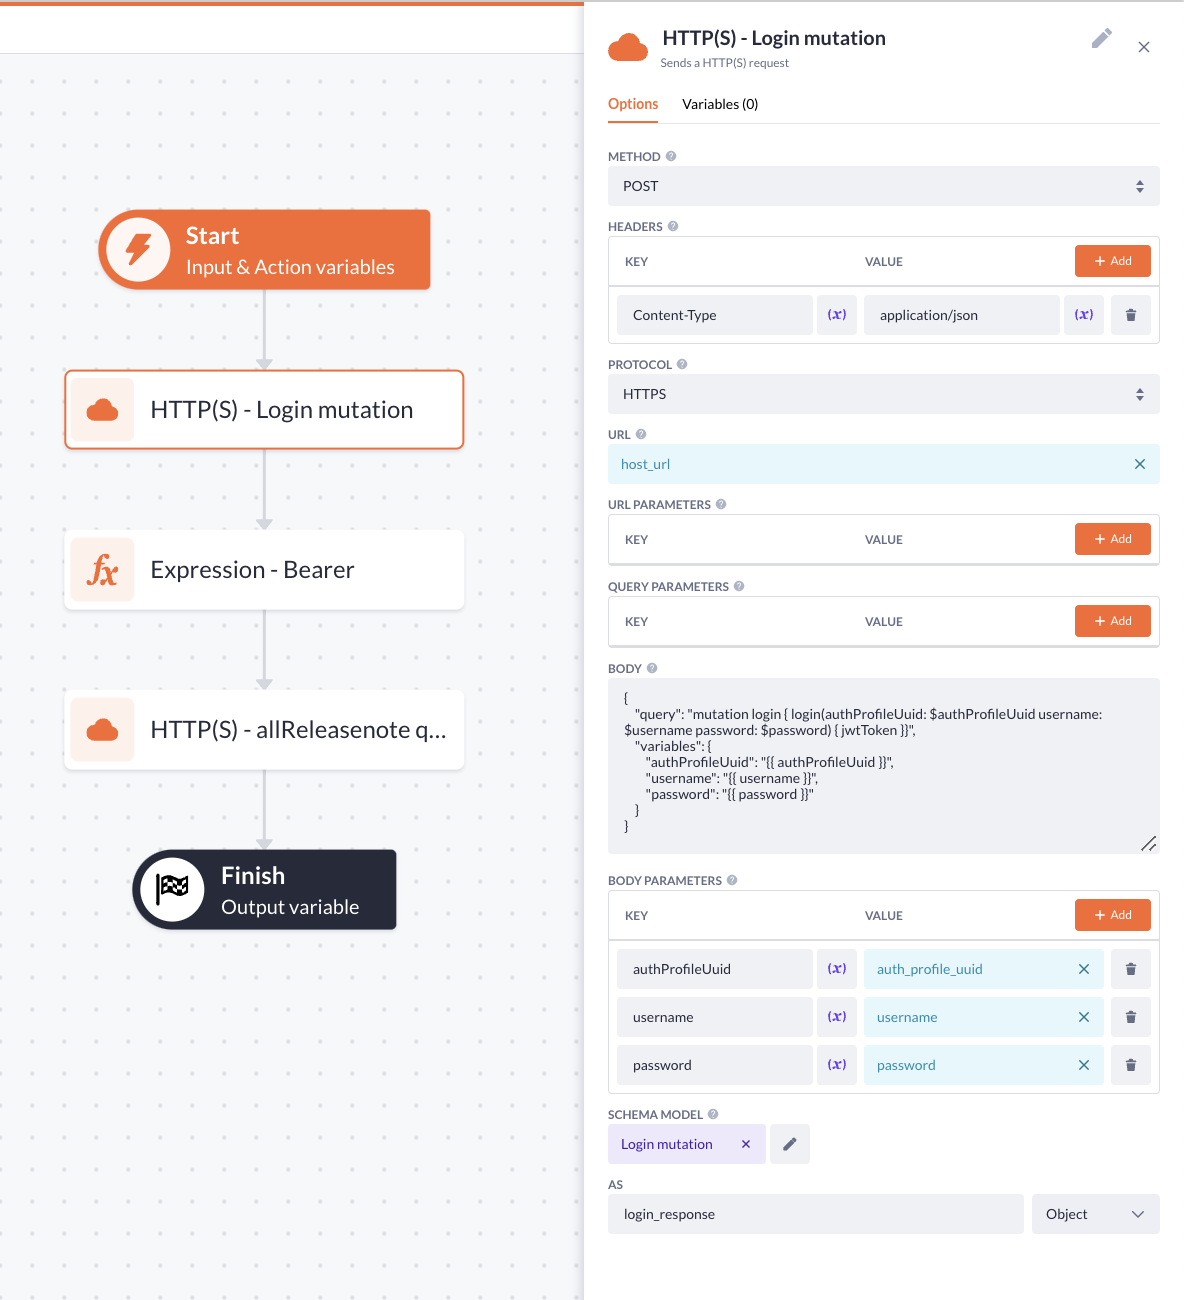
Add an HTTP(S) step with:
- Method: POST
- Protocol: HTTPS
- URL:
<appIdentifier>.betty.app/api/runtime/<appUUID>(the Playground URL of app A) - Headers:
Content-Type: application/json - Body:
{
  "query": "mutation login { login(authProfileUuid: $authProfileUuid username: $username password: $password) { jwtToken }}",
  "variables": {
    "authProfileUuid": "",
    "username": "",
    "password": ""
  }
}
Tip: You can also cache (store) the JWT token from the login mutation in the application. That way, you only need to run the login mutation again when the existing JWT token has expired, instead of every time the action is triggered. In that setup, you move the HTTP(S) login mutation step into a separate sub-action.
GraphQL syntax isn't supported directly in the body, so the mutation has to be wrapped as a string under "query".
Map the body parameters (authProfileUuid, username, password) to your variables, and store the response as an object — login_response in the screenshot. Attach a schema model so you can address the JWT token by path in the next step.
Step B: build the Bearer header
Add an Expression step:
- Expression:
"Bearer " - Variable:
jwtToken=login_response.data.login.jwtToken - Result name:
bearer
This pulls the token out of the nested login response and prefixes it with Bearer so it's ready to drop into the next request's Authorization header.

Step C: run the query
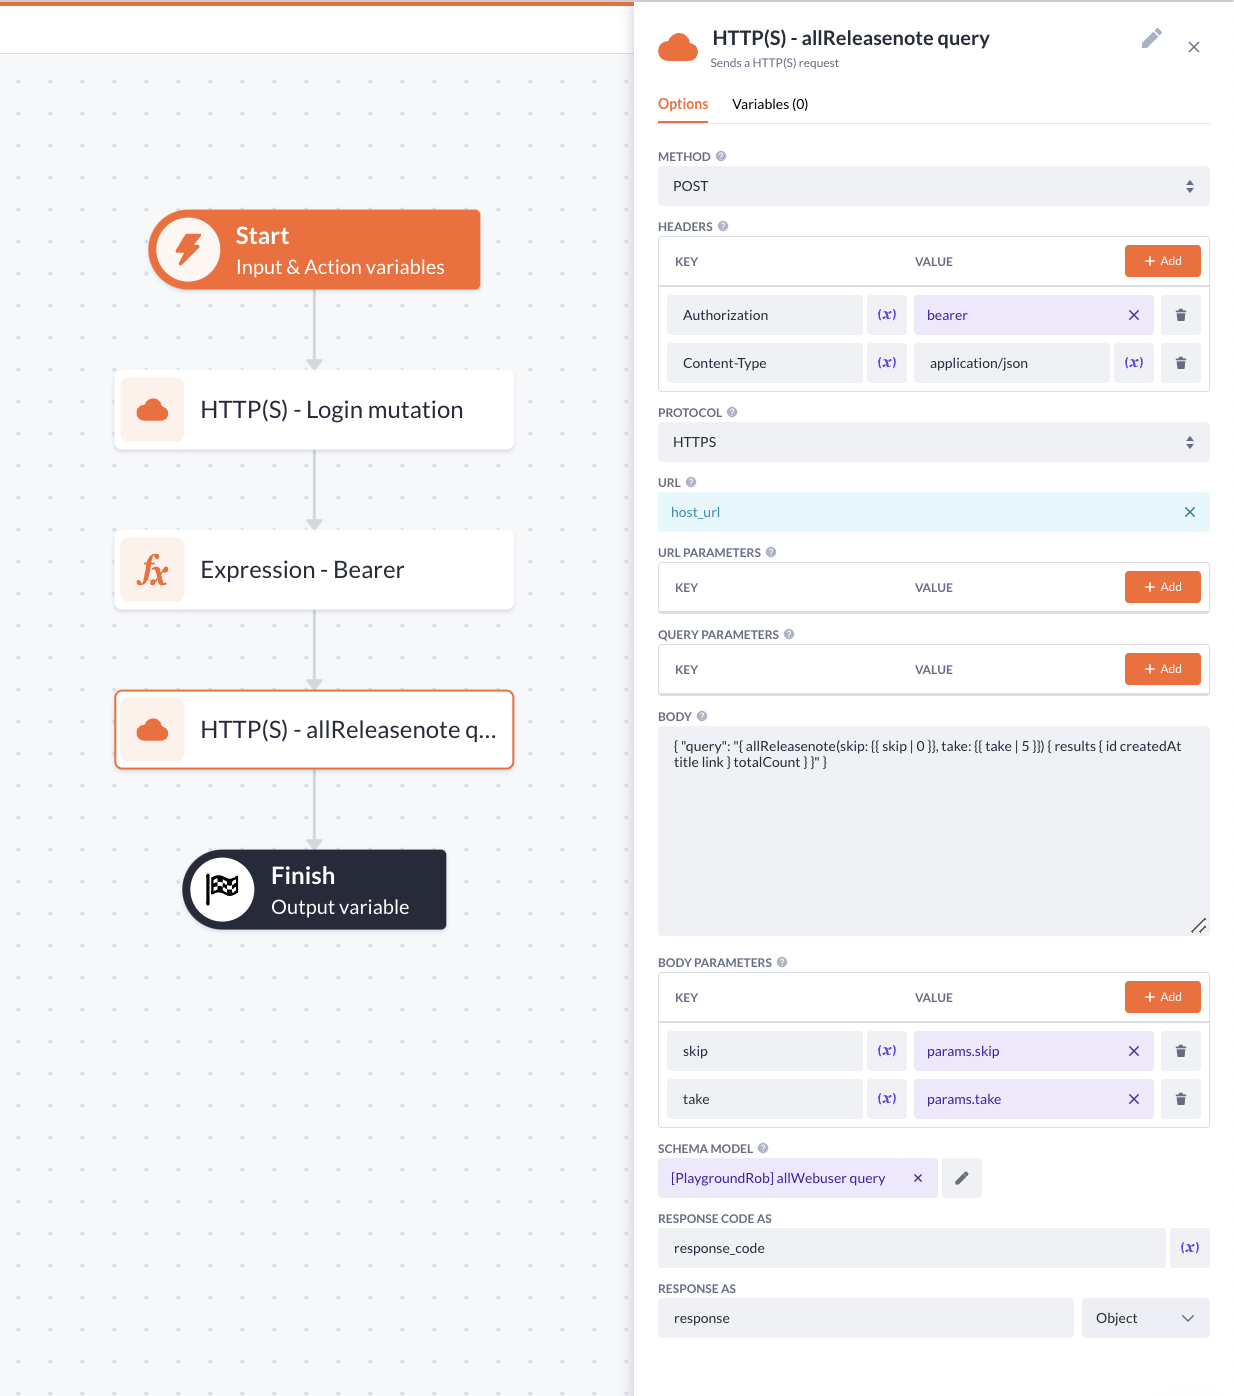
Add a second HTTP(S) step:
- Method: POST
- Protocol: HTTPS
- URL: same Playground URL as step A
- Headers:
Authorization:Content-Type: application/json
- Body:
{
  "query": "{ all<modelName>(skip: , take: ) { results { id } totalCount } }"
}
Replace <modelName> with your actual model name and add the fields you need inside the results selection set. Map skip and take to the action's input parameters (params.skip, params.take).
Store the response as an object (e.g. response) and attach a schema model so you can address nested values.
Step D: return the data
In the Finish step, set the output variable to response.data.all<modelName>.
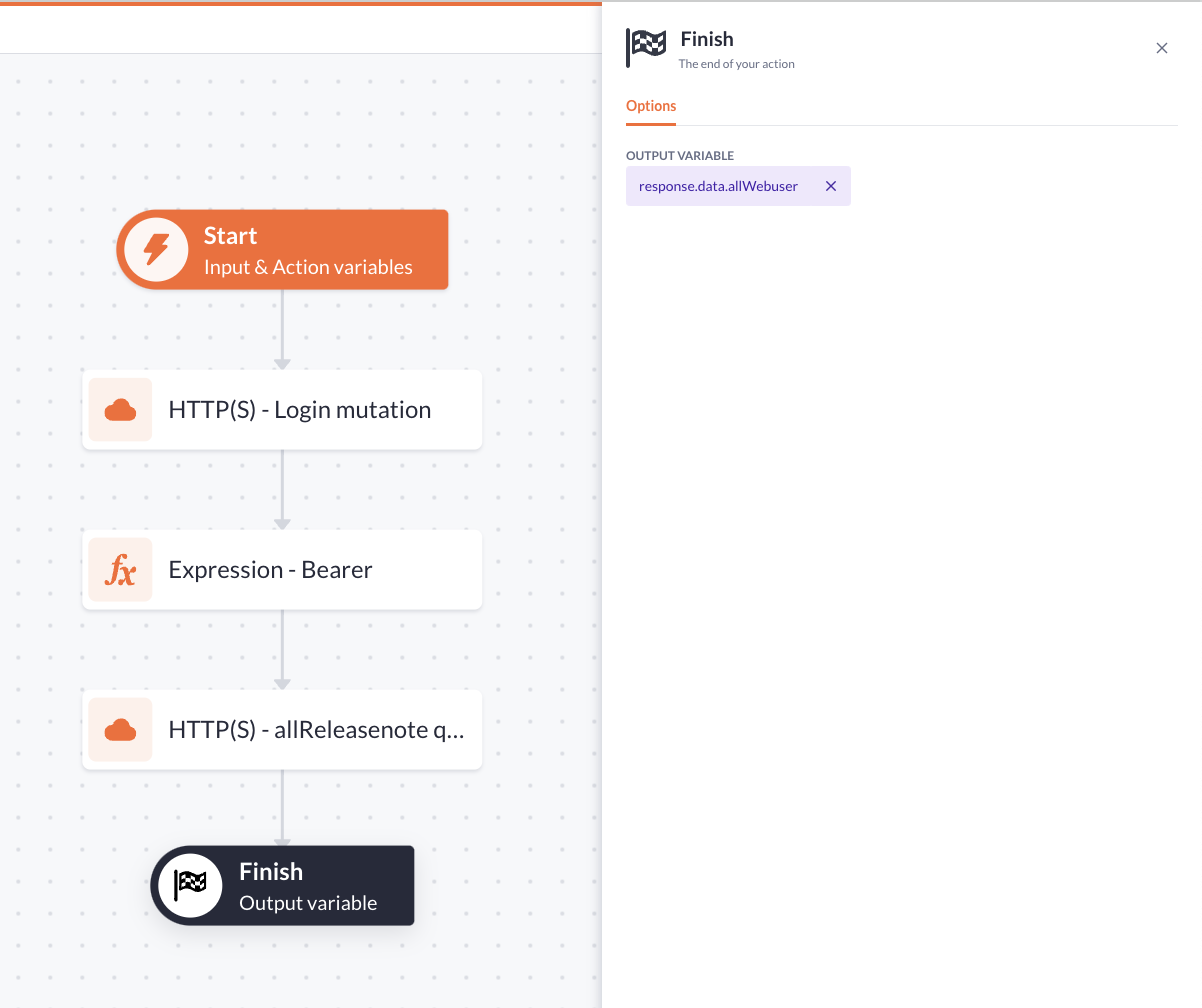
This is the part that catches people out: both the login response and the query response come back as deeply nested JSON. Schema models are the cleanest way to navigate that nesting. See the schema models guide for the setup.
Repeat the same pattern (login > bearer > query > finish) for the GetOne, Create, Update, and Delete actions, swapping the GraphQL operation each time.