After reading this article you’ll know:
-
How to prepare to use the Update many records step
-
When you should use this step and what it is based on
-
Update and filter on collection variable to update many records
As the Block Store gets expanded, we get more and more functionality that simplifies the workflow within applications. In this article, we’ll have a look at how to apply the Update many records step that is based on a collection variable and can be used to update the statuses of a certain number of tasks, invoices, orders, etc. Without further speculations, let’s dive in.
Getting started
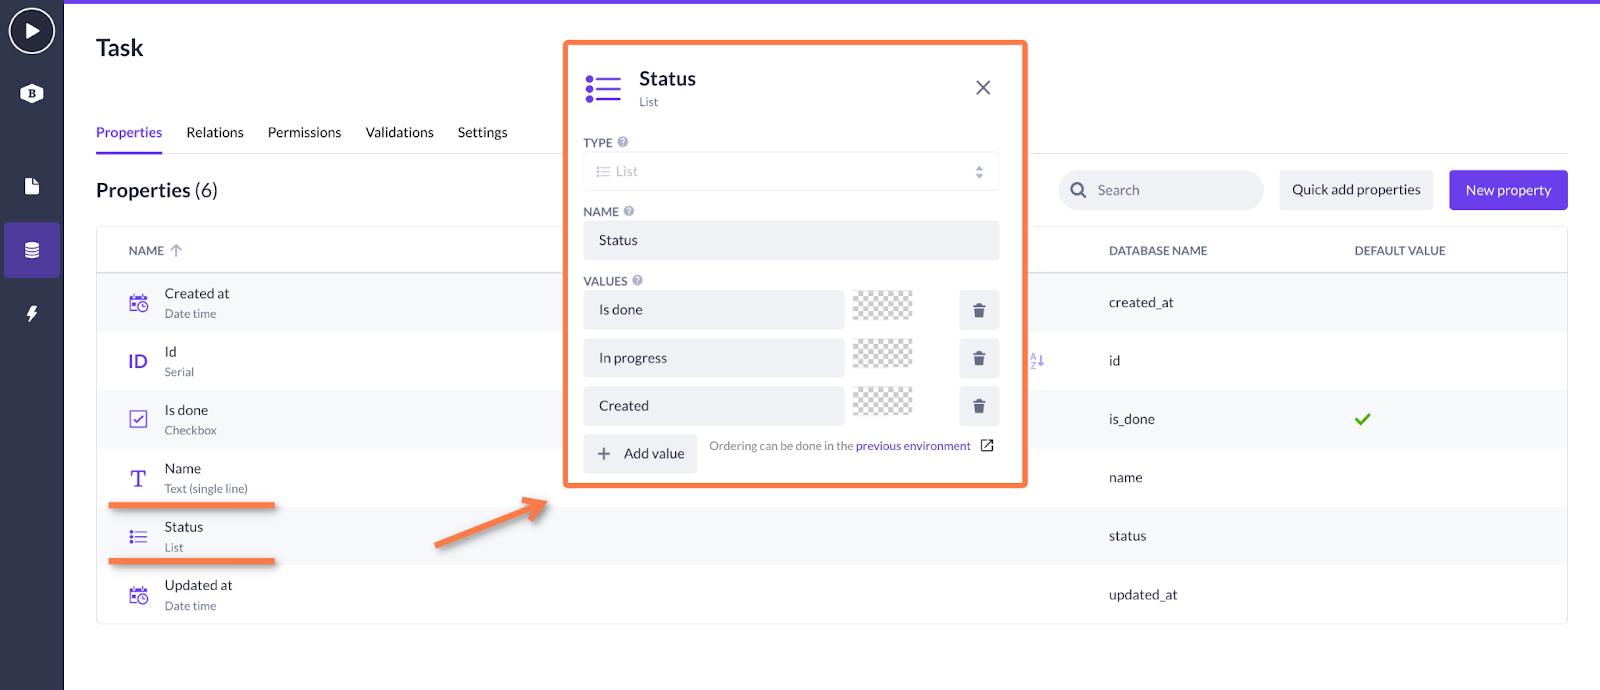
The first thing we need to create is a new model. For this use case, we will create the basic Task model and the most important properties within it will be ‘Name’ (text property) and the list property ‘Status’ with three statuses (Is done, In progress, and Created).
Next, to be able to view our tasks in the front end, let’s also create a new page in the page builder with a data table on it that will show our current goals and their statuses:

As you can see they have In progress and Created statuses right now, and as a result we want all of these to become Is done after processing them with just one action step - Update many records.
Applying action step
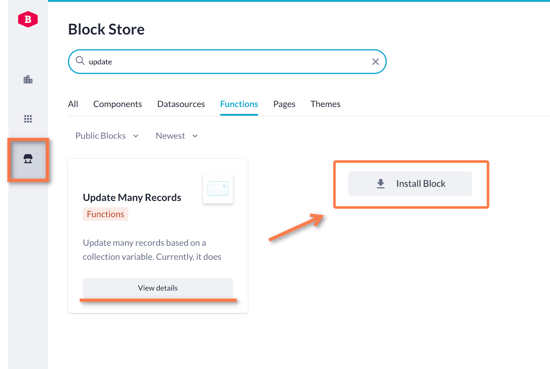
After preparations have been made, go to the block store and find the Update many records step in the Functions segment. Click on View details to open the block’s detail page and then press Install block.
After you’ve installed the block to your application, come back to the page builder and our page with tasks. From the components menu, pick up the Action button and drag it onto the bottom of the data table (or whenever you feel like). It will serve as a trigger for the action to start and eventually update our tasks.
Come up with a name for the button and in its options click on the editing button beside the action.

The newly generated action will open in the action builder. Before adding and setting the Update record step, we first need to make sure the right model with its filter is passed to this action flow.
Open the Start step and go to the Action variables tab. Then pick up the Collection as the variable kind, type in the name for it, and select Task model. To make sure every record with other statuses except for Is done is updated, you can set the filter to: Status is not equal to Is done. Press Save after you're done.
Note: Keep in mind that currently, the Update many records step does not support assigning has_many and has_and_belongs_to_many relations.

Now drag our previously installed Update many records step from the functions list and place it between the Start and Finish. Click on Update many records step and in its options select task_collection (passed from the Start step) and add Status Is done to the value mapping. Lastly, type in something like updated_task to the result (As).

We will need this last (updated_task) value to pass to the output variable. Click on the Finish step and select it. Press Save.

Wrapping up
Almost done! Let's have a look if our configuration works and if it is able to update all of our tasks from the table.
Go to the page builder and find our page with tasks. Compile it and press Set to done (or whatever you called it) button, refresh the page and if everything is done right - all your tasks will have a new status Is done.

Note: If the action button refuses to work and the statuses don’t update after you have done everything according to this guide, try to check the model permissions or if your action has public or private access (in action settings).